Saved filters
A filter the agent built with the filter builder becomes reusable when they save it with a name. After that, the filter shows up in the saved-filters list and one click brings it back exactly as it was.
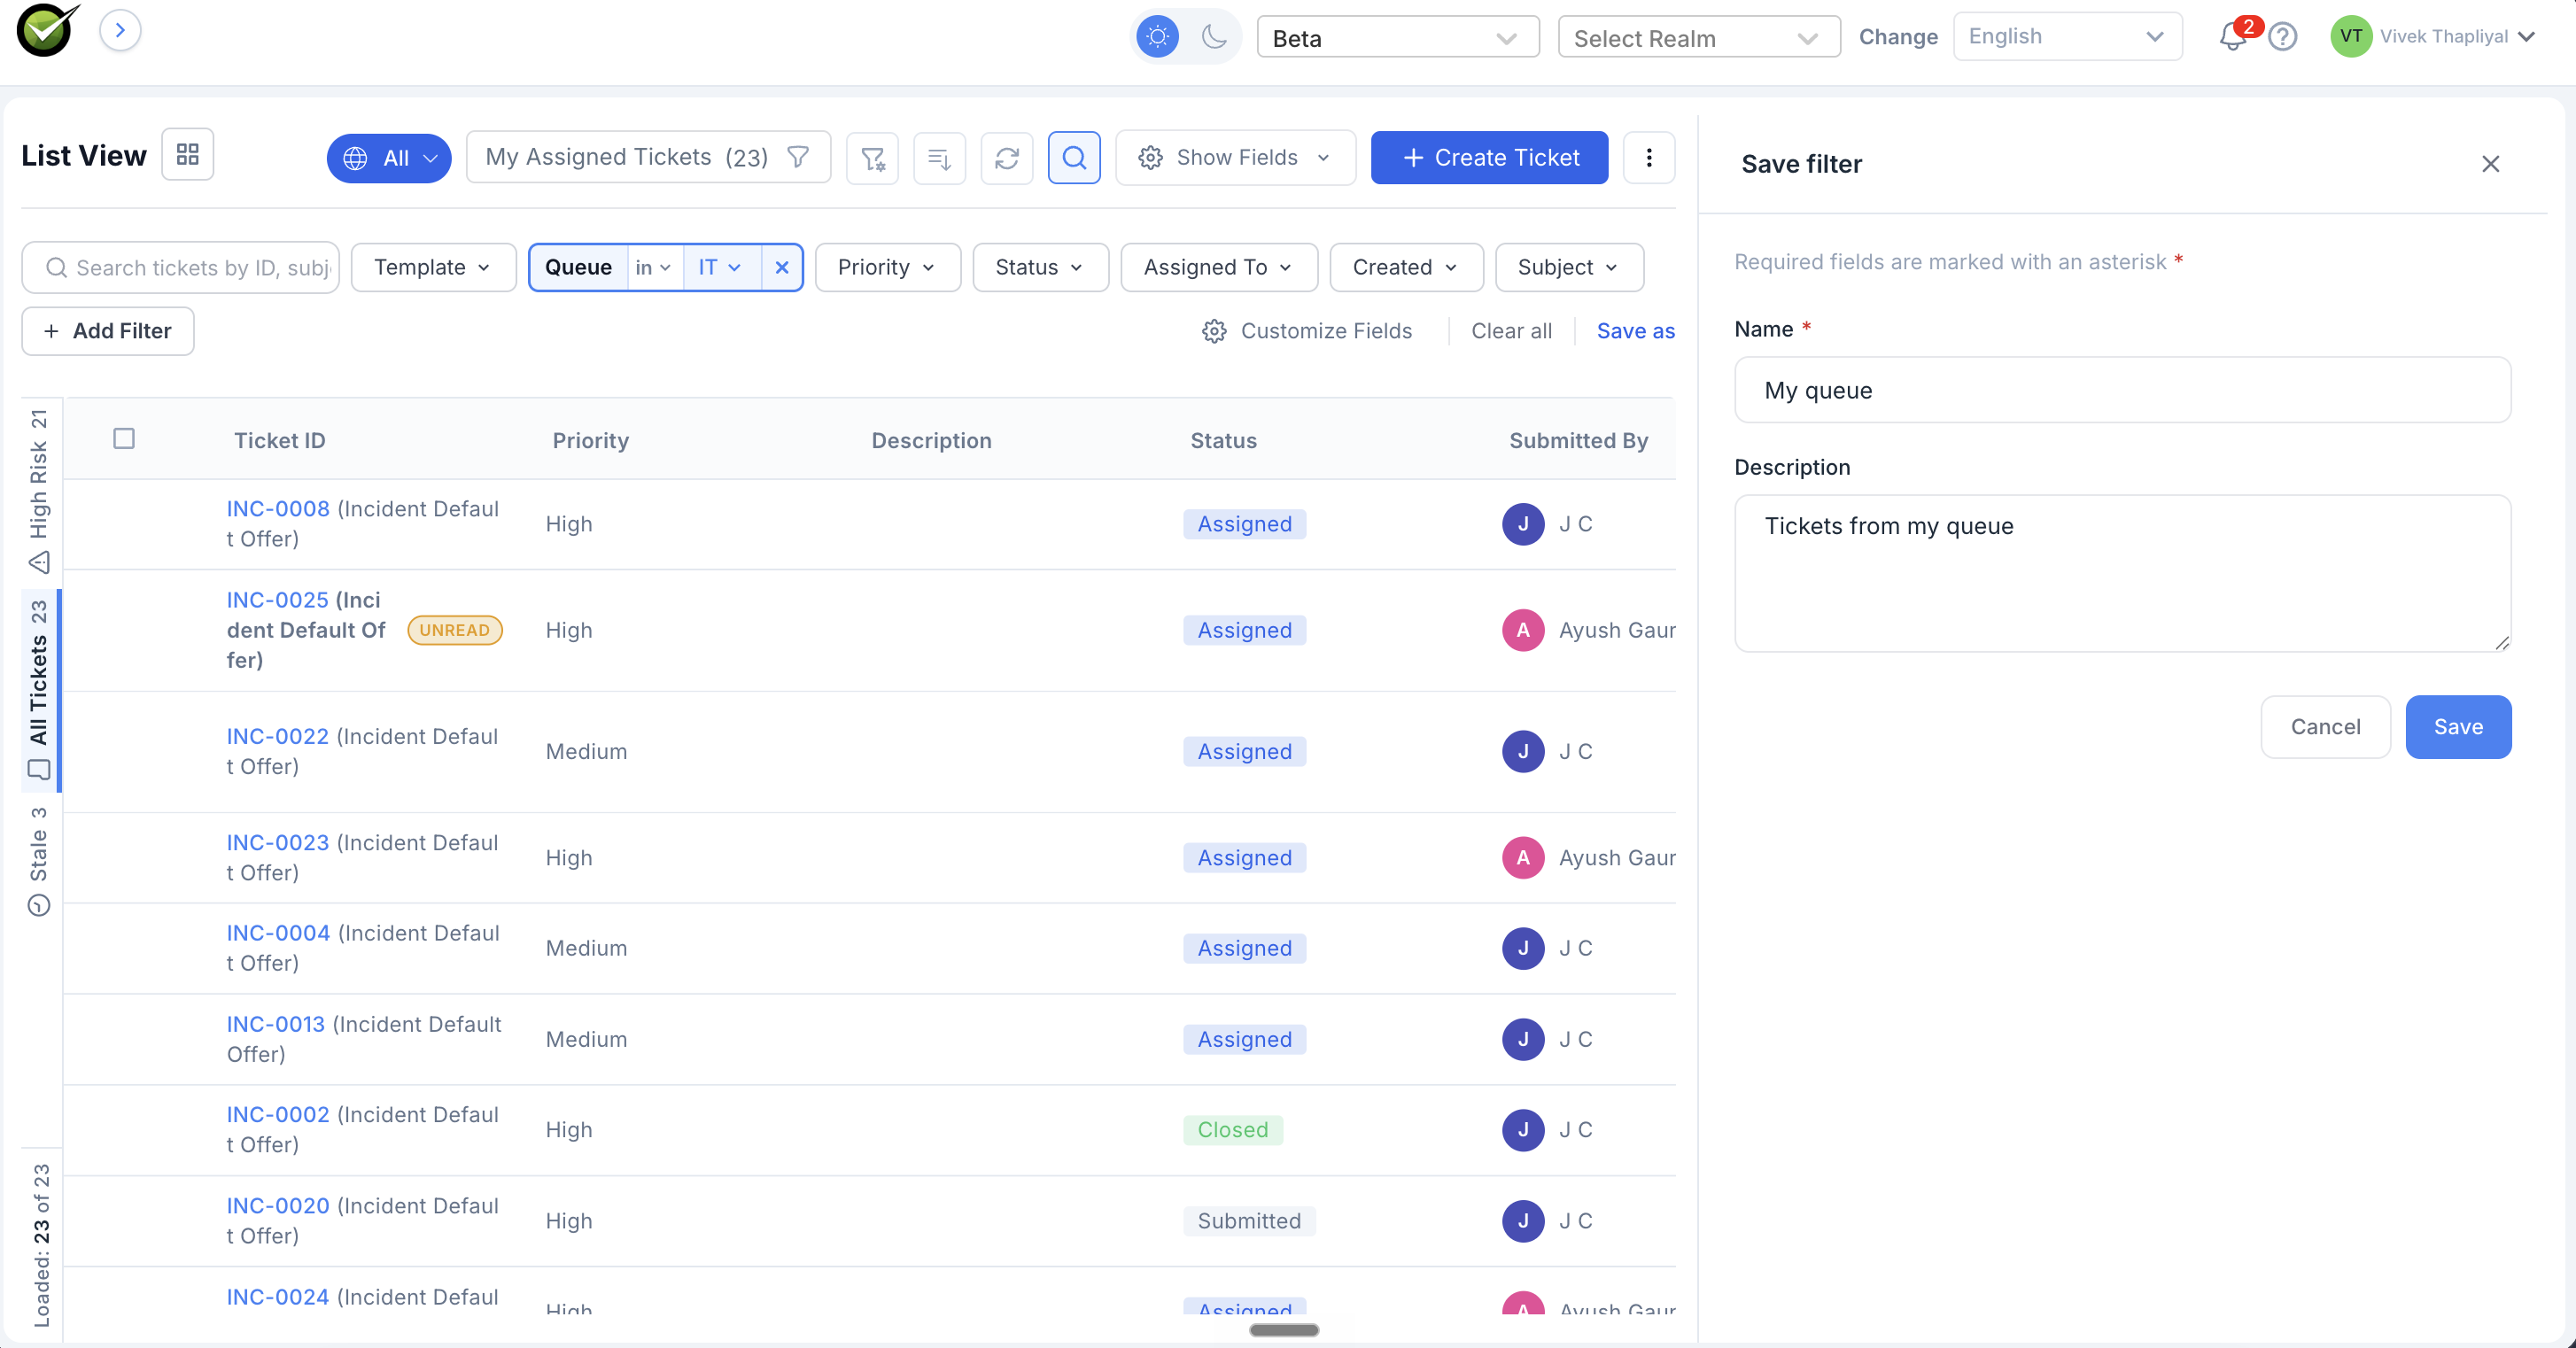
Saving a filter
With the conditions in place, click Save as on the search bar. A side drawer opens with two fields - Name (required) and Description (optional) - plus Cancel and Save buttons. Fill the name, optionally describe what the filter is for, click Save, and the filter appears under the saved-filters list.
The filter is private by default. Only the agent who created it can see it or use it. The MVP doesn't support sharing saved filters with other users; that's coming in a later release.
Reusing a saved filter
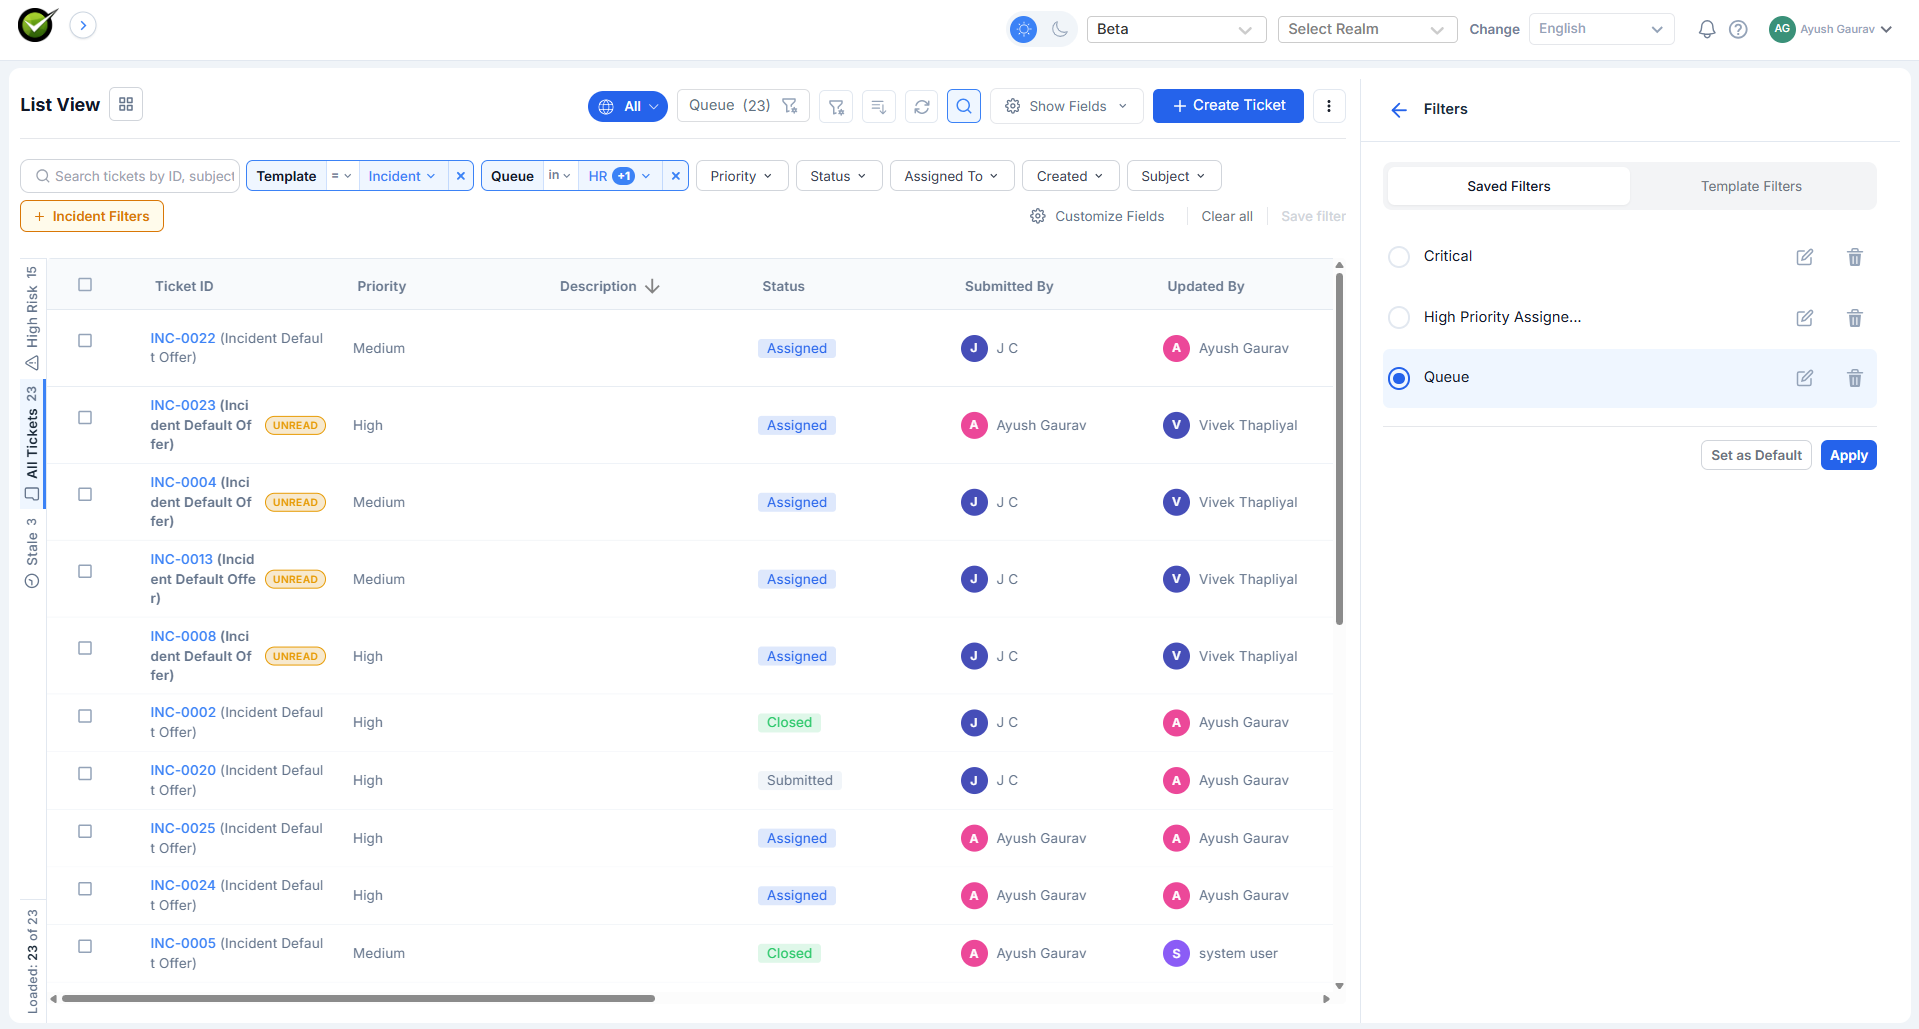
Click the saved-filters icon, pick a filter from the list, and the ticket list updates instantly. The chips on the search bar match the saved conditions exactly; the agent can keep working as if they had built the filter from scratch.
Updating an existing filter
When the agent has a saved filter applied and edits one of the chips, the bar shows a Save and a Save as option:
- Save overwrites the existing filter with the new conditions, after a confirmation prompt so the agent doesn't lose the old definition accidentally.
- Save as opens the same drawer used for the initial save, letting the agent name a new filter and leaving the original untouched.
Renaming and deleting
The saved-filters list has a small menu next to each filter for rename and delete. Deleting a filter is permanent and also cancels any subscription attached to it.
What's not in the MVP
- Sharing a saved filter with another agent or with a queue
- Marking a filter as a favourite (separate from saving it)
- Pinning a filter to the top of the saved-filters list