Transition Rules in Rezolve.ai
Transition Rules in Rezolve.ai | Next-Gen ITSM & HR Support | Agentic AI-Powered Automation's Service Catalog provide powerful capabilities for controlling how tickets move through workflow states. These rules establish governance around status transitions, ensuring tickets follow appropriate approval processes, meet required criteria, and maintain data integrity throughout their lifecycle. By implementing well-designed transition rules, organizations can enforce consistent processes, maintain compliance requirements, and ensure tickets are properly handled at each stage.
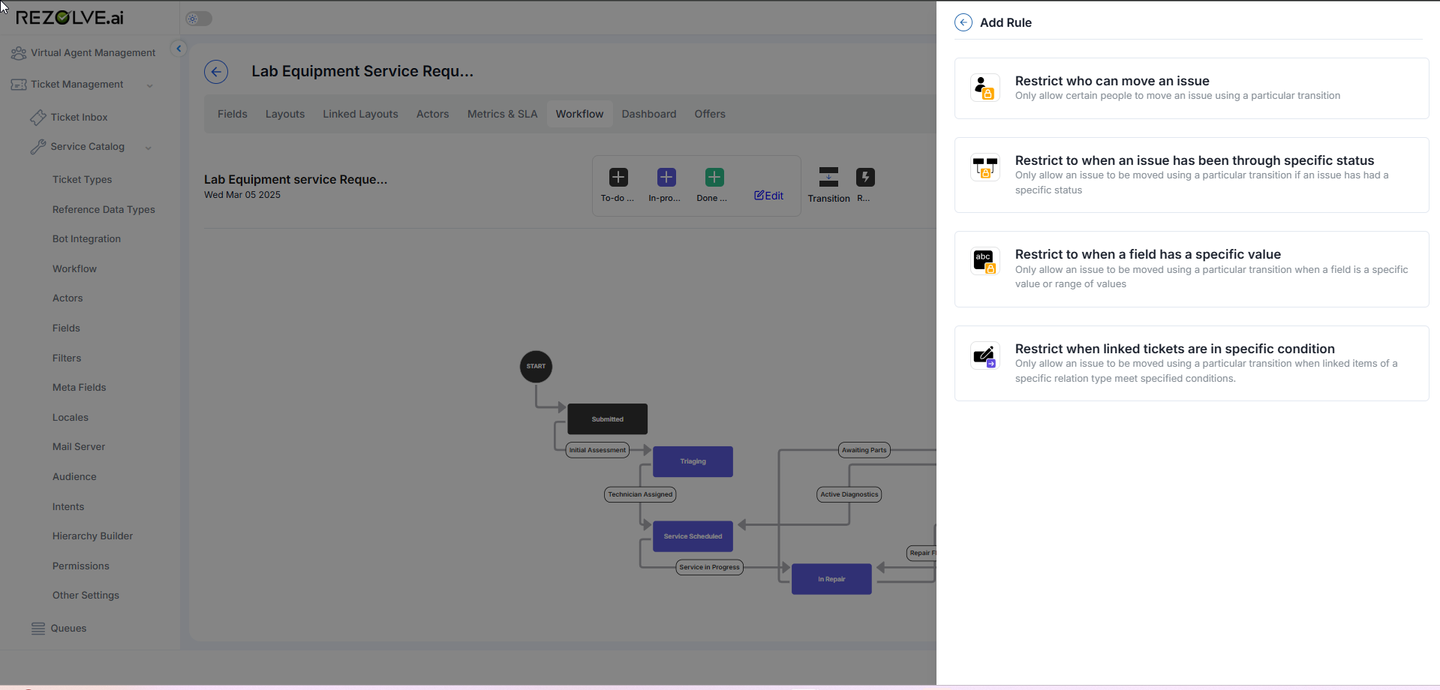
Types of Transition Rules
The Service Catalog workflow engine supports four distinct types of transition rules, each addressing different control requirements:
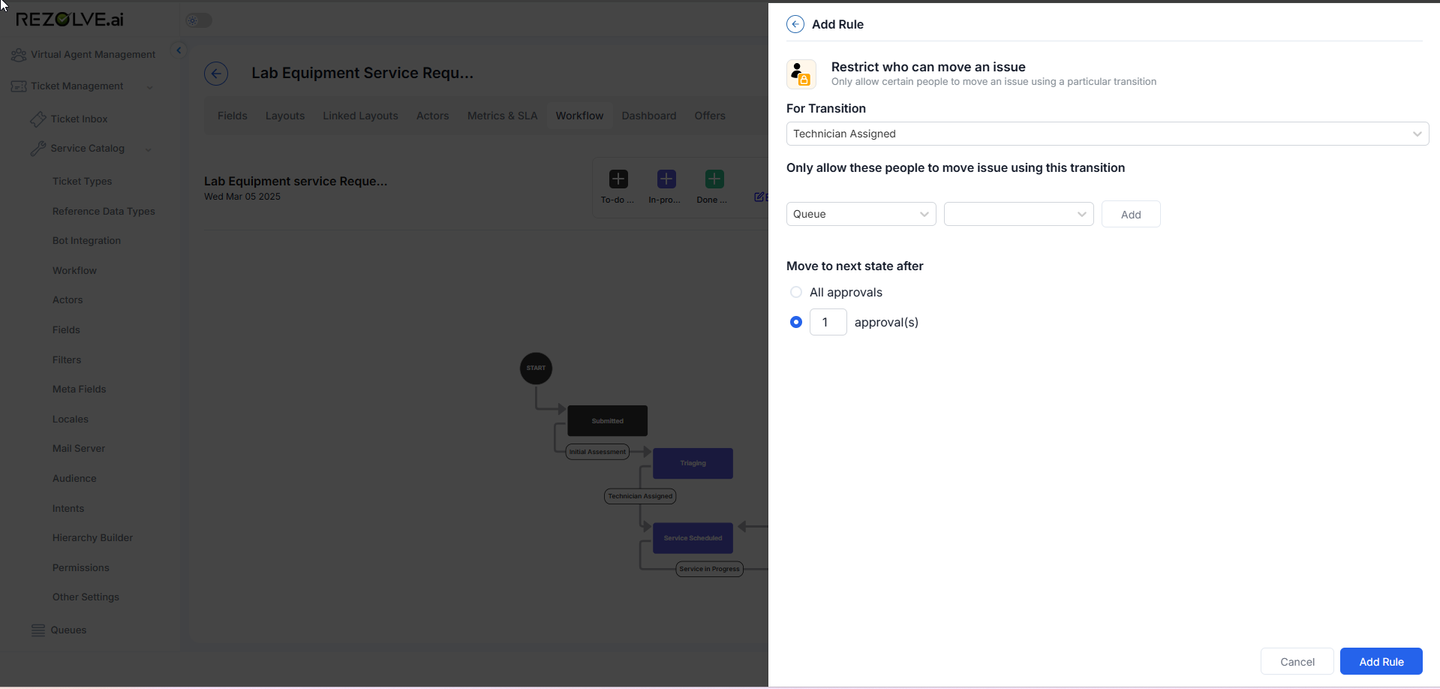
1. User-Based Restrictions
These rules control who can execute specific transitions, limiting the ability to move tickets between states based on user identity or role.
Configuration Options:
- Queue Membership: Limit to members of specific queues
- Group Membership: Restrict to users in designated groups
- Specific Users: Allow only named individuals
- Role-Based: Permit only users with certain roles
- User Attributes: Restrict based on user properties
- Actor Status: Limit to specific actors in the ticket (Assignee, Requester, etc.)
Advanced Approval Requirements:
- Require approval from one or more eligible users
- Require unanimous approval from all eligible users
- Specify approval expiration timeframes
- Configure approval notification methods
Example Scenario: A "Submit for Approval" transition from "Draft" to "Pending Approval" might be restricted to:
- The original requester
- Users in the requester's department
- Users with "Manager" role
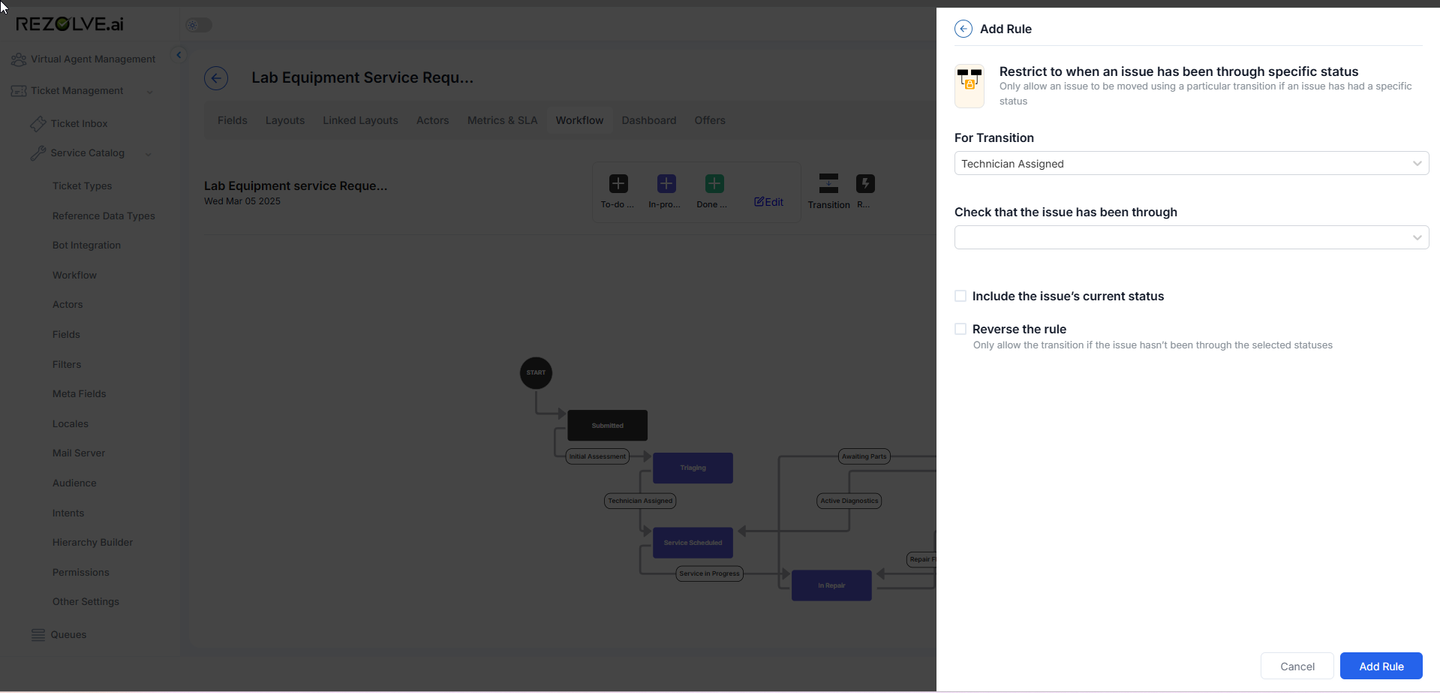
2. Status History Restrictions
These rules enforce sequencing requirements based on a ticket's previous status history, ensuring proper procedural flow.
Configuration Options:
- Status Selection: Choose specific statuses that must have been previously visited
- History Verification: Option to check that the issue has been through selected statuses
- Rule Inversion: Option to reverse the rule (require that the issue has NOT been through selected statuses)
Example Scenario: A "Complete Implementation" transition might be restricted to tickets that have previously been in:
- "Requirements Gathered"
- "Design Approved"
- "Testing Complete"
This ensures proper sequence of activities before implementation is marked as complete.
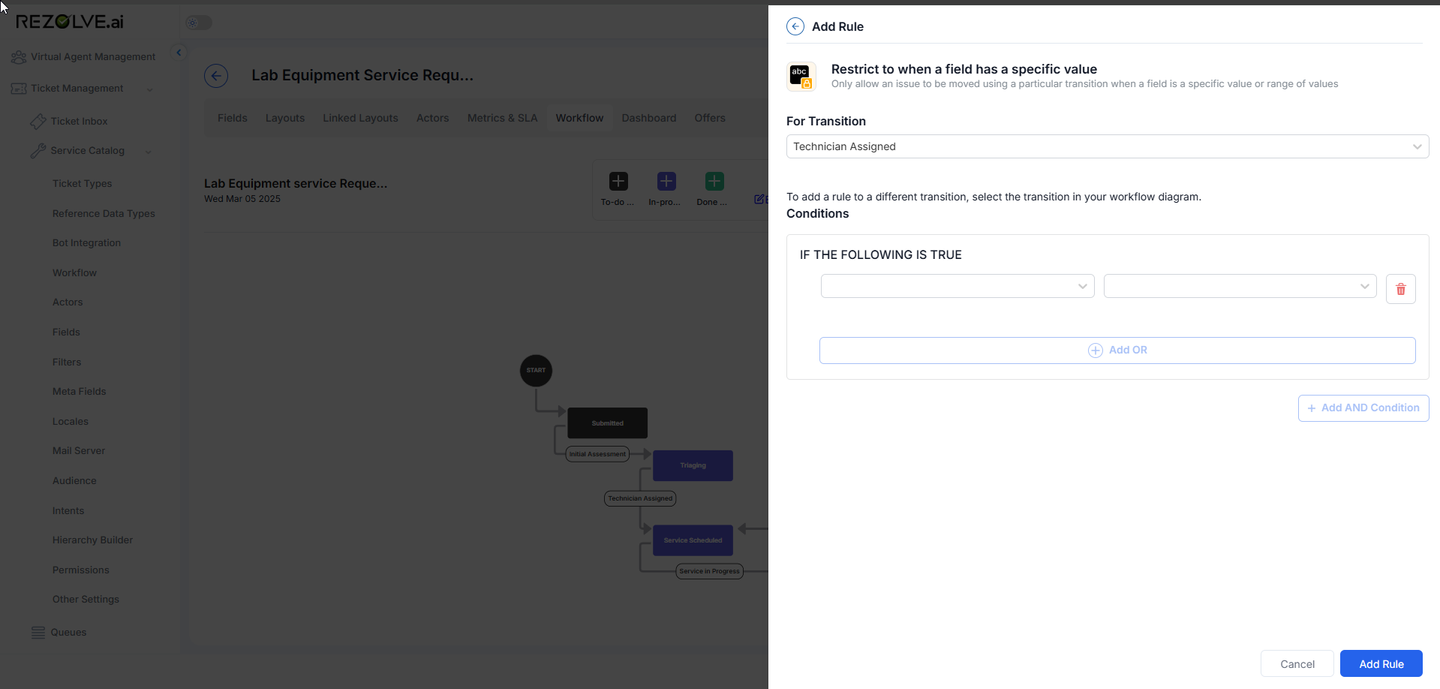
3. Field Value Restrictions
These rules enforce data quality and completeness by requiring specific field values before a transition can occur.
Configuration Options:
- Field Selection: Choose any field from the template
- Value Conditions: Specify required values or value ranges
- Multiple Conditions: Add several field requirements with AND/OR logic
- Custom Validation: Create complex validation rules for field content
Example Scenario: A "Ready for Deployment" transition might be restricted to tickets where:
- Risk Assessment field = "Low" or "Mitigated"
- Test Results field = "Passed"
- Approval Date field is not empty
- Deployment Plan field contains a document attachment
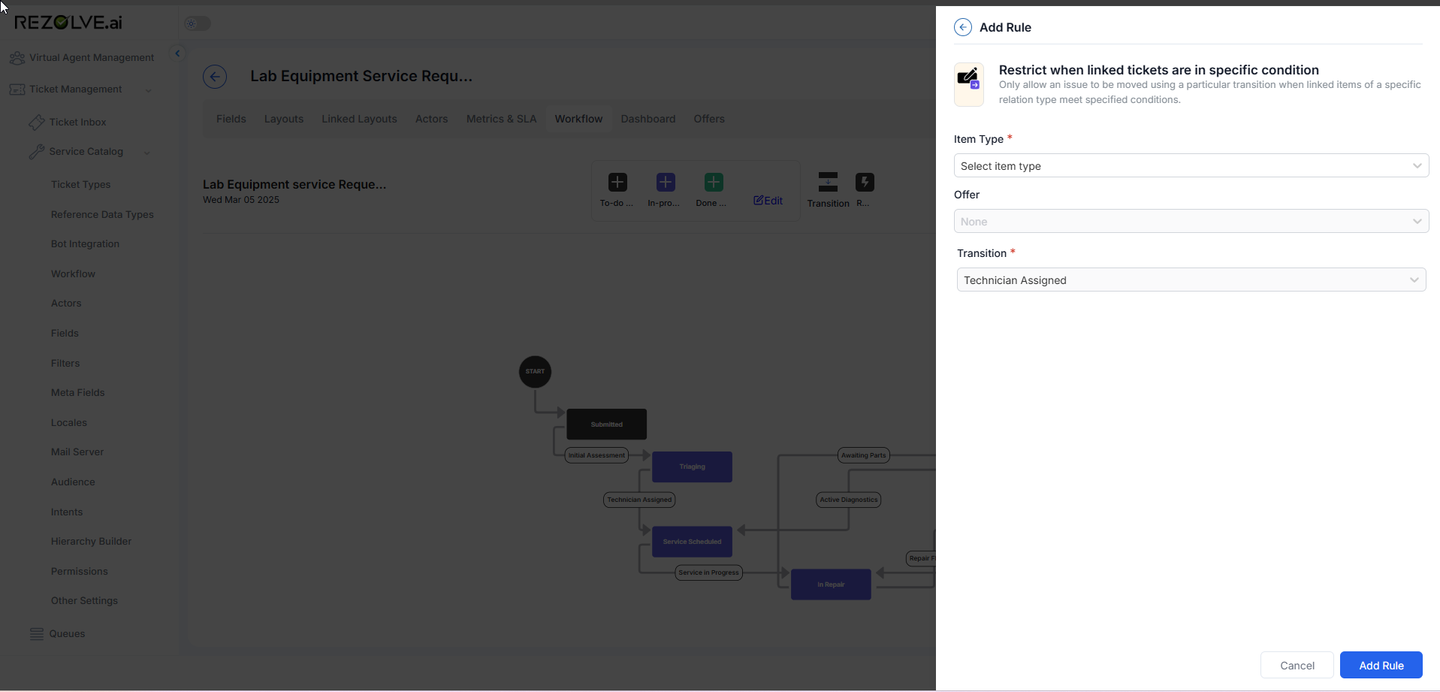
4. Linked Ticket Restrictions
These rules enforce dependencies between related tickets, ensuring coordinated progress across connected work items.
Configuration Options:
- Relation Type: Select the type of ticket relationship to evaluate
- Status Requirements: Specify what status linked tickets must have
- Quantity Requirements: Define how many linked tickets must meet the criteria
- Complex Conditions: Create rules based on multiple attributes of linked tickets
Example Scenario: A "Close Project" transition might be restricted until:
- All linked "Deliverable" tickets are in "Completed" status
- Any linked "Risk" tickets are in "Mitigated" or "Closed" status
- All linked "Approval" tickets are in "Approved" status
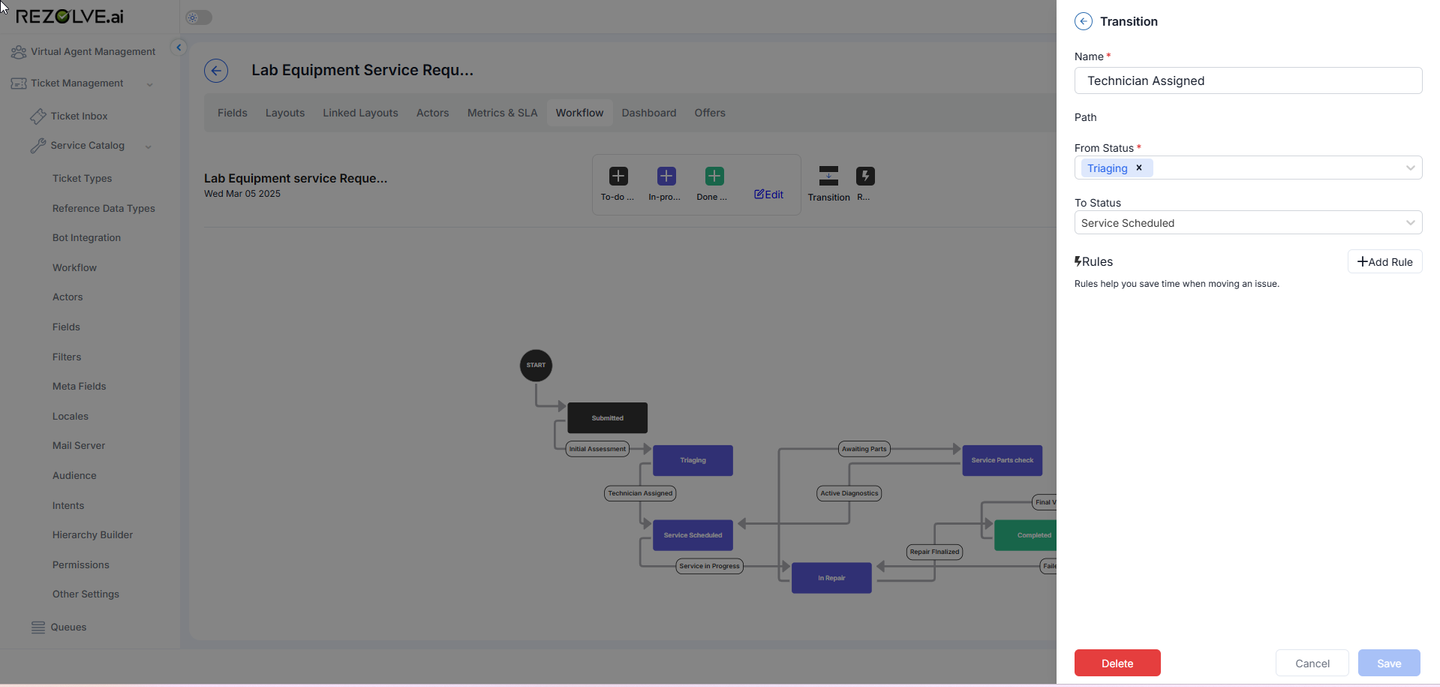
Implementing Transition Rules
Rule Creation Process
To create transition rules within a workflow:
- Navigate to the workflow configuration for your template
- Select the specific transition you want to control
- Access the "Rules" or "Restrictions" section
- Click "Add Rule" and select the rule type
- Configure the specific conditions for your rule
- Save the rule configuration
- Test the rule with sample tickets to verify behavior
Rule Evaluation Logic
- All rules must be satisfied for the transition to be allowed
- Rules are evaluated in real-time when a user attempts the transition
- If any rule fails, the transition is prevented
- Users typically receive feedback about which rule prevented the transition
- Rule evaluation results can be logged for audit purposes
Best Practices for Transition Rules
- Start Simple: Begin with basic rules and add complexity as processes mature
- Consider User Experience: Balance control with usability to avoid frustrating bottlenecks
- Document Rule Purpose: Maintain clear documentation explaining why each rule exists
- Test Thoroughly: Verify rule behavior with various scenarios before implementation
- Monitor Impact: Evaluate whether rules are effectively supporting or hindering processes
- Educate Users: Ensure users understand transition requirements to minimize frustration
- Plan for Exceptions: Create processes for handling legitimate exception cases
Example: Complex Approval Workflow�
A comprehensive employee onboarding workflow might include these transition rules:
Draft → Submitted
- User Restriction: Only the requester or HR coordinators
- Field Values: Required fields must be completed (Start Date, Department, Position)
Submitted → HR Approved
- User Restriction: Only HR Manager role or HR Director
- Approval Requirement: Requires formal approval action
- Field Values: Budget Code must be valid
HR Approved → Department Setup
- User Restriction: Only Department Heads for the relevant department
- Status History: Must have gone through "HR Approved" status
- Linked Tickets: Any linked "Budget Exception" tickets must be in "Approved" status
Department Setup → IT Setup
- User Restriction: Only the assigned Department Coordinator
- Field Values: Department Checklist must be marked complete
- Status History: Must have gone through "Department Setup" status
IT Setup → Ready for Start
- User Restriction: Only IT Support Queue members
- Field Values: Equipment Assignment field must contain values
- Linked Tickets: All linked "Equipment Request" tickets must be in "Fulfilled" status
Conclusion
Transition Rules in the Service Catalog workflow engine provide powerful controls that ensure tickets follow appropriate processes and meet necessary requirements before progressing through their lifecycle. By implementing thoughtful combinations of user restrictions, status history requirements, field value conditions, and linked ticket dependencies, organizations can create sophisticated yet manageable workflows that enforce business processes while maintaining flexibility.
These rules transform simple status transitions into governed process steps, ensuring consistency, compliance, and quality throughout ticket handling. When properly implemented, transition rules create guided pathways through complex processes, helping users understand requirements while ensuring no important steps are missed or performed out of sequence.
By leveraging the four types of transition rules—user-based restrictions, status history requirements, field value conditions, and linked ticket dependencies—organizations can create workflows that accurately reflect their business processes and governance requirements while maintaining an appropriate balance between control and usability.