Assets
Assets are the physical things your organisation owns and tracks — laptops, monitors, phones, anything with a serial number worth knowing.
What's on an asset record
Every asset has:
- Name and an asset tag (auto-generated, e.g.
AST-0042) - Category, Type, and Subtype — how it's classified
- Status — where it is right now (in store, checked out, retired, lost, or any custom status you've defined)
- Serial number, purchase date, assigned user, and notes
- Any custom fields you've added for that category
Status changes are recorded automatically with a timestamp and the person who made the change. You can see the full history on the asset detail page.
Adding an asset
Click Add Asset. Fill in name, category, and type at minimum. Status defaults to In Store.
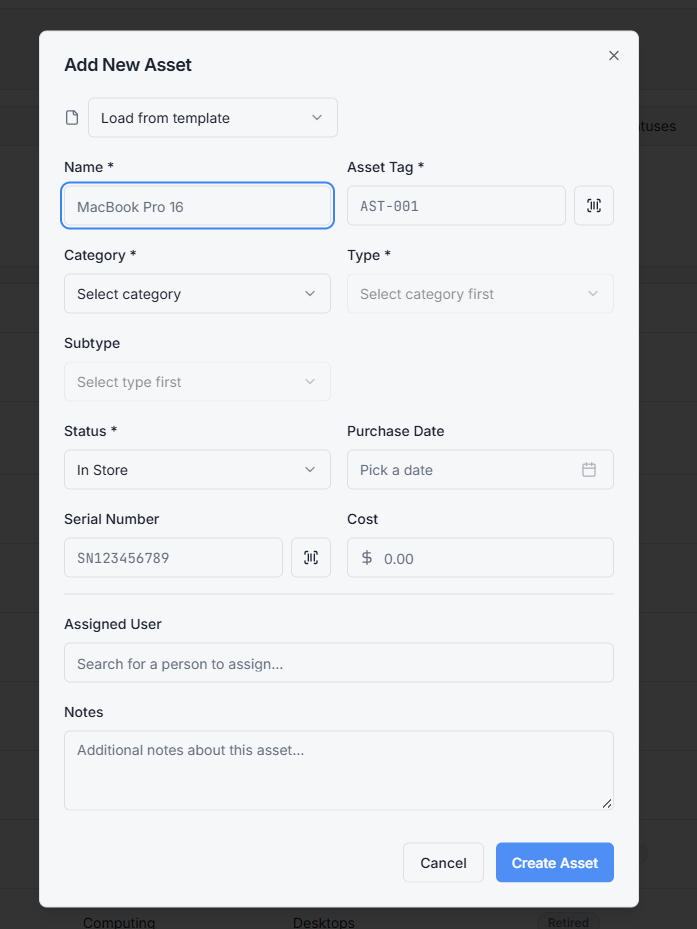
Three shortcuts to save typing:
- Templates — pre-fill the form from a saved template (see Templates and Custom Fields).
- Barcode scan — point your camera at the device's barcode and it populates the asset tag or serial number.
- Bulk import — upload a CSV/Excel of existing assets (see Imports and Bulk Actions).
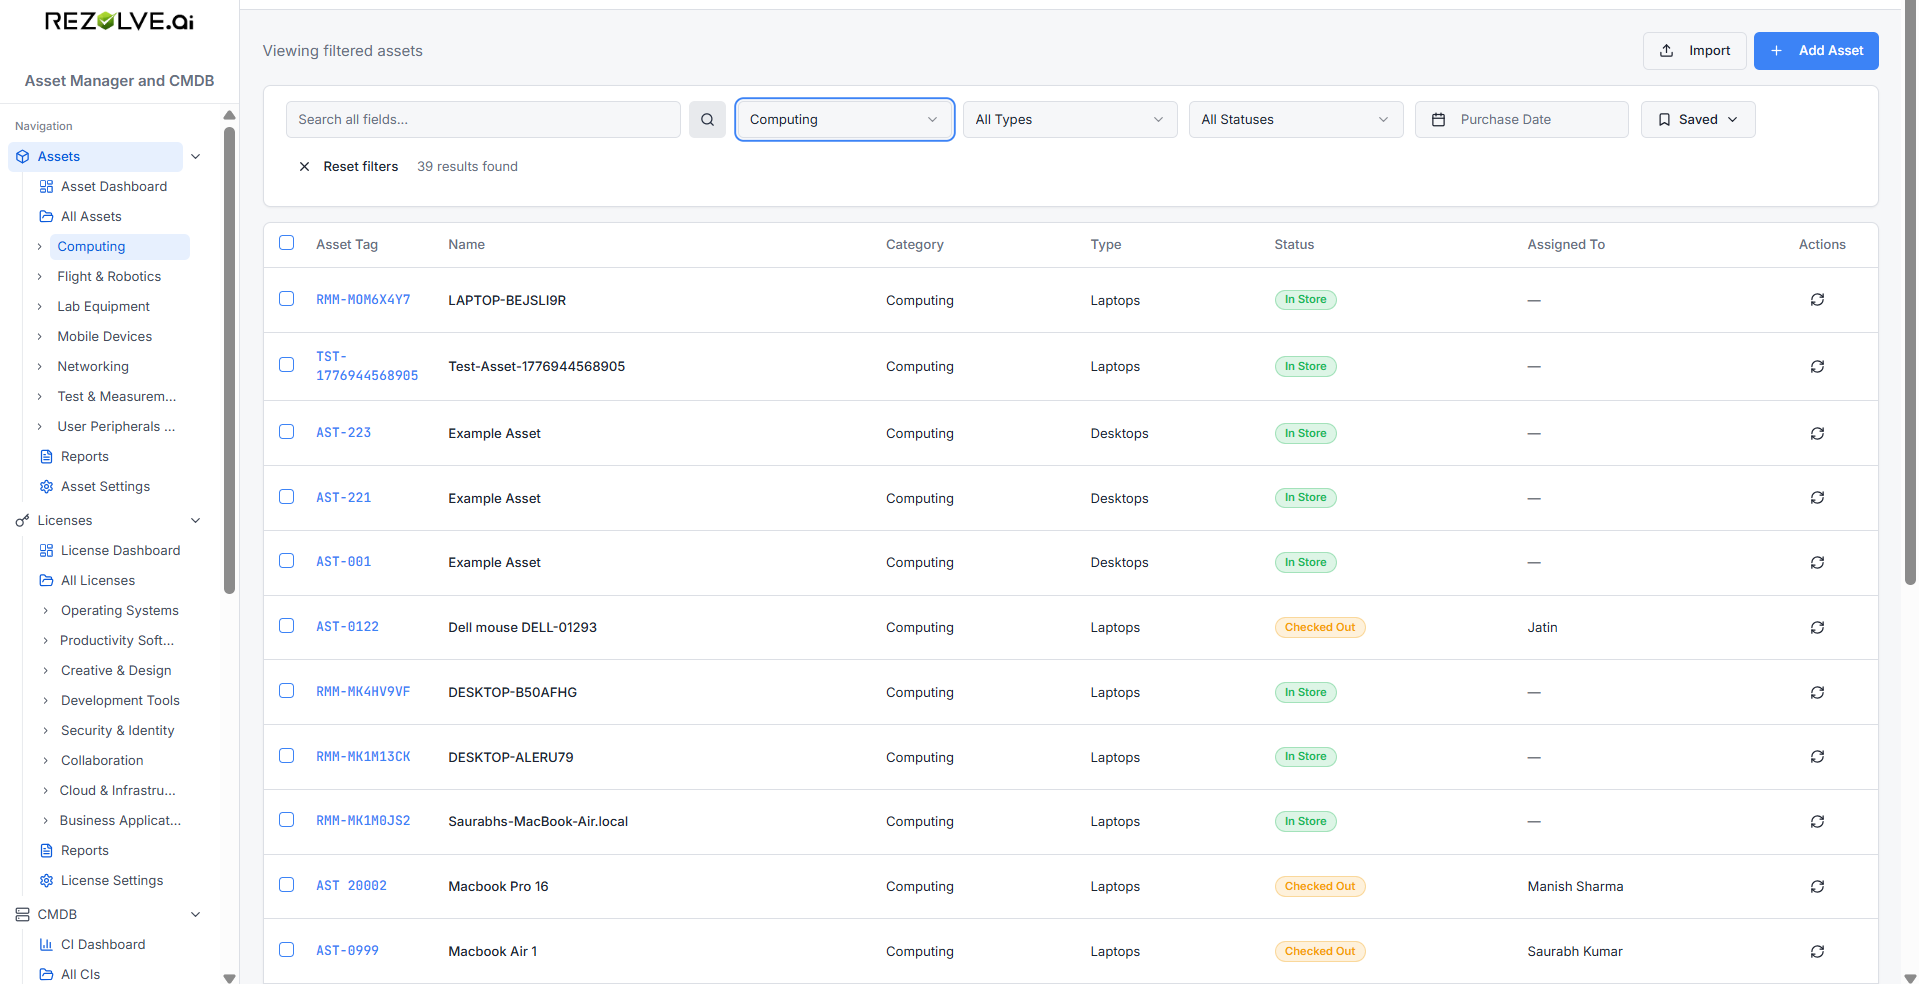
Finding an asset
The asset list supports:
- Free-text search across name, asset tag, and serial number
- Filters by category, type, subtype, status, and purchase date range
- Custom field filters — filter on any custom field you've defined
- Saved filters — save a filter combination you use often (e.g. "Engineering laptops checked out") and reopen it with one click
The sidebar also has direct links from any category or type, so clicking Computing → Laptops takes you to that filtered view.
Editing an asset
Click into any asset to see its detail page. You can edit fields, change status, assign or unassign, and view its full history.
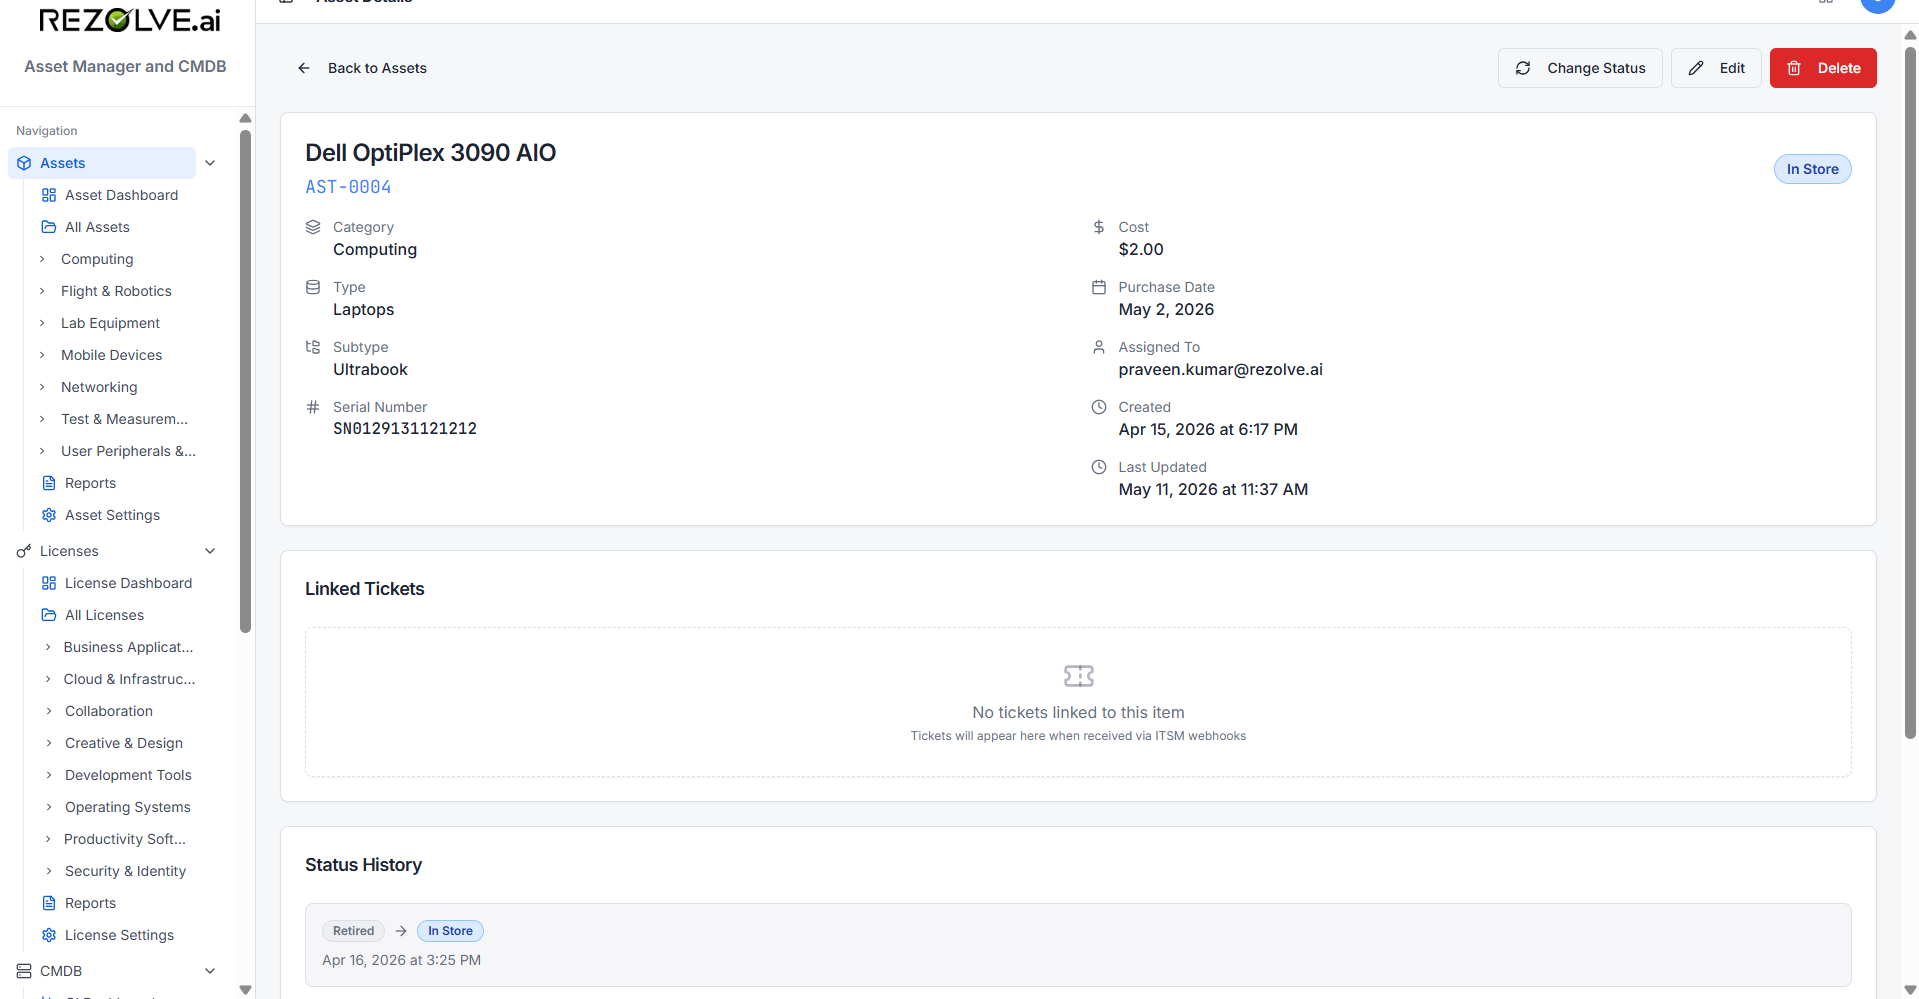
A few things to know:
- Editing fields doesn't trigger status history. Only status changes are tracked there.
- Changing category doesn't move the asset to a new "place" — it's just relabelling.
- Custom fields are tied to the category. If you change category, custom field values may no longer apply.
Deleting vs retiring
You usually want to retire an asset, not delete it. Retiring keeps the record and its history but takes the asset out of active inventory. Use Lost for items you can't account for.
Delete only when the asset shouldn't have been there in the first place — a duplicate, a mistake, or a test record. Deletion is permanent and removes status history.
Bulk actions
From the asset list, select multiple assets and you can:
- Bulk delete
- Bulk status change (e.g. retire 30 old laptops in one go)
- Bulk export to CSV