Microsoft Graph API Mail Server Setup
Rezolve's mail-ticket-service turns inbound email into tickets. To read the mailbox it signs in as an application rather than as a person, using the OAuth 2.0 client credentials flow. This guide covers Steps 1 to 5 — everything your Microsoft 365 / Azure administrator does before handing the values over to Rezolve.
Because the app signs in as itself:
- No user password is stored, and a password change never breaks the integration.
- Multi-factor authentication does not apply, because there is no interactive sign-in to challenge.
- No IMAP host, port or refresh token is involved.
| Item | Detail |
|---|---|
| Audience | Your Microsoft 365 / Azure administrator. No Rezolve involvement is needed until Step 5. |
| Outcome | Rezolve reads one named mailbox through Microsoft Graph — no user password, no MFA prompt, no IMAP. |
| Time required | About 30 minutes of configuration, plus up to 30 minutes for policy propagation. |
| Privileges needed | Global Administrator, or Application Administrator plus Exchange Administrator. |
The Graph permission the app needs, Mail.ReadWrite, is granted tenant-wide. Step 4 confines it to the mailbox you choose. Step 4 is mandatory — the setup is not safe to leave half-finished.
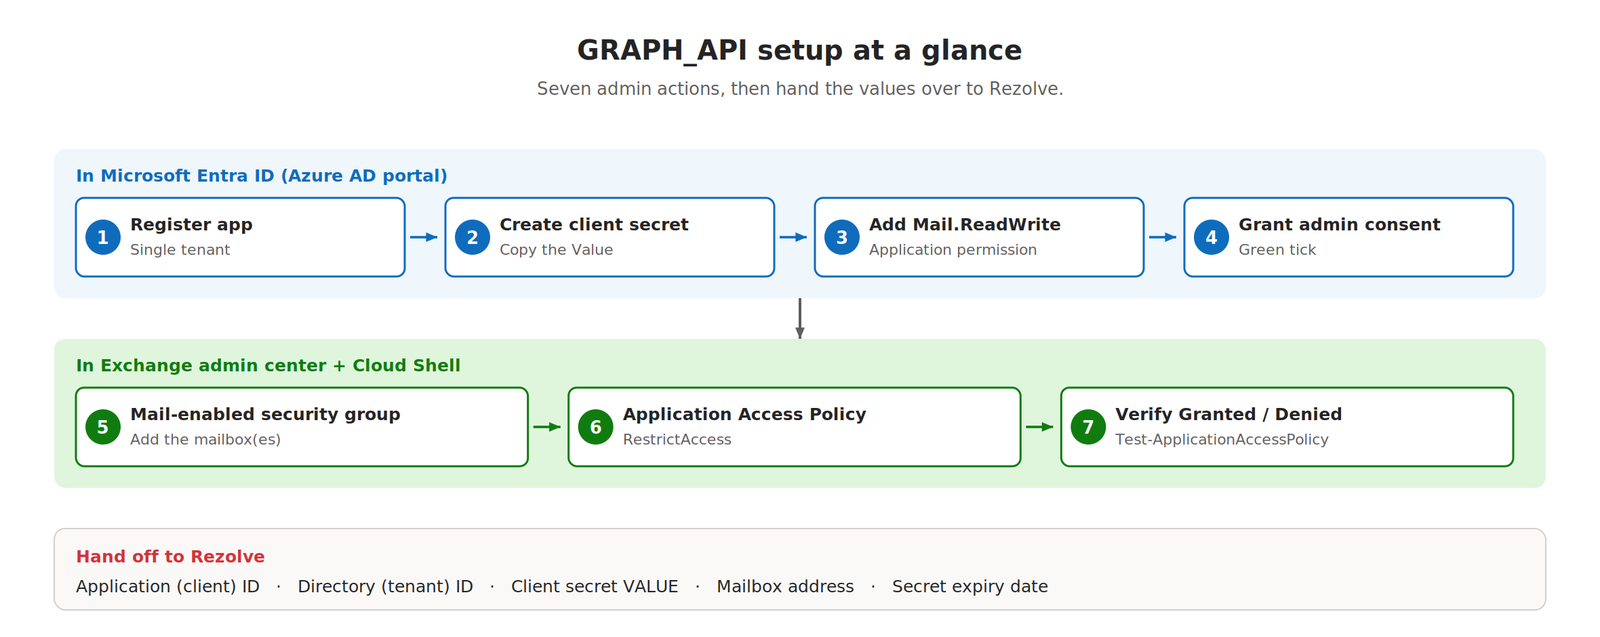
Before you start
- Administrative access to Microsoft Entra ID, with the ability to register an application and grant tenant-wide admin consent.
- Exchange Administrator or Global Administrator rights, to create a mail-enabled security group and the access policy.
- The mailbox must be hosted on Microsoft 365 / Exchange Online. On-premises Exchange is not supported by Graph.
A shared mailbox is a normal Microsoft 365 mailbox, so it works exactly like a licensed user mailbox here. It still has to be added to the security group in Step 4.
Step 1. Register an application
This creates the identity Rezolve will sign in as. It takes about five minutes.
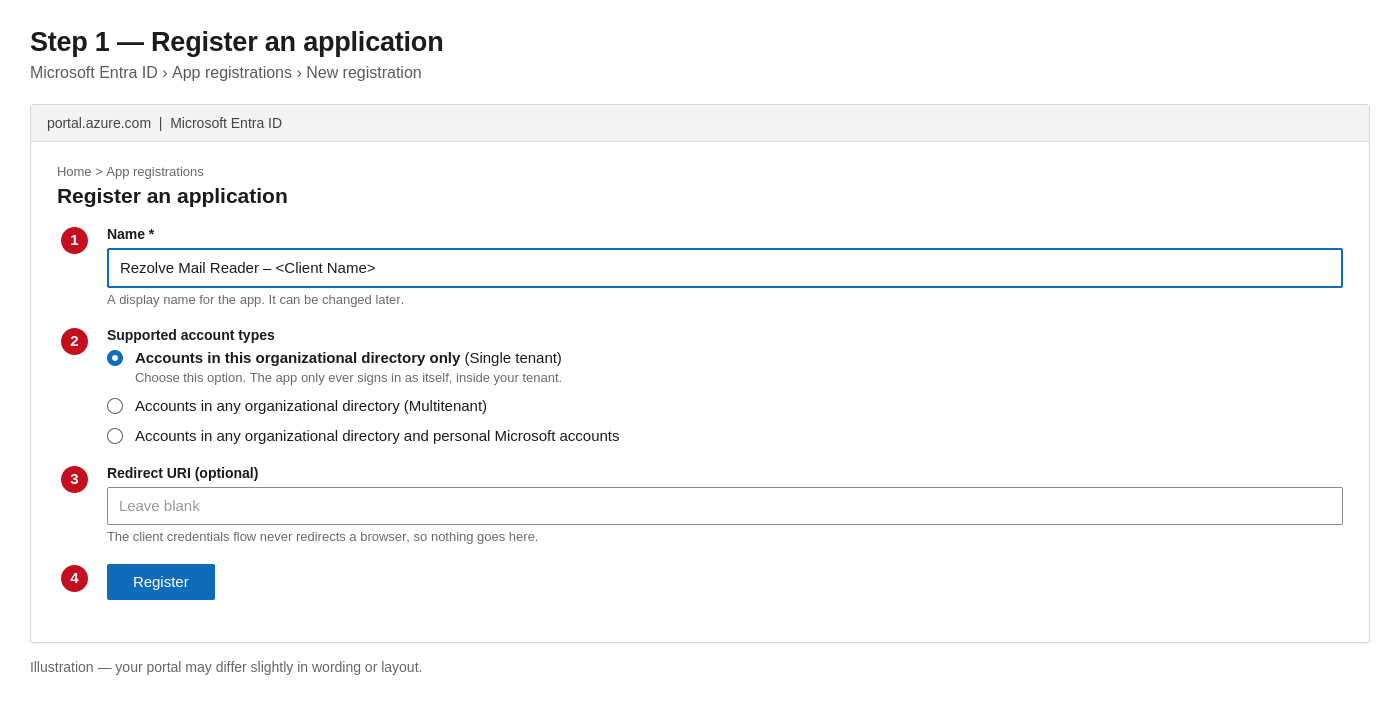
- Sign in to portal.azure.com as an administrator.
- Go to Microsoft Entra ID (Azure Active Directory) → App registrations → + New registration.
- Give it a descriptive name, for example
Rezolve Mail Reader – <Client Name>. - For Supported account types, choose Accounts in this organizational directory only (single tenant).
- Leave Redirect URI blank, then click Register.
Record two identifiers
When registration completes you land on the app's Overview page. Two values there are needed later — copy them with the copy icon rather than retyping them, because a single mistyped character in a GUID produces an authentication failure that is tedious to trace.
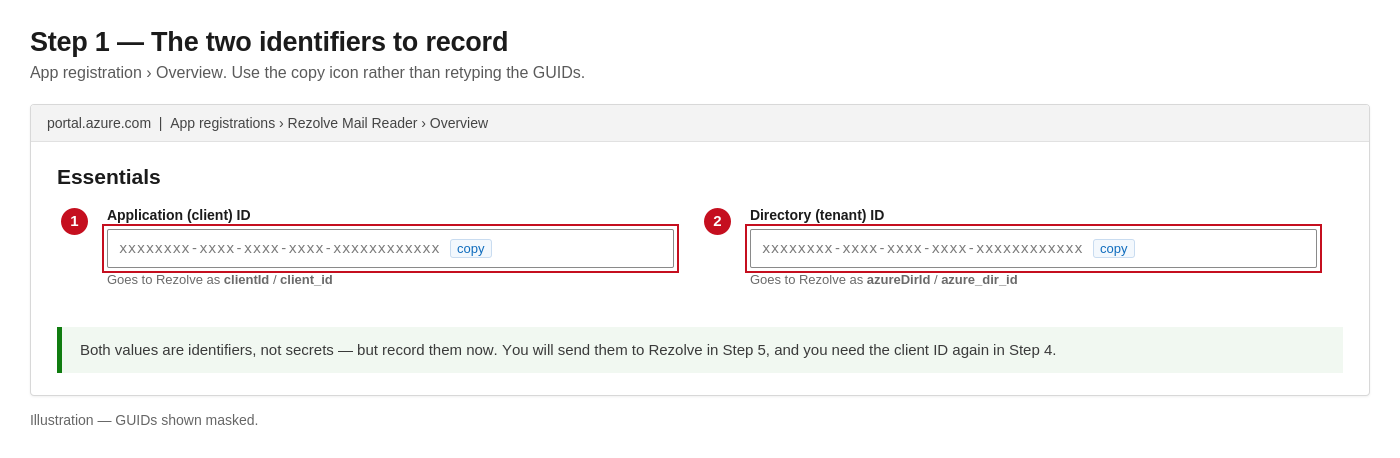
| Portal field | Rezolve configuration field | Needed in |
|---|---|---|
| Application (client) ID | clientId / client_id | Step 4 and Step 5 |
| Directory (tenant) ID | azureDirId / azure_dir_id | Step 5 |
Step 2. Create a client secret
The secret is the application's password. Rezolve uses it, together with the client ID, to obtain an access token.
- In the app registration, open Certificates & secrets.
- Click + New client secret.
- Enter a description, for example
Rezolve Mail Reader, and choose an expiry. 24 months is recommended. - Click Add, then copy the Value immediately.
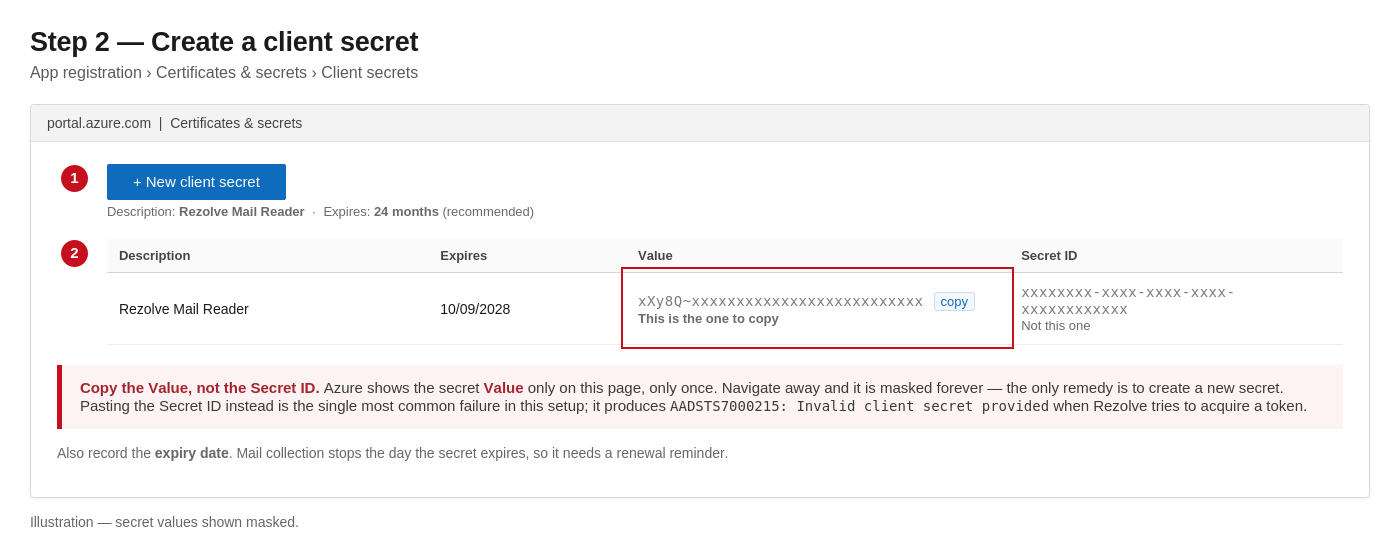
Azure displays the secret Value only on this page, only once. As soon as you navigate away it is masked permanently and the only remedy is to create a new secret.
Copying the Secret ID instead of the Value produces the error AADSTS7000215: Invalid client secret provided when Rezolve tries to acquire a token. If you see that error, the value was almost certainly the wrong column.
Note the expiry date as well. Mail collection stops the day the secret expires, so it is worth putting a renewal reminder in the calendar a month ahead.
Step 3. Grant Microsoft Graph API permissions
The app now exists but can do nothing. This step gives it exactly one Graph permission.
- In the app registration, open API permissions.
- Click + Add a permission → Microsoft Graph → Application permissions.
- Search for Mail.ReadWrite, tick it, and click Add permissions.
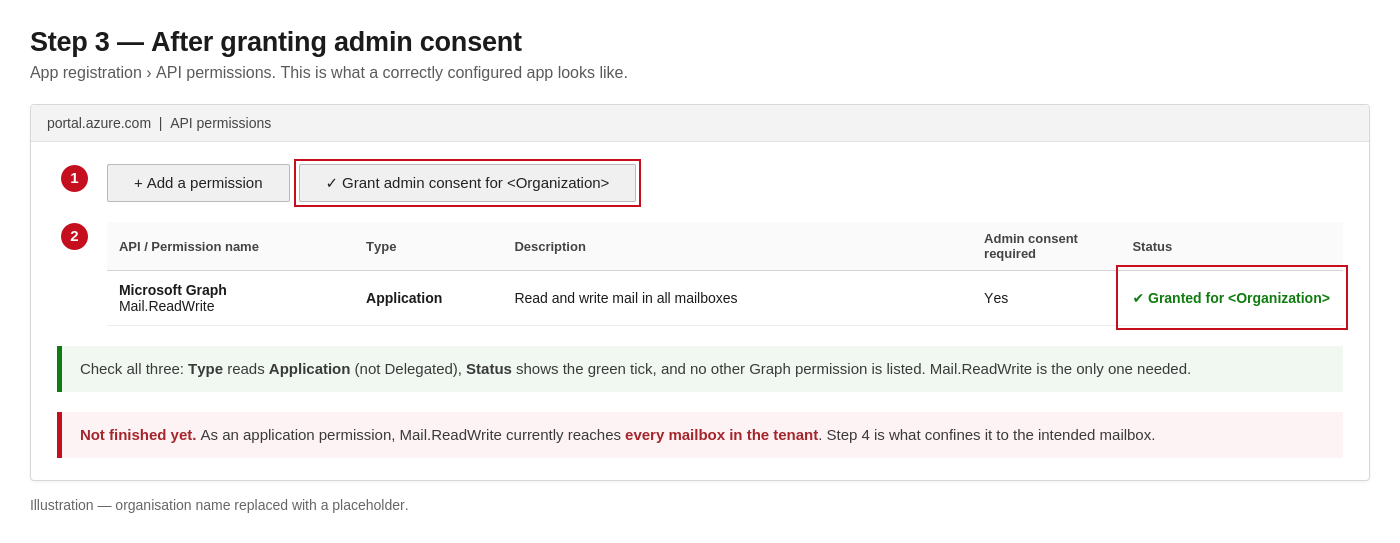
- Back on the API permissions page, click Grant admin consent for <Organization> and confirm.
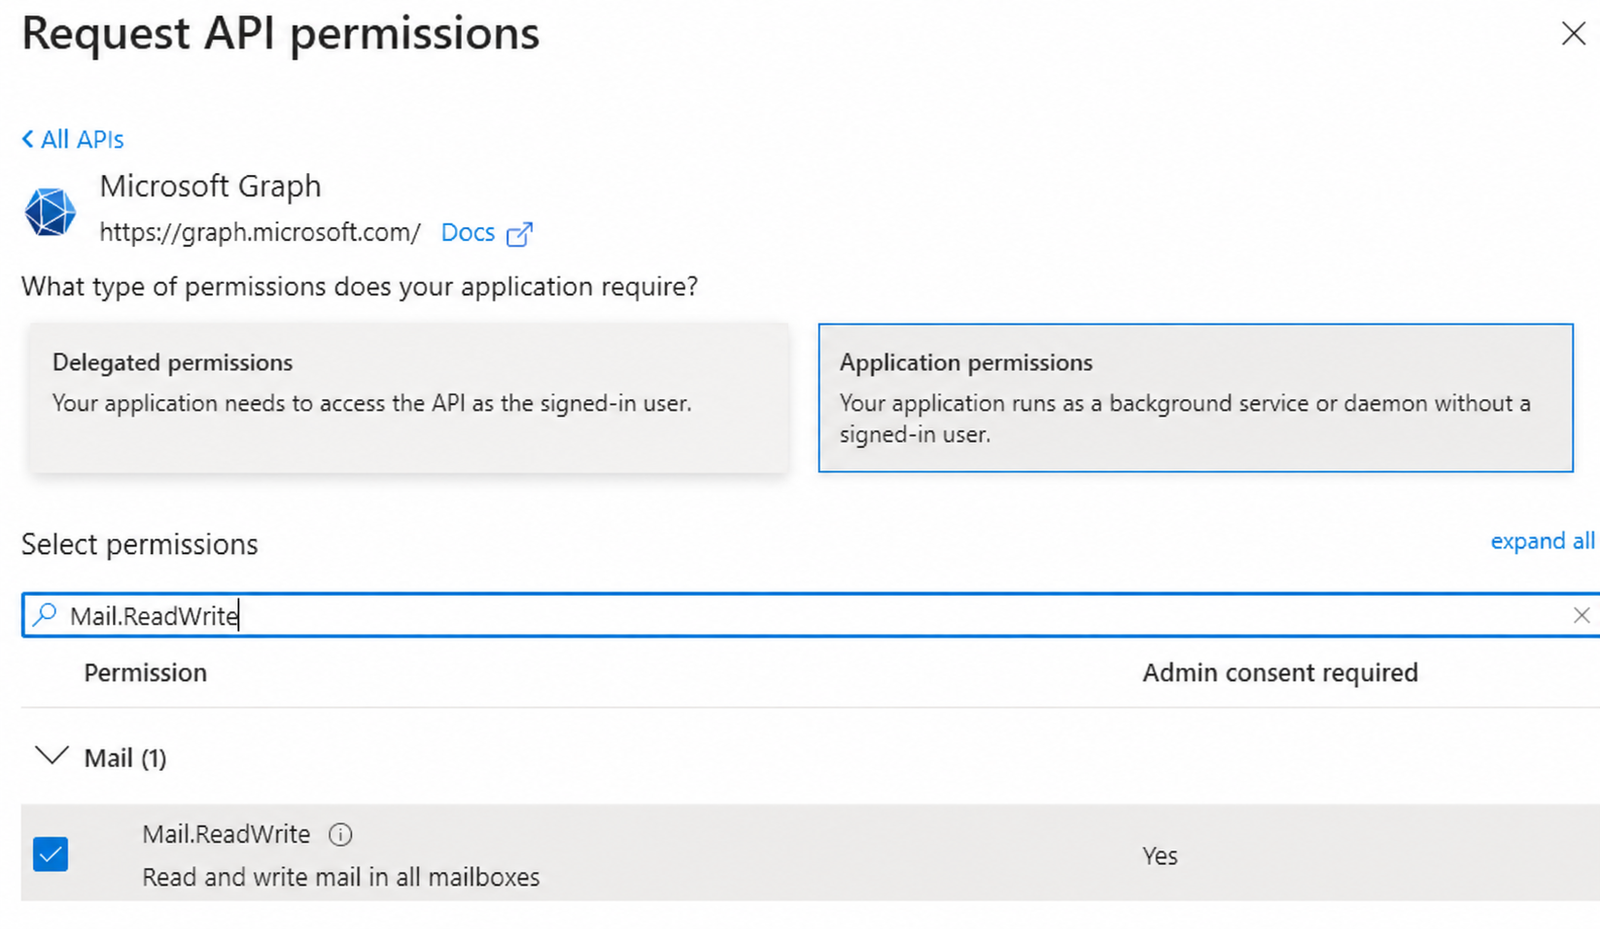
Delegated permissions act on behalf of a signed-in user and are subject to MFA and password changes — which is exactly what this setup exists to avoid. If the Type column later reads Delegated, the wrong tile was chosen and the permission needs to be removed and re-added.
After granting consent, confirm the result on the API permissions page. Type must read Application, Status must show the green tick, and Mail.ReadWrite should be the only Graph permission listed.
Permission reference
| Permission | Type | What it allows | Needed? |
|---|---|---|---|
| Mail.ReadWrite | Application | Read messages, mark them as read, and move them between folders | Yes — the service moves processed mail into success and failure folders |
No other Graph permission is required. If anything else appears in the list, it can be removed.
Step 4. Restrict mailbox access (mandatory)
Granted as an application permission, Mail.ReadWrite applies to every mailbox in the tenant — the CEO's, HR's, finance's — not only the one Rezolve is configured to read.
Left unrestricted: a typo in the configured mailbox address reads someone else's mail, a leaked client secret exposes the whole organisation, and there is no server-side boundary to fall back on.
An Application Access Policy is Microsoft's supported mechanism for scoping app-only mailbox access. Treat it as part of the deployment, not as hardening to do later.
The step has three parts: create a group, put the mailbox in it, and bind the app to that group with a policy.
4.1 Create a mail-enabled security group
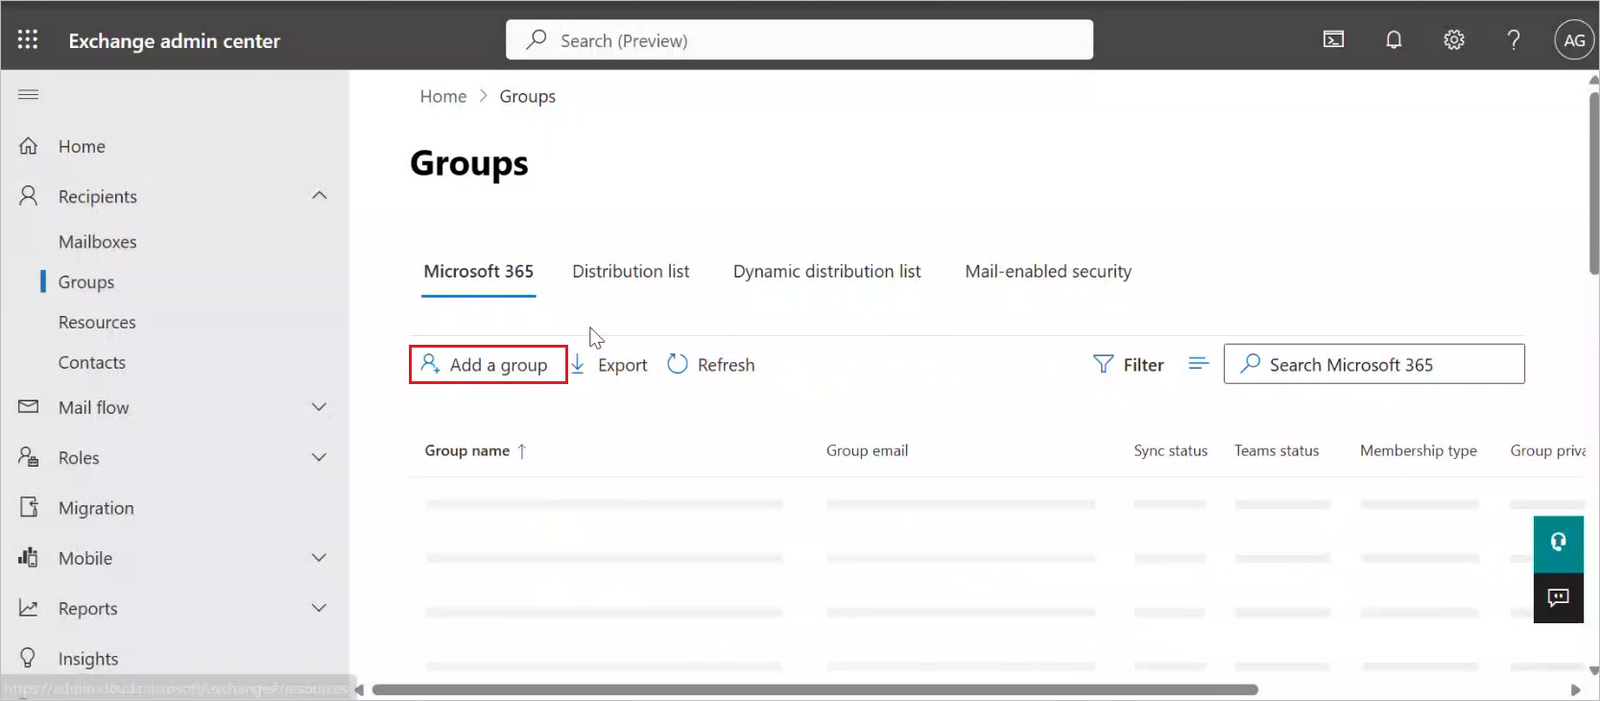
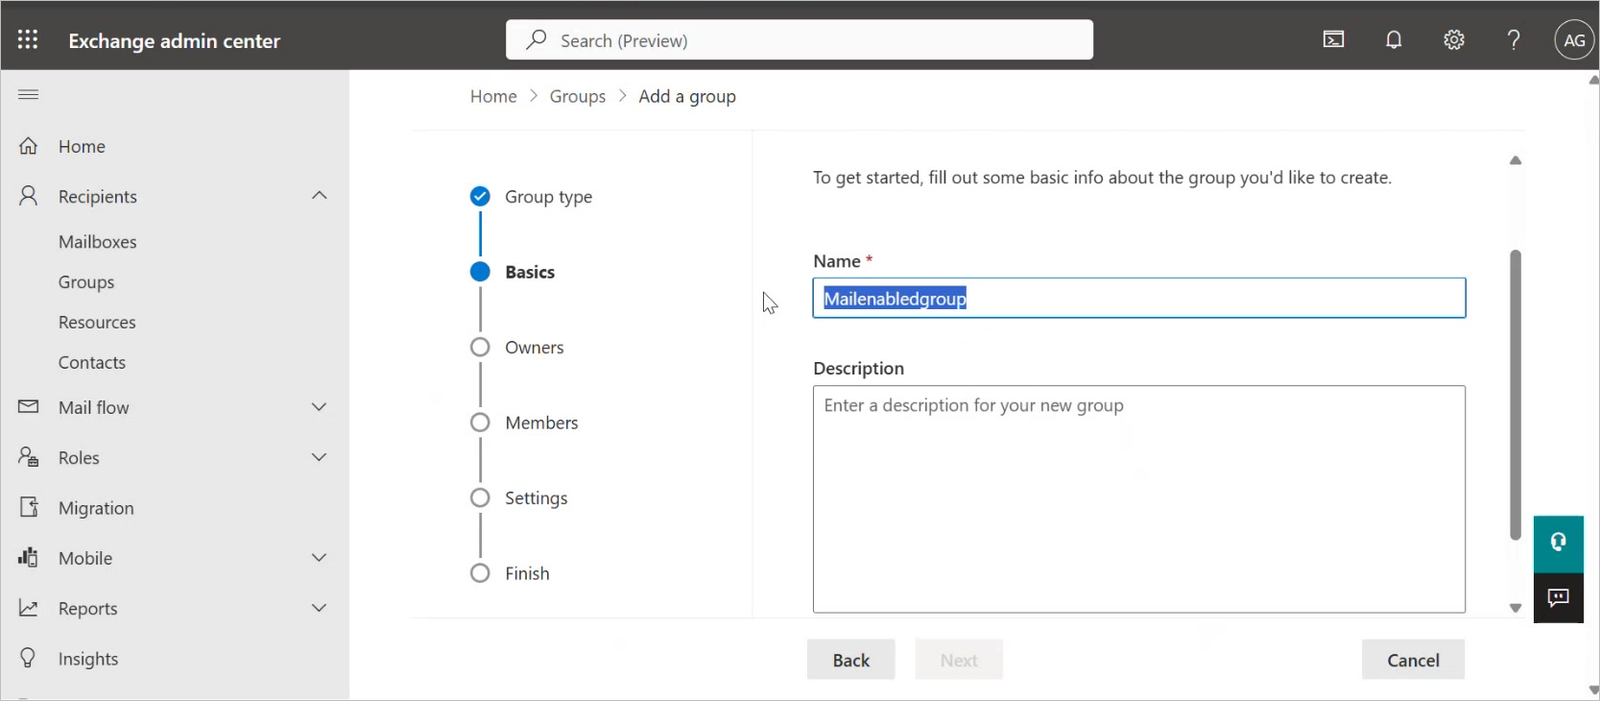
Go to admin.exchange.microsoft.com → Recipients → Groups, then click Add a group.
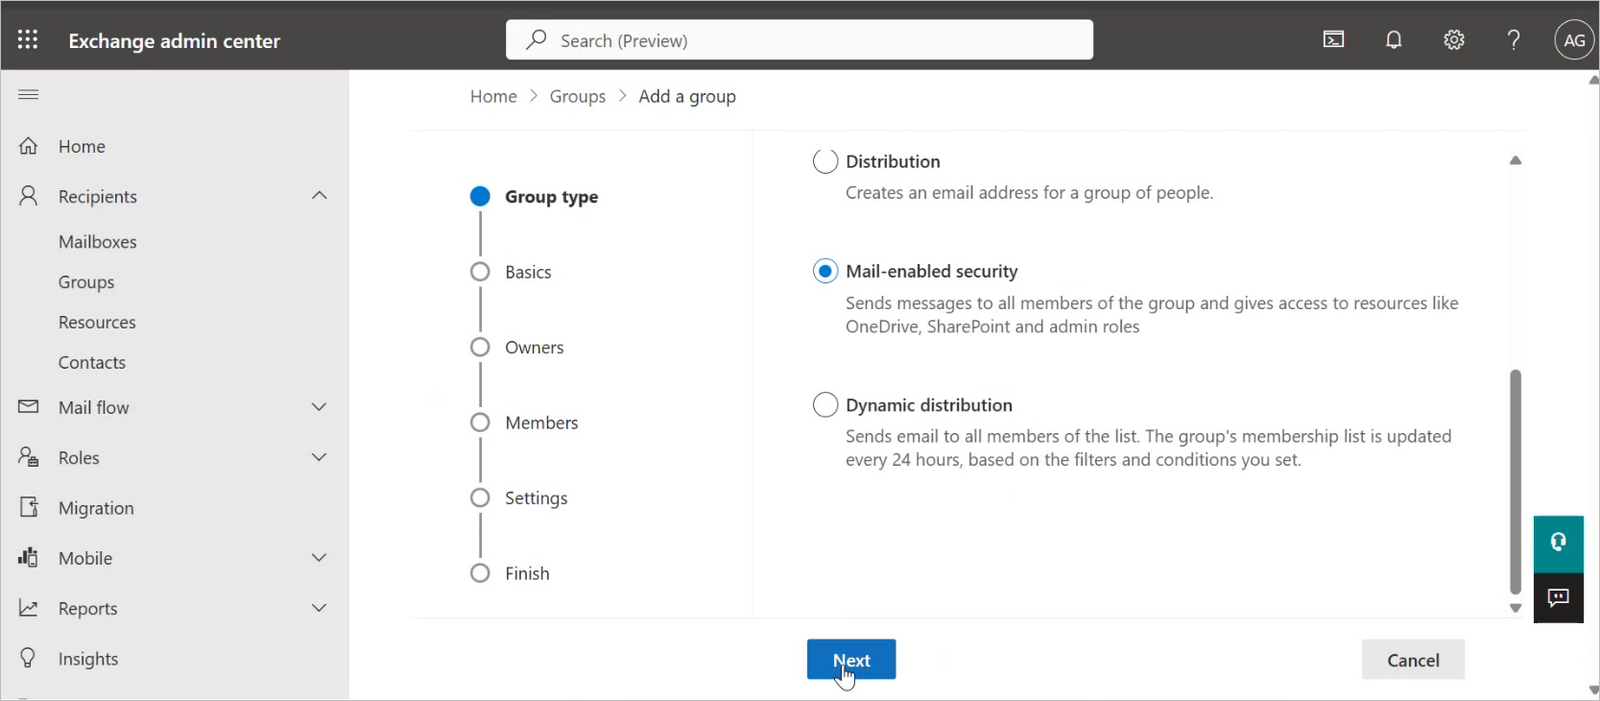
Choose the group type Mail-enabled security and click Next. This type matters — see the note at the end of this section.
Give the group a name that makes its purpose obvious, for example Rezolve-GraphMail-AllowedMailboxes, with a description such as "Mailboxes the Rezolve mail-ticket-service Graph app may access".
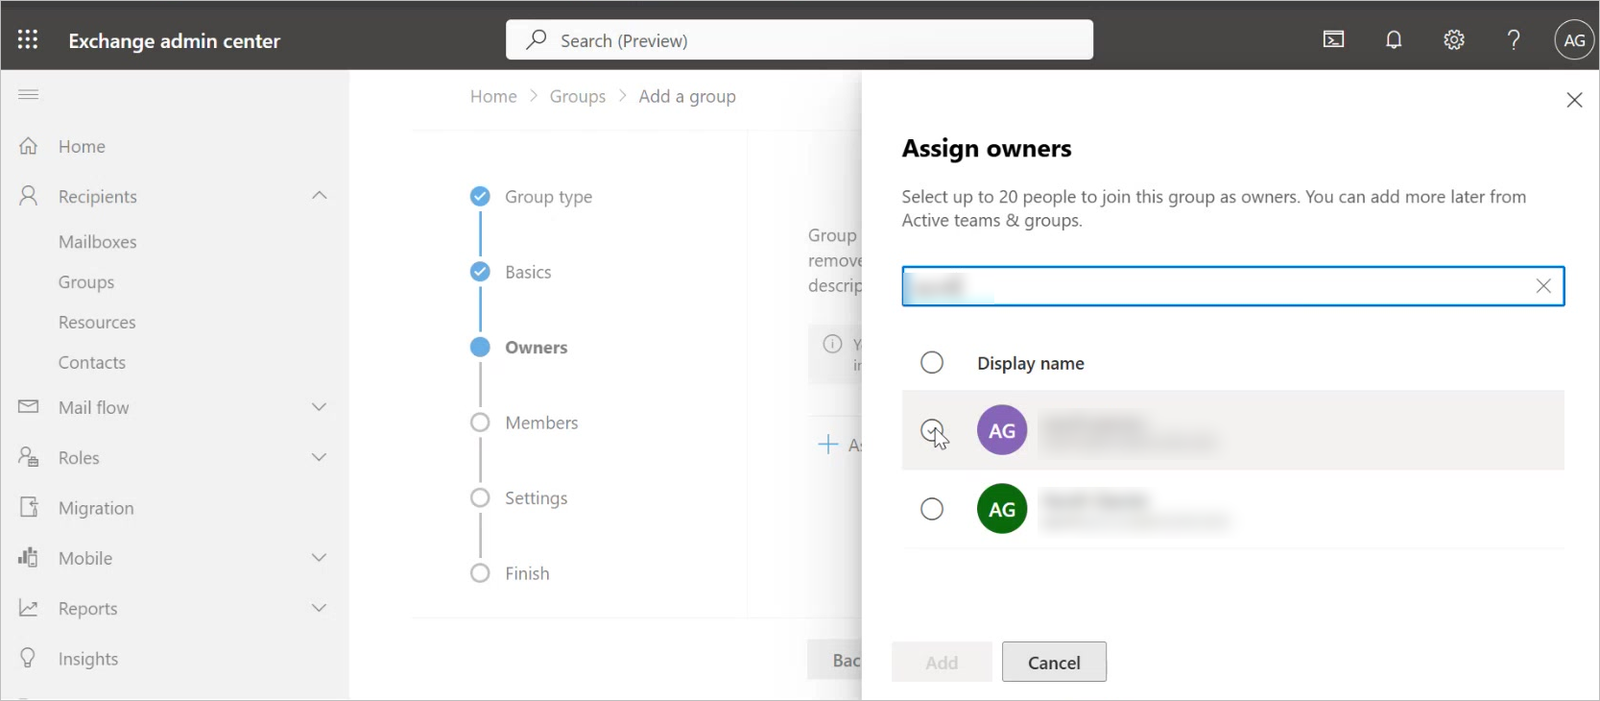
Assign an owner — yourself, or whoever will maintain the group when mailboxes are added or removed later.
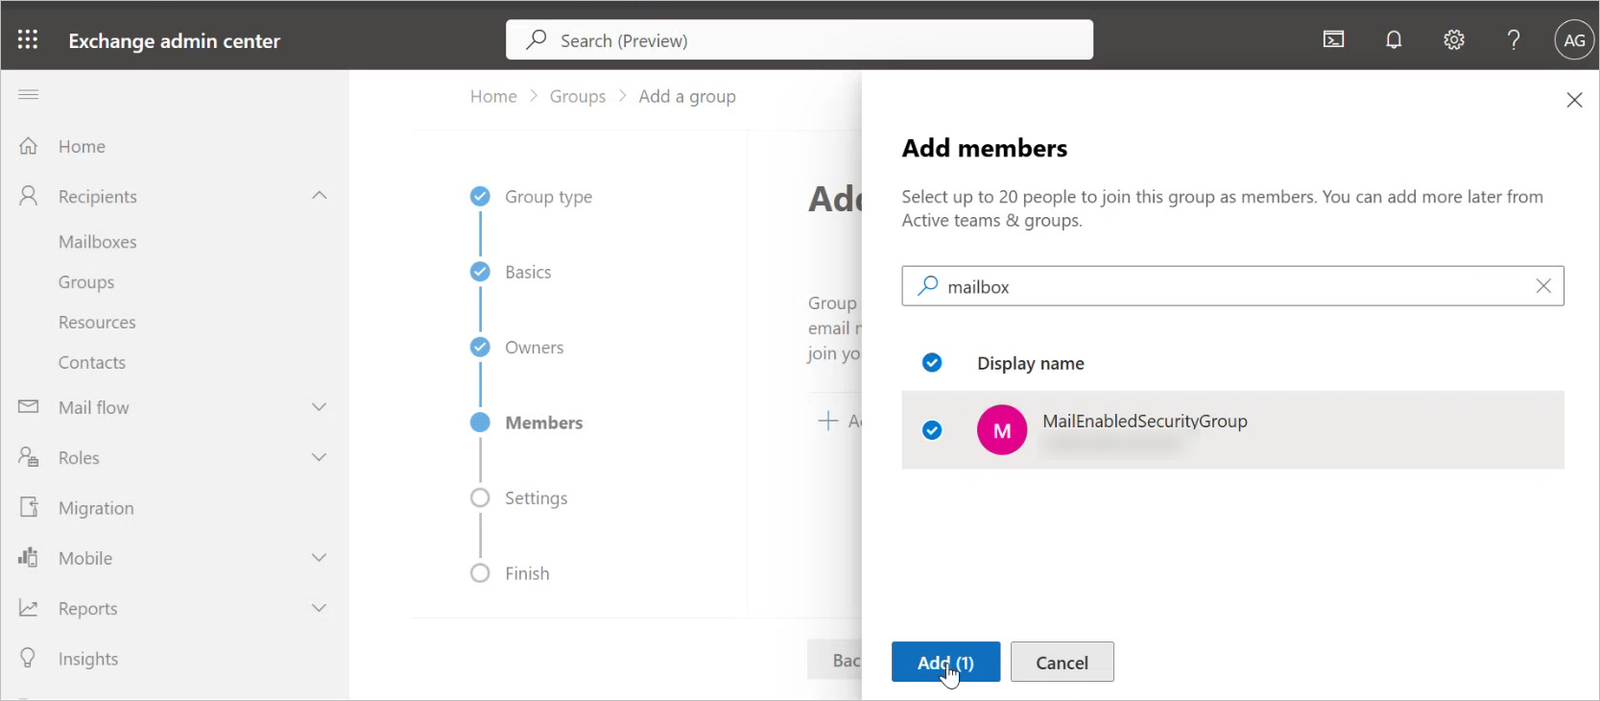
4.2 Add the mailbox to the group
On the Members page, add every mailbox Rezolve will read. In most deployments that is a single support or helpdesk mailbox; add all of them if there are several.
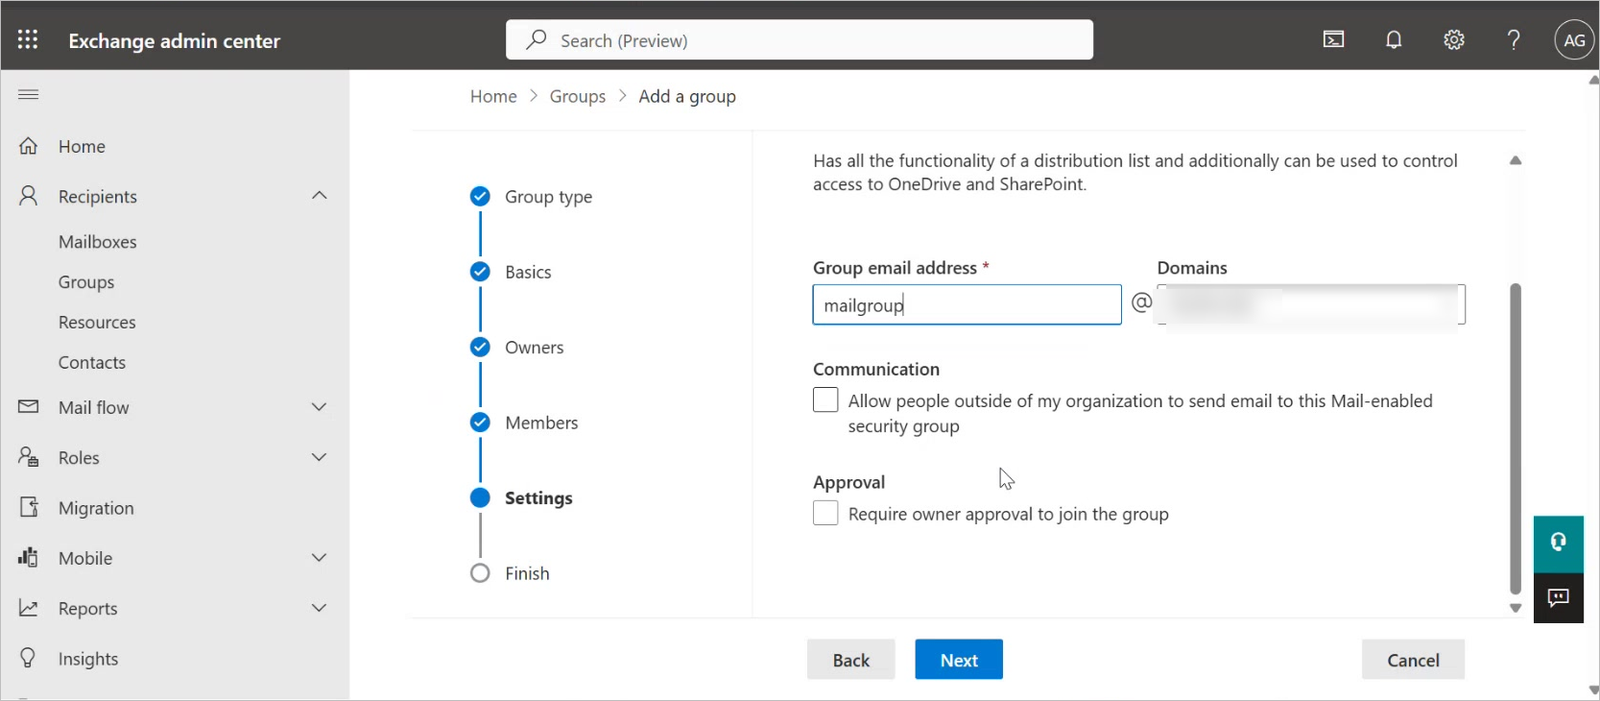
On the Settings page, give the group its own email address. You will need this address in the next part, and again in Step 5.
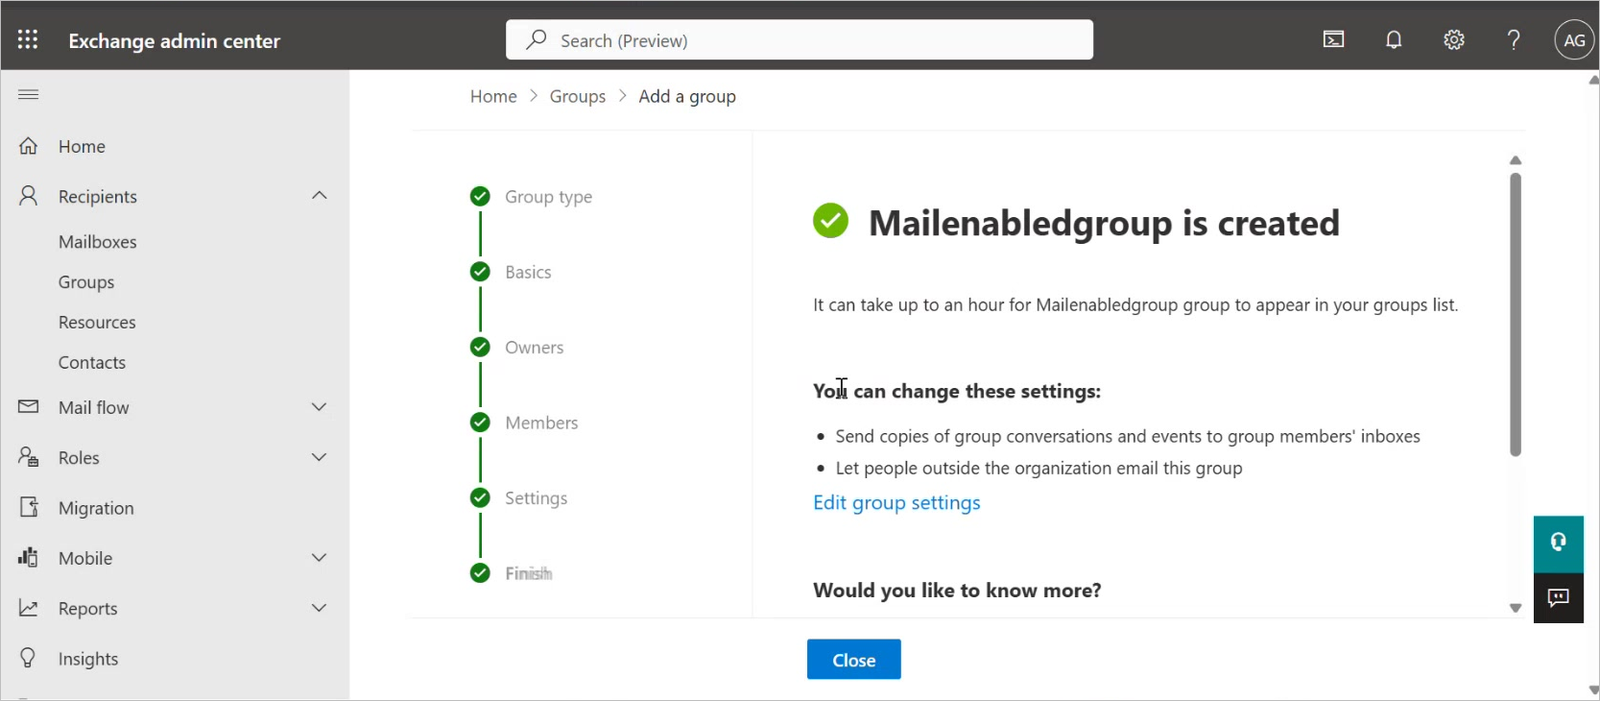
Microsoft 365 groups and ordinary Entra ID security groups are rejected by the policy command with "The identity of the policy scope is not a security principal."
The Entra ID portal only offers Security and Microsoft 365 group types, so this group can only be created from the Exchange admin center.
A newly created group can take up to an hour to appear everywhere. If the policy command in 4.3 cannot find the group, wait and try again rather than creating a second group.
4.3 Create the Application Access Policy
Application Access Policies have no portal interface; they are created with Exchange Online PowerShell. Azure Cloud Shell runs it in the browser, so nothing has to be installed on your machine.
In portal.azure.com, click the Cloud Shell icon (>_) in the top bar. Choose PowerShell if prompted. On first use Azure asks to create a storage account — click Create storage.
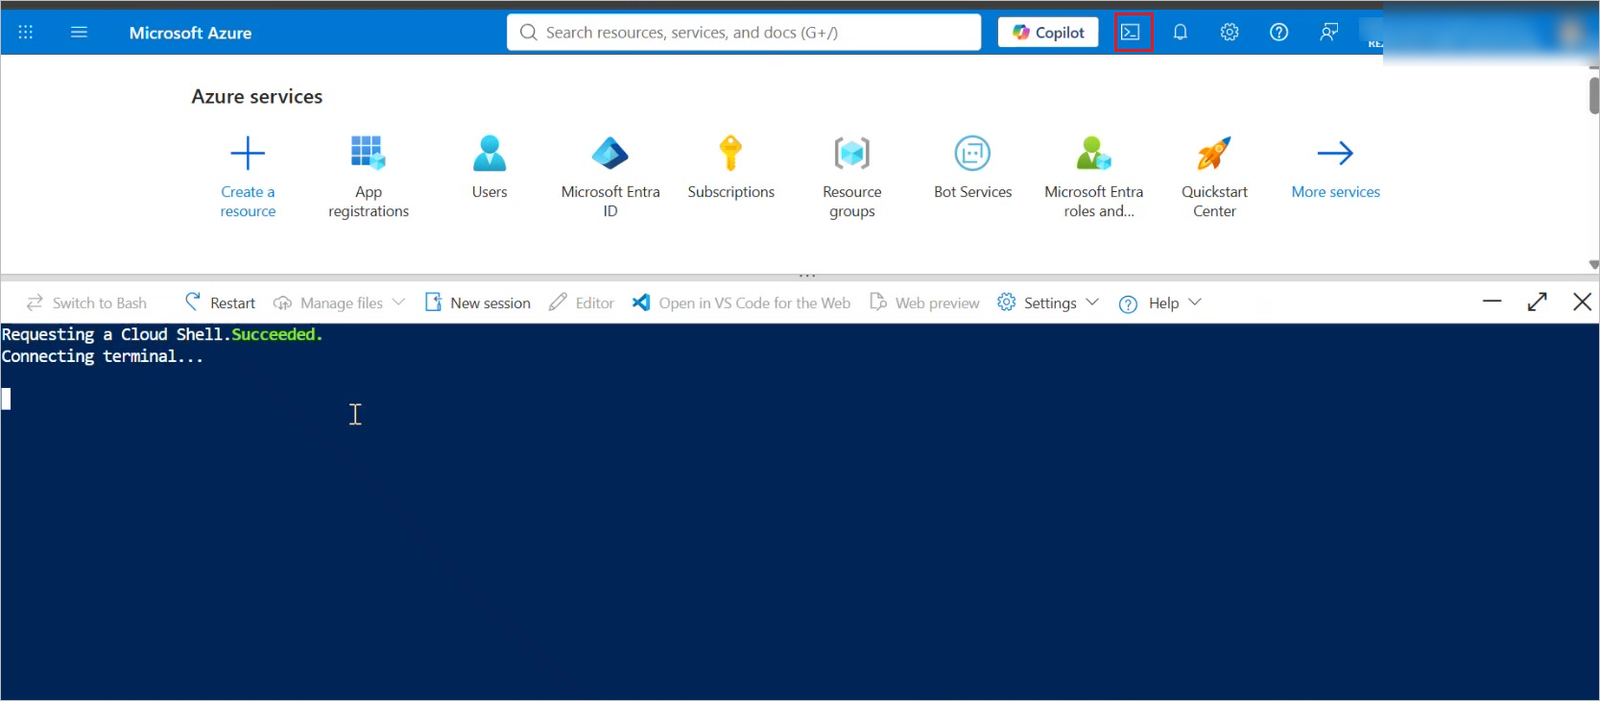
First, install the Exchange Online module. This is only needed the first time and takes about a minute.
# 1. Install the Exchange Online module (first run only)
Install-Module -Name ExchangeOnlineManagement -Scope CurrentUser -Force
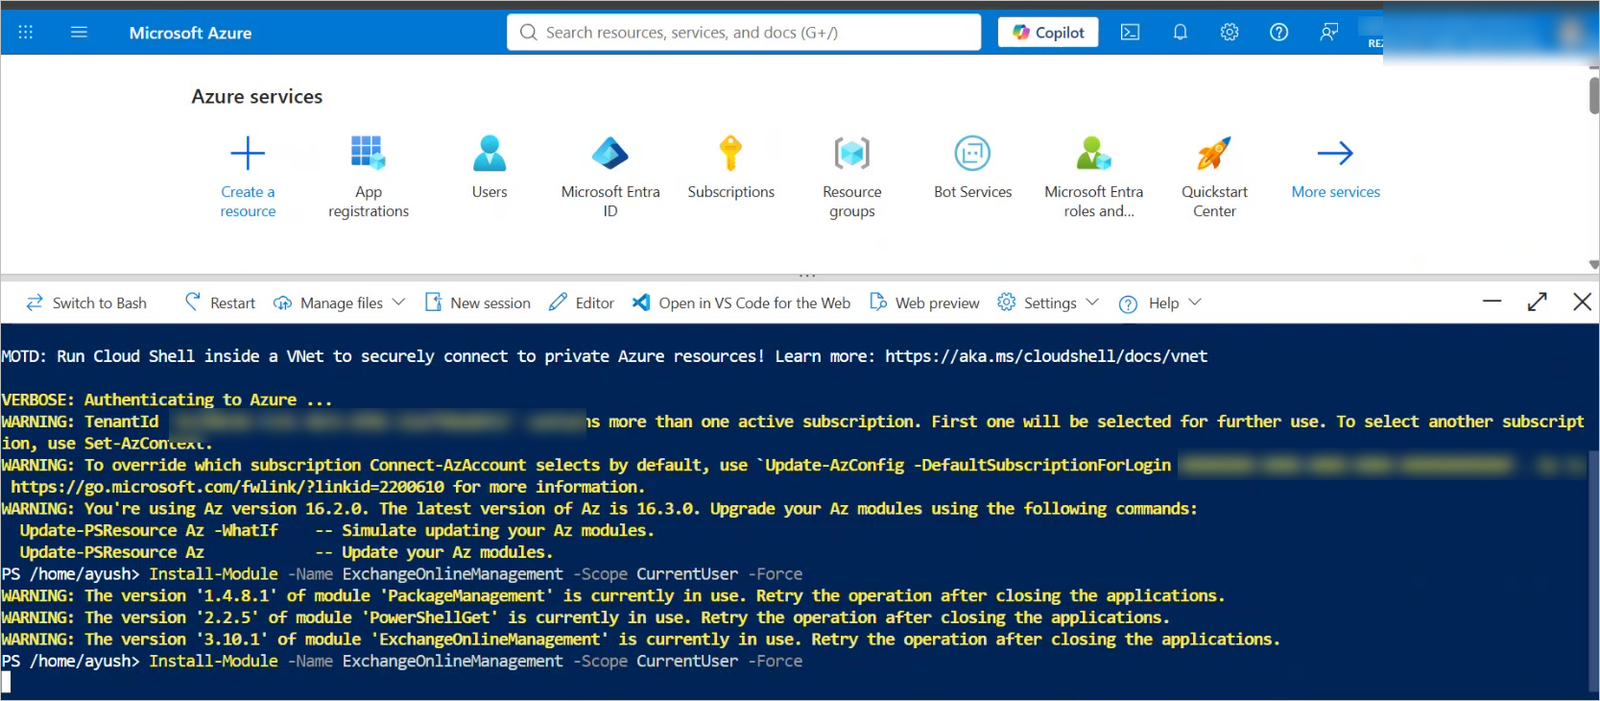
Warnings that a module is already in use are normal and can be ignored.
Next, connect to Exchange Online. Sign in as an Exchange Administrator or Global Administrator.
# 2. Connect to Exchange Online
Connect-ExchangeOnline
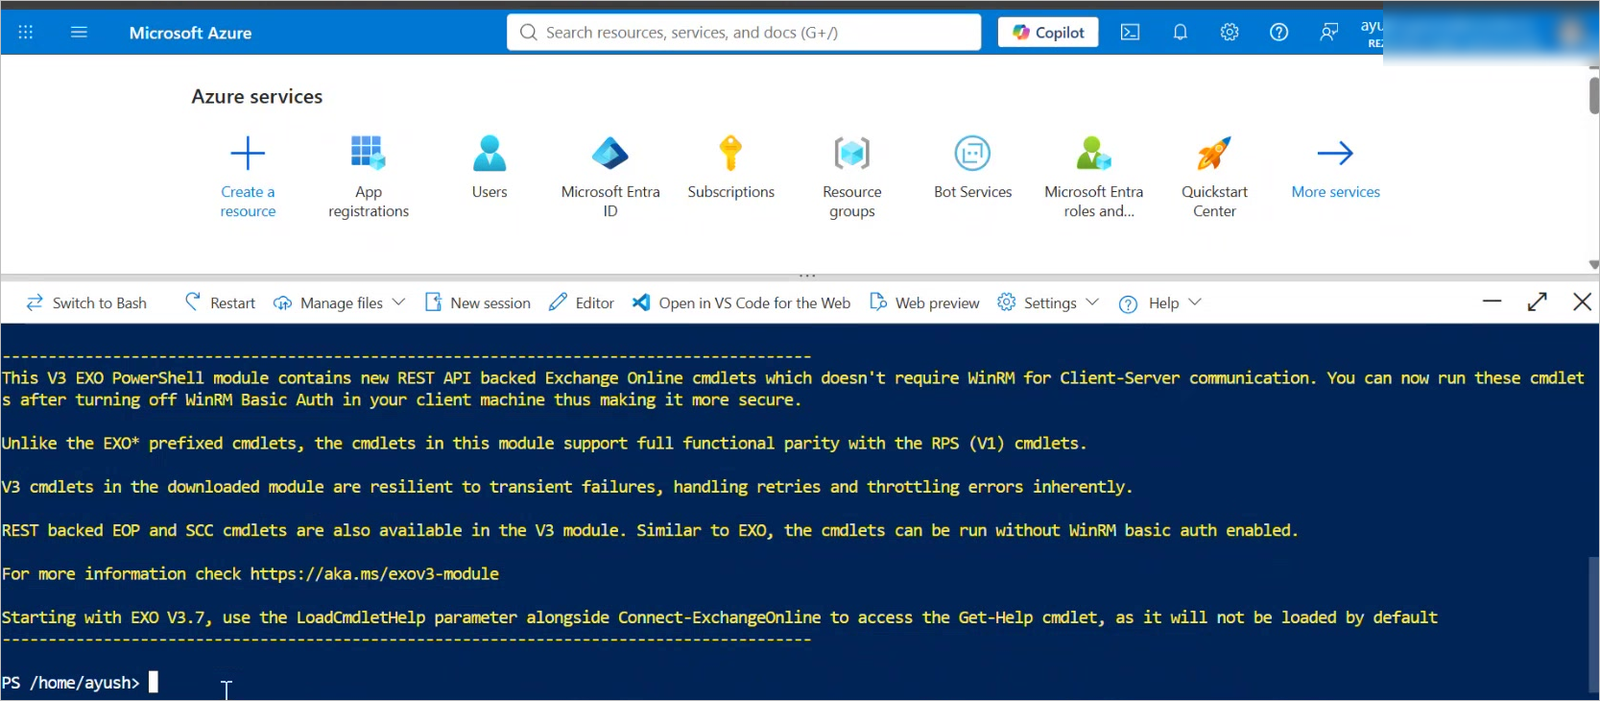
Now create the policy, substituting your own client ID from Step 1 and the group address from Step 4.2. The backtick at the end of each line continues the command onto the next.
# 3. Create the policy
New-ApplicationAccessPolicy `
  -AppId "<Application (client) ID from Step 1>" `
  -PolicyScopeGroupId "<group address from Step 4.2>" `
  -AccessRight RestrictAccess `
  -Description "Restrict Rezolve mail-ticket-service to configured mailboxes only"

# 4. Disconnect when finished
Disconnect-ExchangeOnline -Confirm:$false
A successful run echoes the policy back. Check that AccessRight reads RestrictAccess and IsValid reads True.
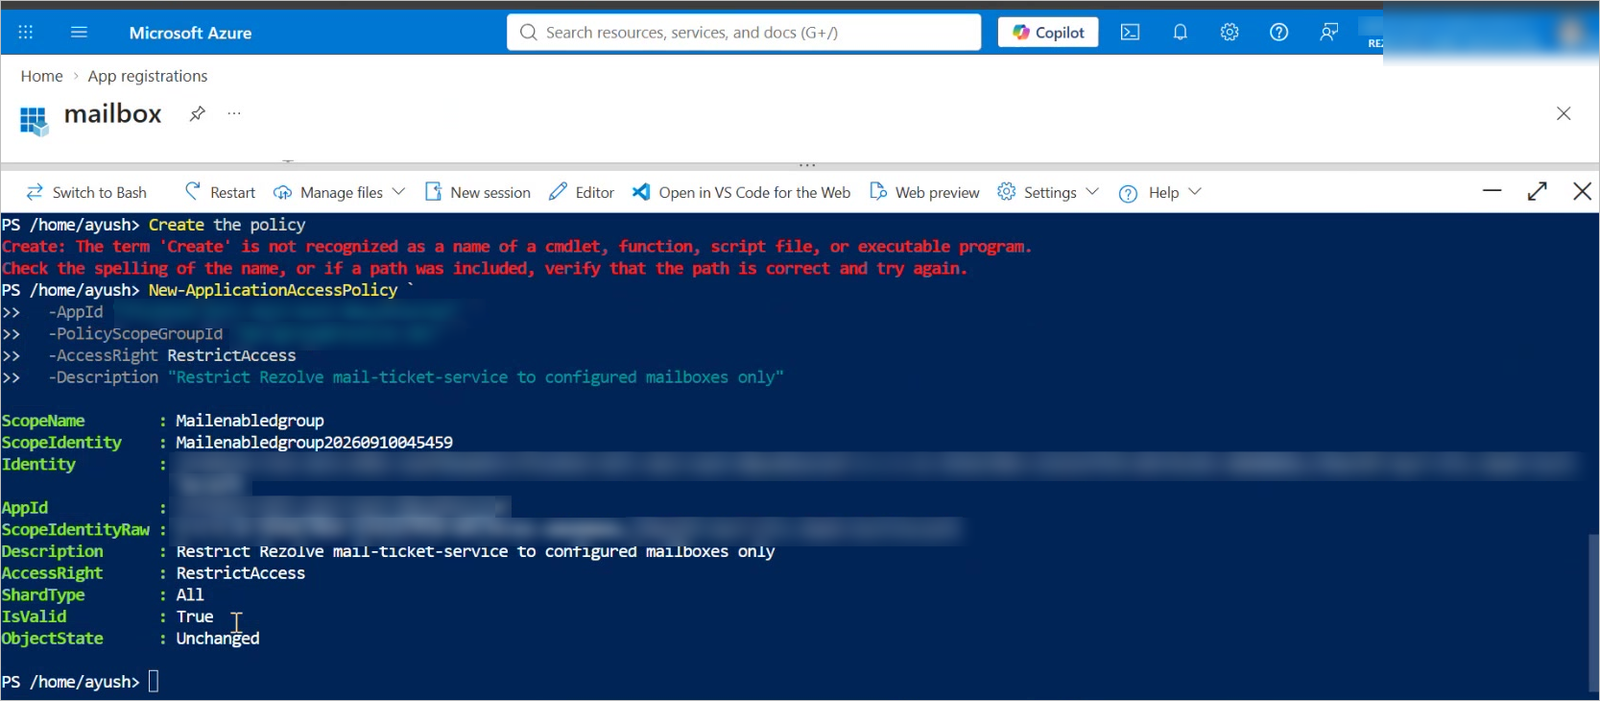
The app can access only the mailboxes in that group. Every other mailbox in the tenant returns HTTP 403.
Cloud Shell sessions time out after 20 minutes of inactivity, but the policy, once created, is permanent.
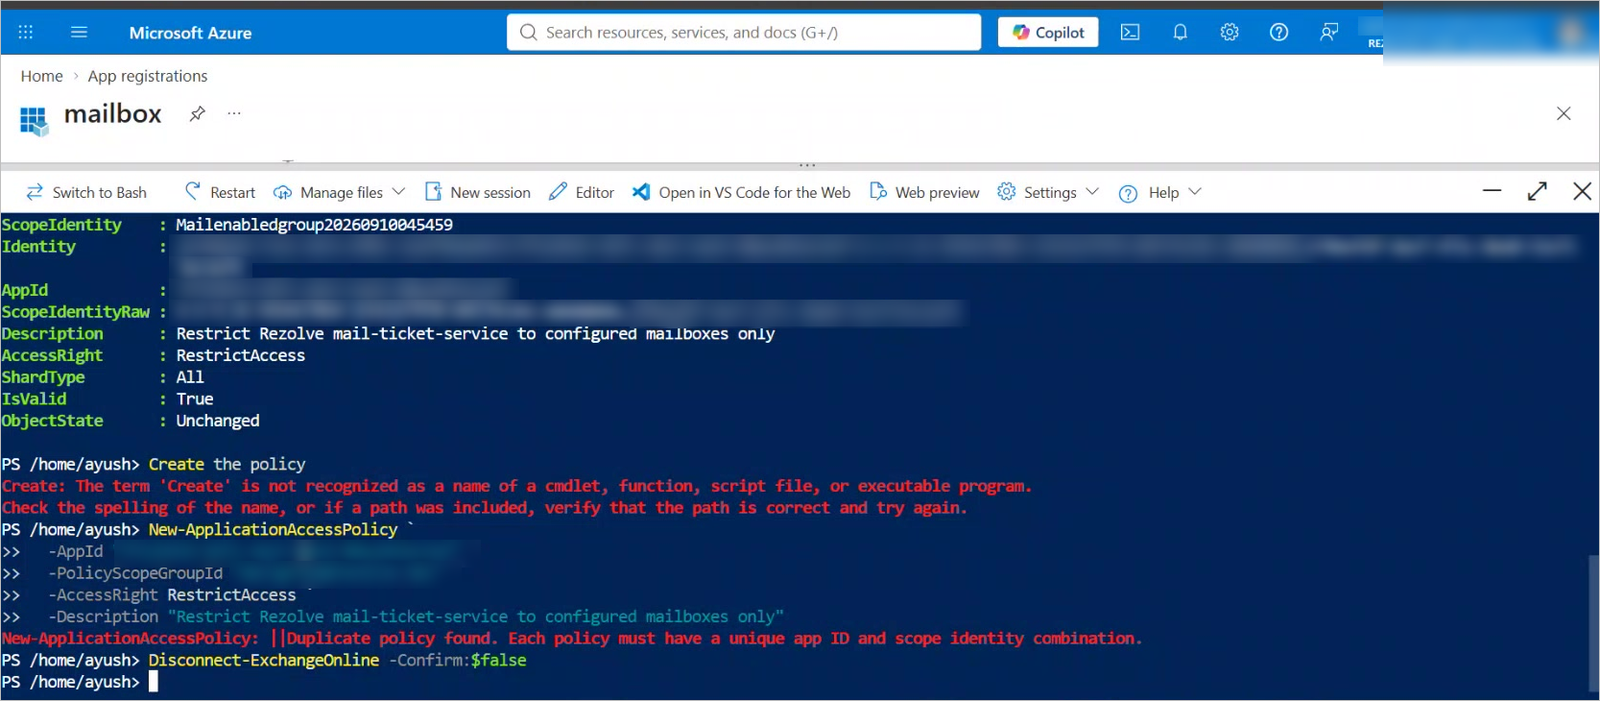
If the command reports a duplicate policy
Running the command twice for the same app and group returns "Duplicate policy found. Each policy must have a unique app ID and scope identity combination." This is harmless — it means the policy already exists from the earlier run. Verify it with the checks below rather than trying to create it again.
4.4 Verify the policy
Two checks, and both matter: one mailbox that must work, and one that must not. Testing only the mailbox that should work tells you nothing about whether the restriction is in force.
Connect-ExchangeOnline

# Expect: AccessCheckResult = Granted
Test-ApplicationAccessPolicy -AppId "<clientId>" -Identity "support@company.com"

# Expect: AccessCheckResult = Denied
Test-ApplicationAccessPolicy -AppId "<clientId>" -Identity "ceo@company.com"

Disconnect-ExchangeOnline -Confirm:$false
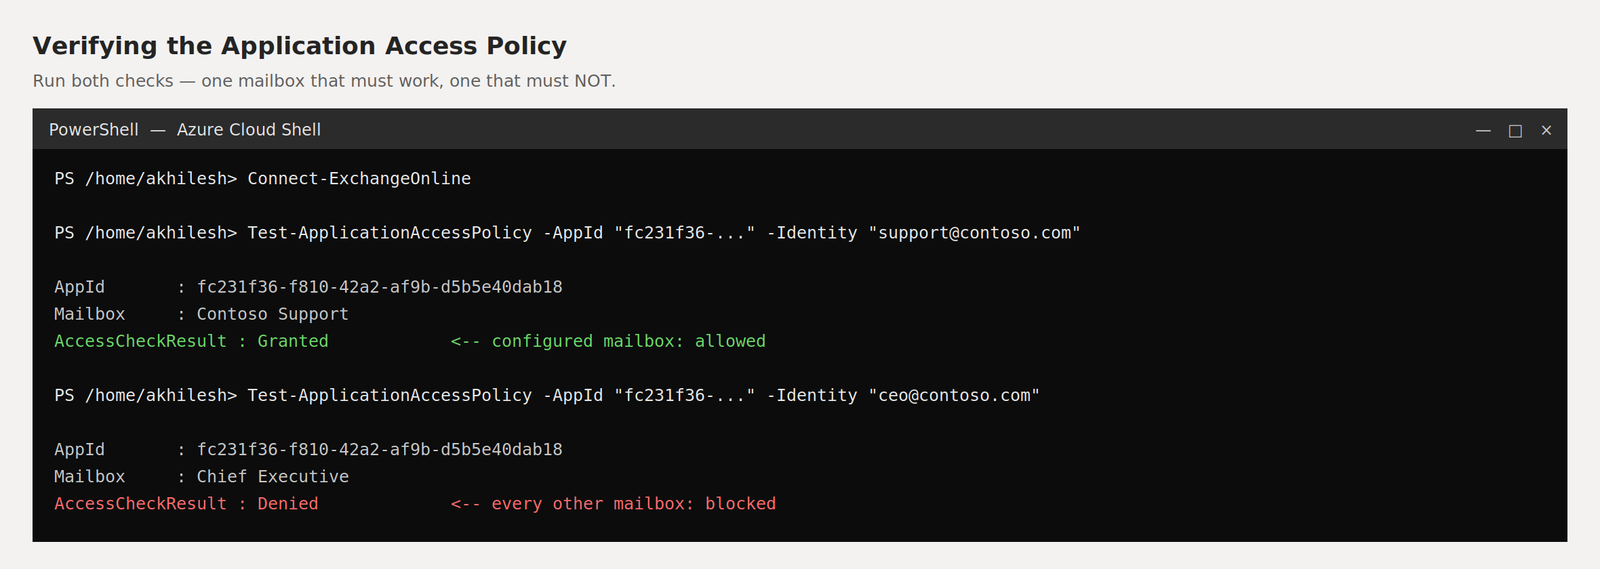
Policies take up to 30 minutes to propagate across Microsoft's infrastructure. During that window the app may still reach other mailboxes.
Do not consider the setup complete until a Denied result has actually been observed for a mailbox outside the group.
Step 5. Hand the values to Rezolve
Six values complete the handover. Send them over a secure channel — a password manager entry, a secrets vault, or an encrypted file share. The client secret must not go by plain email or chat.
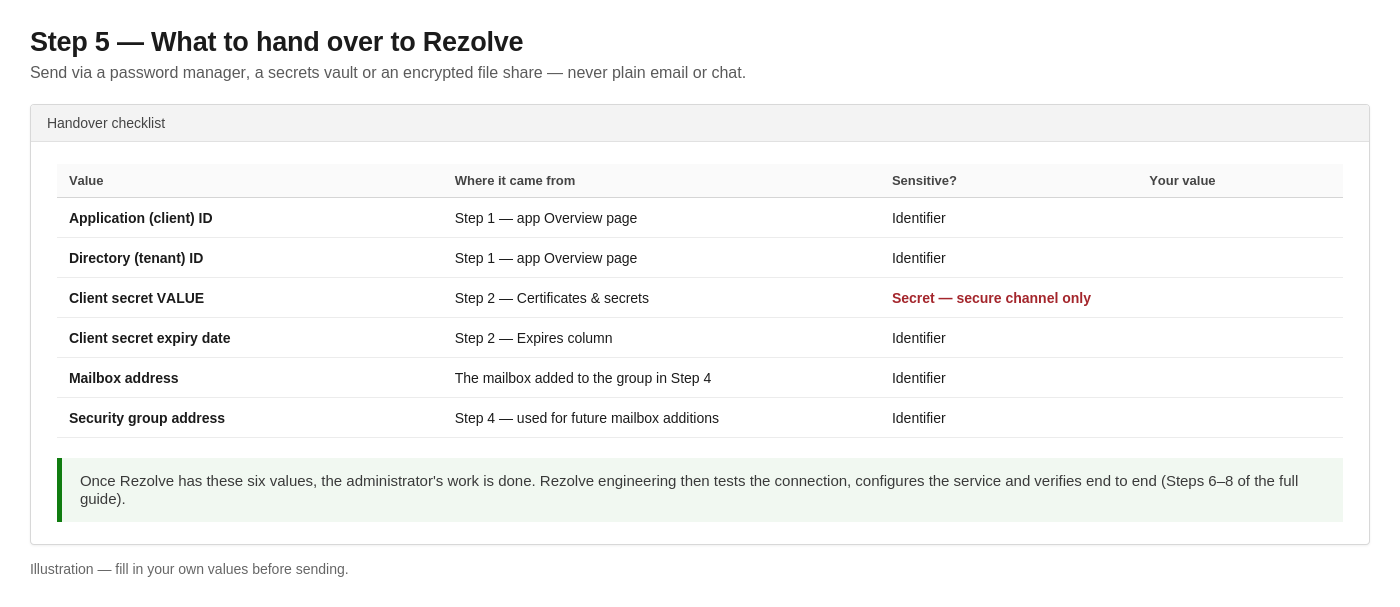
| Value | Where it came from | Sensitive? |
|---|---|---|
| Application (client) ID | Step 1 — app Overview page | Identifier |
| Directory (tenant) ID | Step 1 — app Overview page | Identifier |
| Client secret VALUE | Step 2 — Certificates & secrets | Secret — secure channel only |
| Client secret expiry date | Step 2 — Expires column | Identifier |
| Mailbox address | The mailbox added to the group in Step 4.2 | Identifier |
| Security group address | Step 4.2 — used for future mailbox additions | Identifier |
What happens next
Once Rezolve has these values, the administrator's work is done. Rezolve engineering then tests the connection with a utility script, configures the mail server record and folder mapping, and verifies end to end by sending a test message to the mailbox and confirming a ticket is created. Those steps are covered in the full engineering guide and need no further access from your side.
Ongoing administration
Adding another mailbox later
Add the mailbox to the same security group. No new app registration, secret or policy is needed, and the change takes effect within the usual propagation window. Tell Rezolve the new address so a mail server record can be configured for it.
Removing a mailbox
Remove it from the group. Access stops once the change propagates.
Rotating the client secret
Create a new secret before the current one expires, send the new Value to Rezolve, and delete the old secret once the new one is confirmed working. Nothing else in the configuration changes.
Frequently asked questions
Does this work with shared mailboxes?
Yes. A shared mailbox is a normal Microsoft 365 mailbox and is reachable through Graph. It still has to be a member of the security group.
Does it work with on-premises Exchange?
No. Graph covers Exchange Online only. On-premises Exchange requires one of the IMAP authentication types instead.
Can one app registration serve several mailboxes?
Yes. The same client ID, secret and tenant ID are reused, with a different mailbox per mail server record — and every one of those mailboxes must be in the access policy group.
Can the app read mail it should not?
Only if the Application Access Policy is missing, or the wrong mailbox was added to the group. With the policy in place, every other mailbox returns 403. This is why the Denied check in Step 4.4 is worth doing properly.
What breaks this setup?
Two things: the client secret expiring, and the app registration being deleted. Mailbox password changes and MFA policy changes have no effect on it.
Smart Mailbox — Scoped Graph Access covers the newer Exchange Online RBAC for Applications method of scoping the same access. Either mechanism restricts the app to a defined set of mailboxes; use this guide when the administrator is following the Application Access Policy route.