Mail Channel Setup
The Mail Channel Setup allows organizations to integrate email capabilities with the ticketing system. This integration enables ticket creation via email, email notifications, and the ability to update tickets through email replies.
Key Features
Mail Server Configuration
- Set up new mail servers with detailed connection parameters
- Configure authentication methods including OAuth and password-based authentication
- Establish secure connections to email services like Office 365 or other IMAP/SMTP servers
Email to Ticket Conversion
- Automatically create tickets from incoming emails
- Map email components (subject, body, attachments) to ticket fields
- Filter emails based on domains and folders
Reply Processing
- Process email replies and add them as notes to existing tickets
- Configure which ticket types can receive email updates
- Handle attachments and formatting in email replies
Configuration Tabs
Connection Form Fields
- Protocol: Select the email protocol (e.g., IMAP)
- Host/IP: Specify the mail server host (e.g., outlook.office365.com)
- Username: Email account username
- Port: Connection port (typically 993 for IMAP)
- Reply To Mail: Optional reply-to address
- Auth Type: OAuth or Password
- Azure Active Directory Tenant ID: For Microsoft integrations
- Redirect URL: For OAuth authentication flow
- Client ID/Secret: For OAuth authentication
- Token Endpoint: OAuth token endpoint URL
- Connection Settings: Timeout, retry settings, etc.
Folder Mapping
- Fail Folder: Where problematic emails are moved
- Success Folder: Where processed emails are moved
- Exclusion Folder: Emails to ignore (e.g., bulk mail)
Domain Settings
- Allowed Domains: List of domains from which to accept emails
- Exclude AutoReplies: Option to filter out automatic replies
Ticket Mapping Settings
- Template Selection: Choose which template receives email-created tickets
- Whitelist Ticket Types: Templates that can receive email updates
- Field Mapping: Map email properties to ticket fields
Implementation Process
- Access the Mail Server section in Service Catalog
- Set up connection details for your email server
- Configure folder mappings and allowed domains
- Map email components to ticket fields
- Test the configuration with sample emails
- Monitor and adjust settings as needed
Important Notes
- Setting up an email server creates a silent offer for the selected template
- This offer won't be visible in the normal offer section but functions as an email entry point
- Changes to the template selection cannot be made after initial setup and publishing
Best Practices
- Use dedicated email accounts for ticket management
- Implement clear folder structures for processed emails
- Regularly monitor the fail folder for problematic emails
- Configure appropriate security settings to protect sensitive information
- Set up clear auto-response messages for ticket creation confirmation
Mail Server Configuration Guide (Postmark Integration)
1. Create New Mail Server
Navigation: Go to: Ticket Management > Service Catalog > Mail Server
Click "Add New Mail Server".
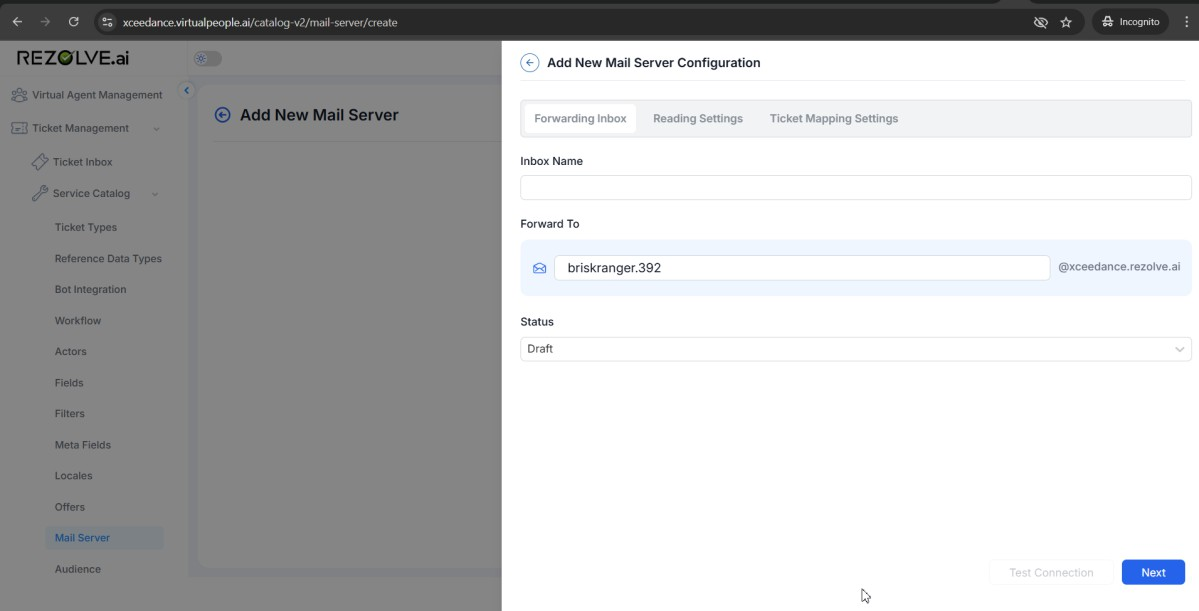
2. Forwarding Inbox Setup
Under the Forwarding Inbox tab:
-
Inbox Name Provide a recognizable name such as: Support Mailbox, Incident Intake, or Postmark Handler.
-
Forward To Enter the email alias where incoming emails should be forwarded. Example: briskranger.392@xceedance(tenant_name).rezolve.ai
-
Status After setup and verification, change the status to: Published
Click "Next" to proceed to reading settings.
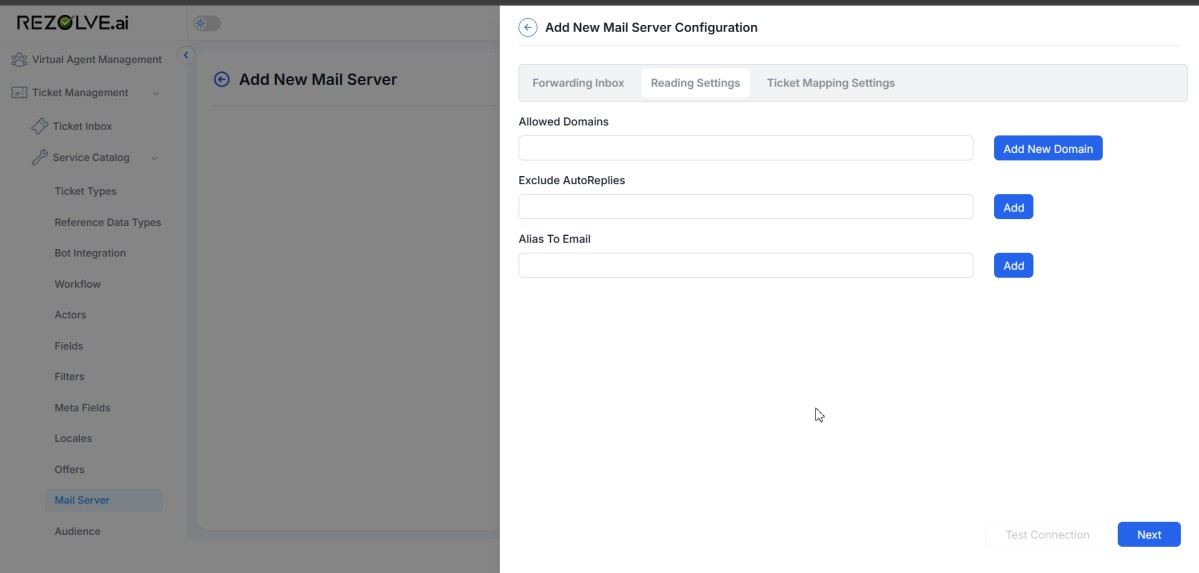
3. Reading Settings
1. Folder Mapping
- Purpose: Identify which folder to read emails from.
- Input: Choose from a dropdown or manually enter a folder like "Inbox" or "Support Requests".
- Use Case: Prevents the system from reading from folders such as "Spam" or "Promotions".
2. Allowed Domains
- Purpose: Restricts email ingestion to emails from specified domains.
- Input: Enter domain(s) like company.com, support.com, then click "Add New Domain".
- Use Case: Ensures only emails from trusted domains create tickets, reducing spam.
3. Exclude AutoReplies
- Purpose: Filters out autoresponders (e.g., out-of-office).
- Input: Enter specific sender addresses or keywords and click "Add".
- Use Case: Keeps the ticketing system from being overwhelmed by automated emails.
4. Alias to Email
- Purpose: Maps alternate email addresses to a single main configuration.
- Input: Add alias addresses such as helpdesk@company.com, it-support@company.com.
- Use Case: Consolidates multiple support channels under one ticket processing system.
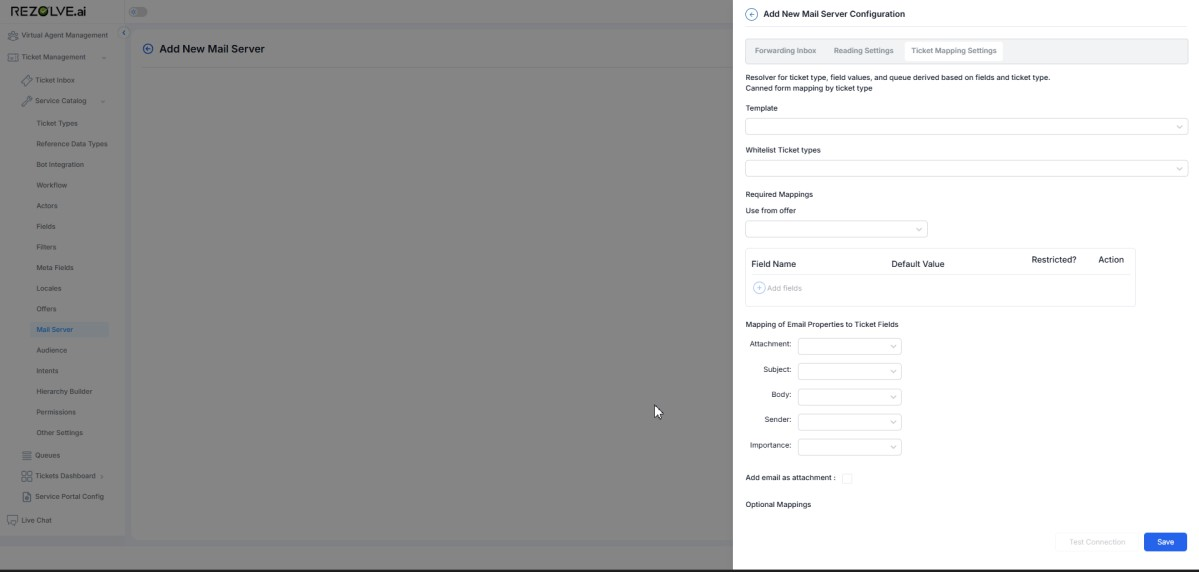
4. Template Mapping
1. Template
- Purpose: Choose a published ticket template.
- Input: Select from available templates in the dropdown.
- Use Case: Ensures consistent formatting and field structure in tickets.
2. Whitelist Ticket Types
- Purpose: Select ticket types where email replies are treated as public notes.
- Input: Choose relevant types from the dropdown.
- Use Case: Allows public notes only for emails related to whitelisted types, ignoring others.
3. Required Mappings
- Use from Offer: Select an offer. Automatically creates a backend mail server offer (hidden in UI).
4. Custom Field Mappings
- Field Name: Lists required fields from the selected template.
- Default Value: Set fallback values.
- Restricted?: Toggle access limits for roles or workflows.
- Action: Option to delete or update mapping.
5. Mapping of Email Properties to Ticket Fields
- Attachment: Define handling of attached files.
- Subject: Map to ticket's subject field.
- Body: Map to description or detailed field.
- Sender: Maps sender's email for ownership or requester data.
- Importance: Reflects email priority into ITSM ticket priority.
6. Add Email as Attachment
- Purpose: Adds the full email as an attachment to the ticket.
- Input: Checkbox (☐ or ☑).
- Use Case: Provides traceability and full email context for auditors or escalations.
7. Optional Mappings
- Field Name: Additional fields not required by the template.
- Default Value: Assign fallback values.
- Restricted?: Access control for viewing/editing.
- Action: Remove optional mapping if unnecessary.
5. Final Actions
Once all configurations are complete:
- Save – Stores the mail server configuration.
- Publish – Activate the configuration for real-time.
Why we use Postmark instead of IMAP
-
Postmark is faster compared to IMAP. Postmark uses a modern API-based system designed for speed and reliability, especially for sending and receiving transactional emails. In contrast, IMAP is slower as it relies on syncing emails between the server and client.
-
IMAP requires proper documentation for setup, such as the Client ID, Client Secret, Tenant ID, and other configuration details. On the other hand, Postmark typically just requires the email address and password for setup, making it simpler but less secure.
-
In IMAP, the refresh token expires after a certain period, requiring the user to generate a new token to continue using the service. Postmark does not have this issue, as its API tokens remain valid until they are manually changed or revoked.