Users
Part of Org Administration (App Switcher → Org Administration). Requires the Tenant Admin role.
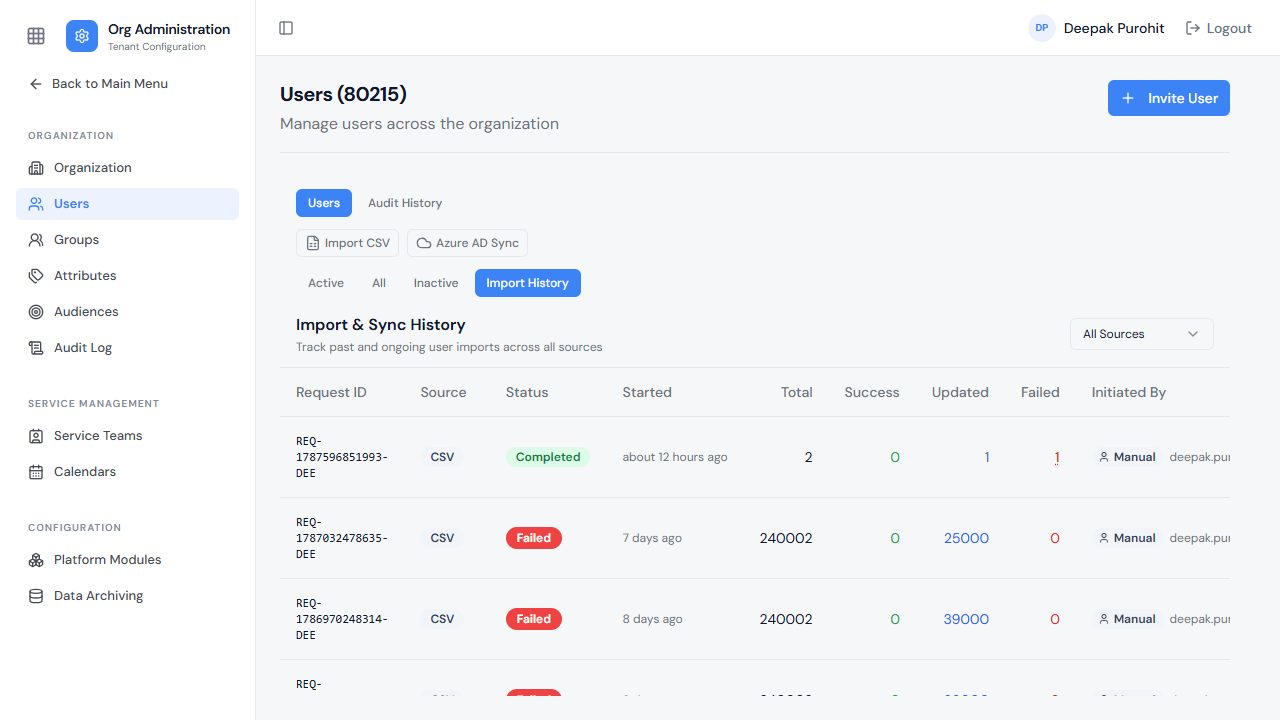
The Users section lists everyone in the tenant and is where administrators maintain user accounts and their roles. Users can be added in three ways: invited manually, bulk-imported from a CSV file, or synced from an identity provider (IDP) such as Azure AD. Roles are also assigned and managed from this section, and account status is controlled here.
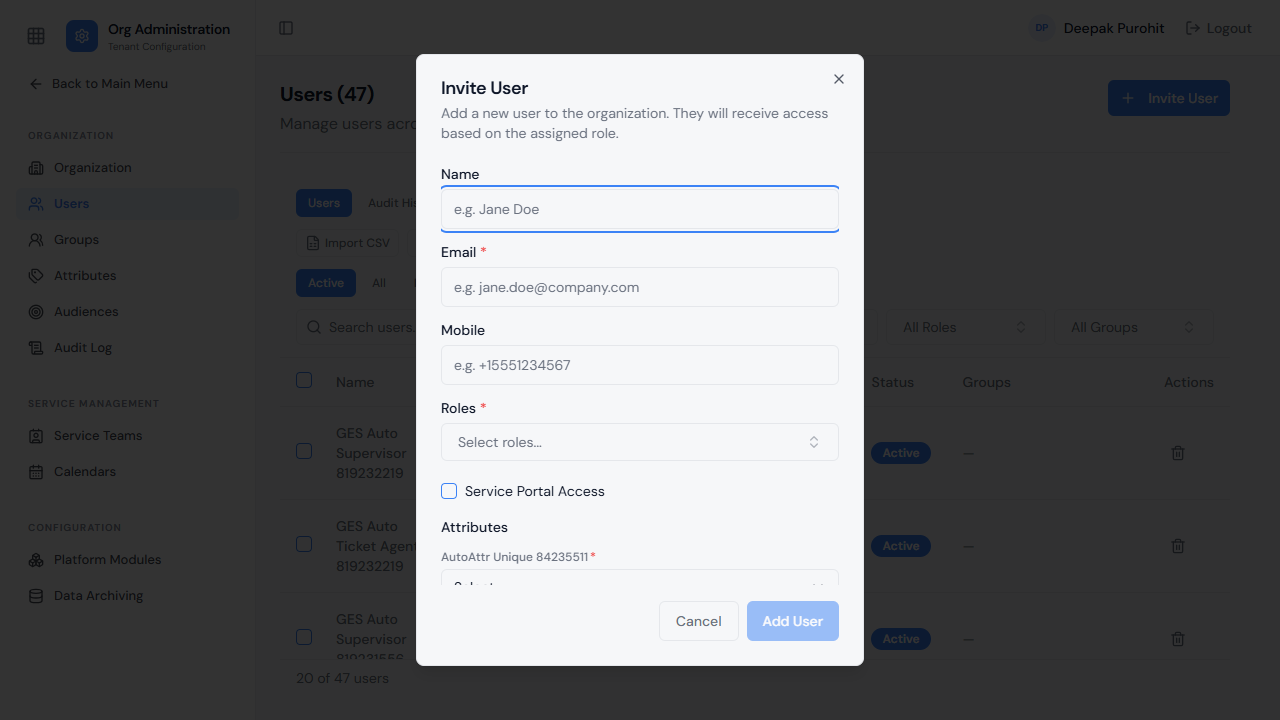
An invitation requires an email address and at least one role; some tenants also require a small set of custom attributes to be filled in before the user can be added. Roles are organized into general categories such as Tenant and Ticketing, and a user may hold more than one role.
Enabling Service Portal Access during invite sends the new user an onboarding email, unless their role is Ticket User or Bot User, in which case no email is sent.
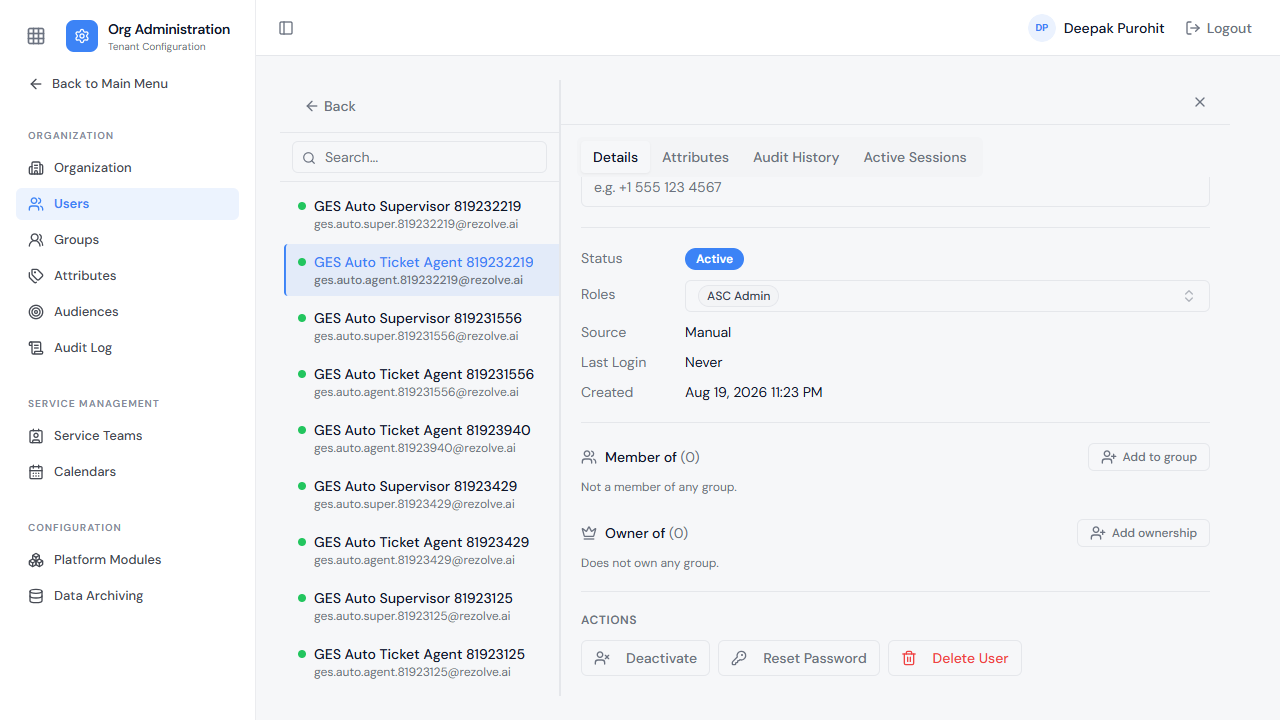
Once created, a user's profile shows their status, roles, and group relationships, along with a few standard actions:
- Group membership: A user can be added to a group as a Member or as an Owner — the two are independent.
- Reset Password: Emails the user a temporary password so they can reset it themselves.
- Deactivate: Marks the account Inactive and blocks sign-in ("Account is disabled, contact your administrator."); the same control reactivates it later.
A user's own page has four tabs — Details, Attributes, Audit History, and Active Sessions. The Attributes tab lets administrators edit custom attributes after the fact — including assigning the user to a Service Team — and Audit History is a timeline of changes to just this one user.
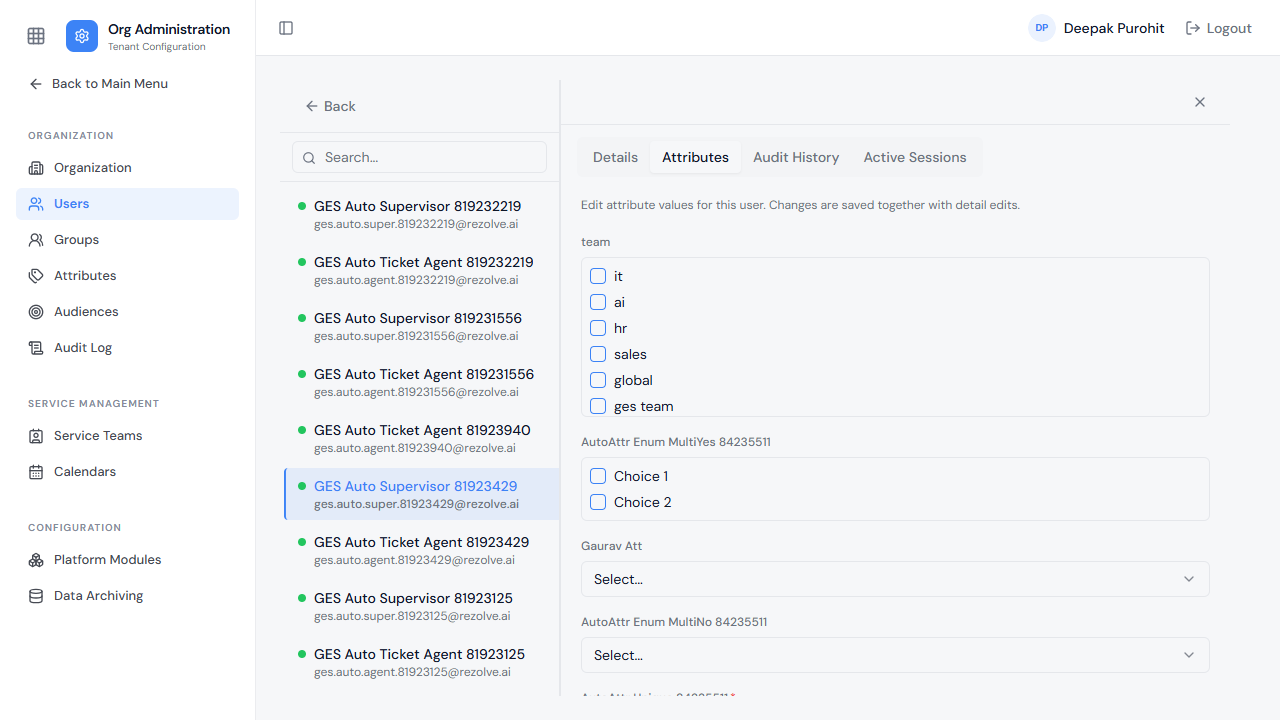
The Users list can be filtered by status (Active / All / Inactive), role, or group, and supports free-text search. Deleting a user is a separate action from anything on their profile — it's the trash icon in the Actions column of the list itself.
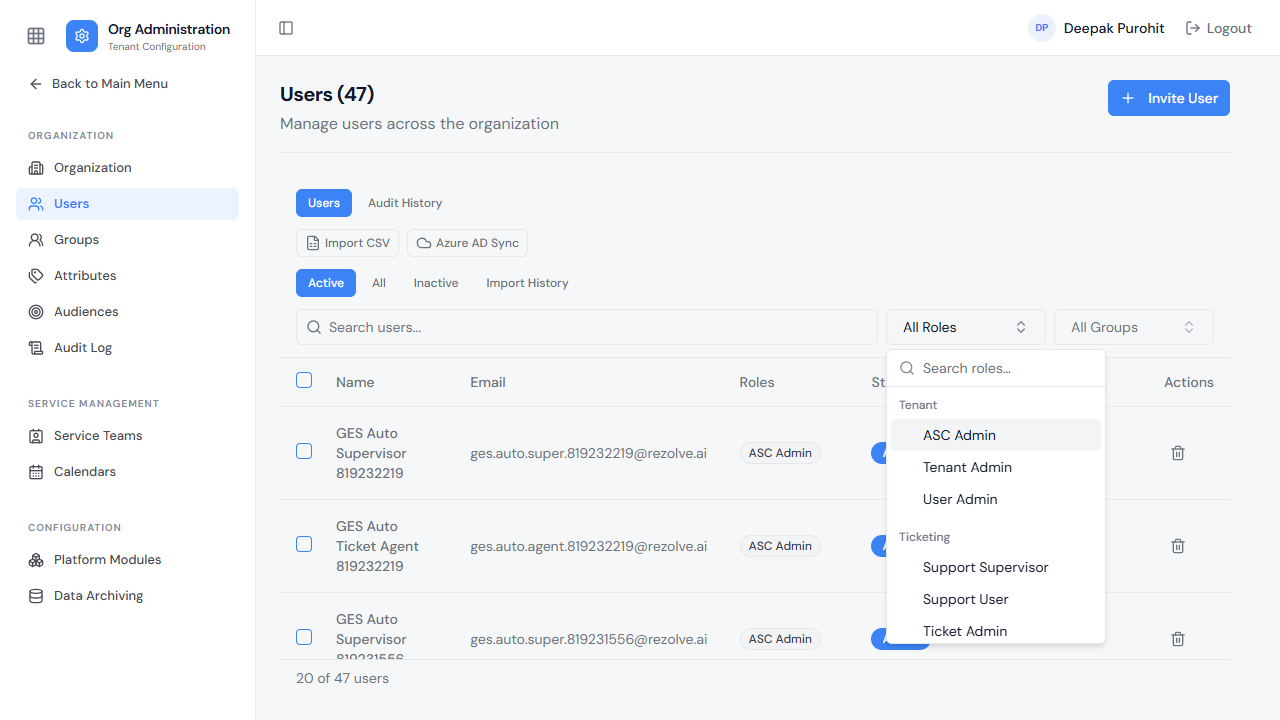
Audit History
Next to the Users list, a section-level Audit History tab lists every change made across all users in the tenant — role changes, name/attribute edits, source changes, creations, and deletions — each entry showing what changed (old → new), who made it, and when. It can be filtered by source (Manual, Azure AD, CSV Import) and by a time range (Last 1 hour / 24 hours / 7 days / 30 days / 90 days, or a custom range), and supports free-text search over the same events. A single user's own Audit History tab (see above) shows this same kind of timeline scoped to just that user.
User Status & Filters
| Filter | Users Displayed | Status | Login Access | Available Action |
|---|---|---|---|---|
| Active | Active users only | Active | Can log in to the tenant | Deactivate |
| Inactive | Users who were deactivated | Inactive | Cannot log in | Activate |
| All | Active, inactive, and deleted users | Depends on user state | Depends on user state | Deleted users cannot be activated |
User Deletion Behavior
When a user is deleted:
- The user's status becomes Inactive.
- The deleted user continues to appear in the All filter.
- The deleted user does not appear in the Inactive filter.
- Unlike a normally deactivated user, a deleted user cannot be activated.
- Therefore, the Activate action is available for normally deactivated users but not for deleted users.
Key difference:
- Deactivated user: Active → Deactivate → Inactive → Can be Activated again
- Deleted user: Active → Delete → Inactive/Deleted state → Visible in All → Cannot be Activated
Importing Users via CSV
From the same list view, Import CSV creates users in bulk through a three-step wizard: Upload File, Map Columns, and Review & Import.
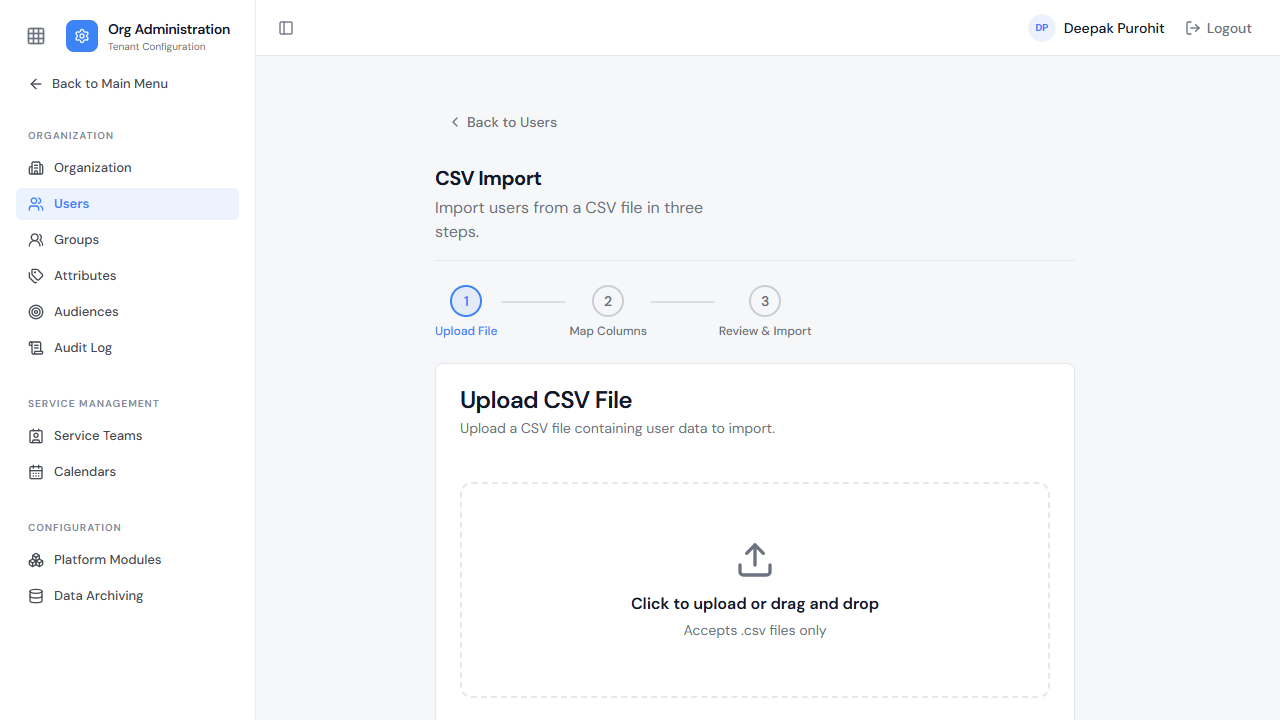
The uploaded file's headers must match the platform's expected format — a Download sample CSV format link on the same screen provides a template with the correct columns. Column mapping is auto-detected but can be adjusted before proceeding.
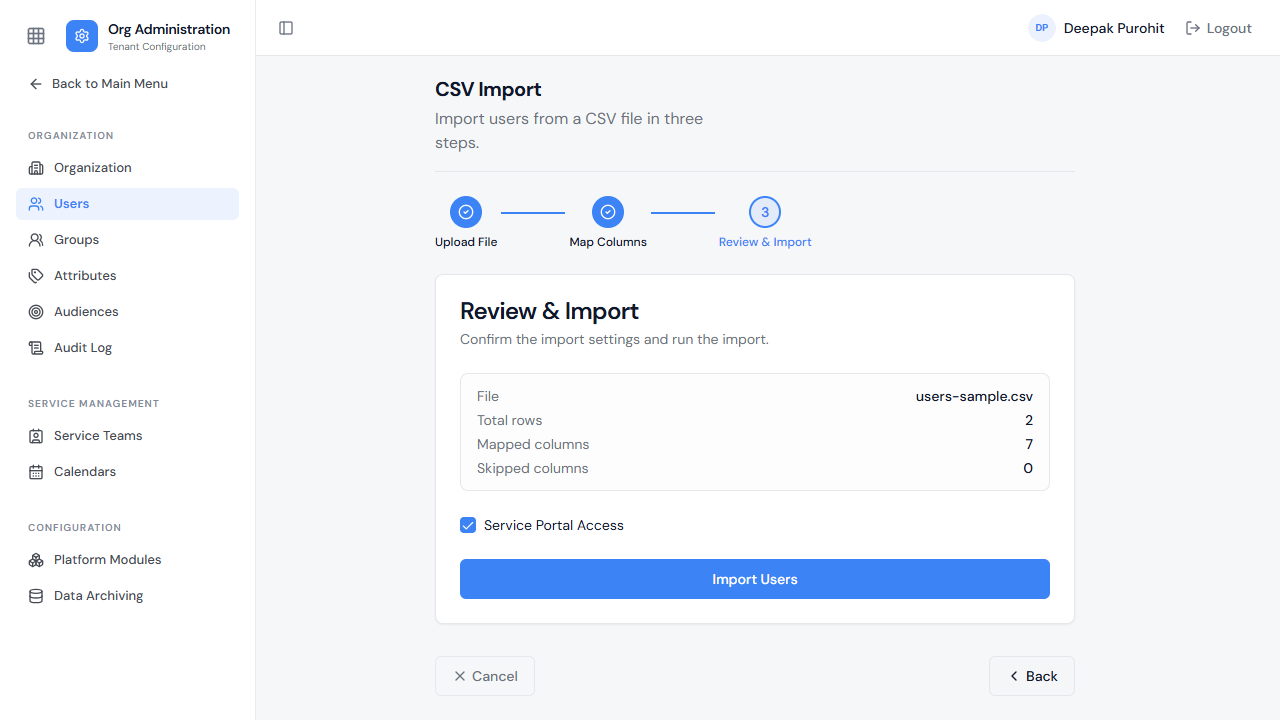
Validation happens all at once rather than row by row: any user with an incorrect name format, a missing or invalid required attribute (for example a single-select field given multiple values, or a boolean field given text), or an invalid role is skipped, and every issue found across the file is reported together in a single pass.
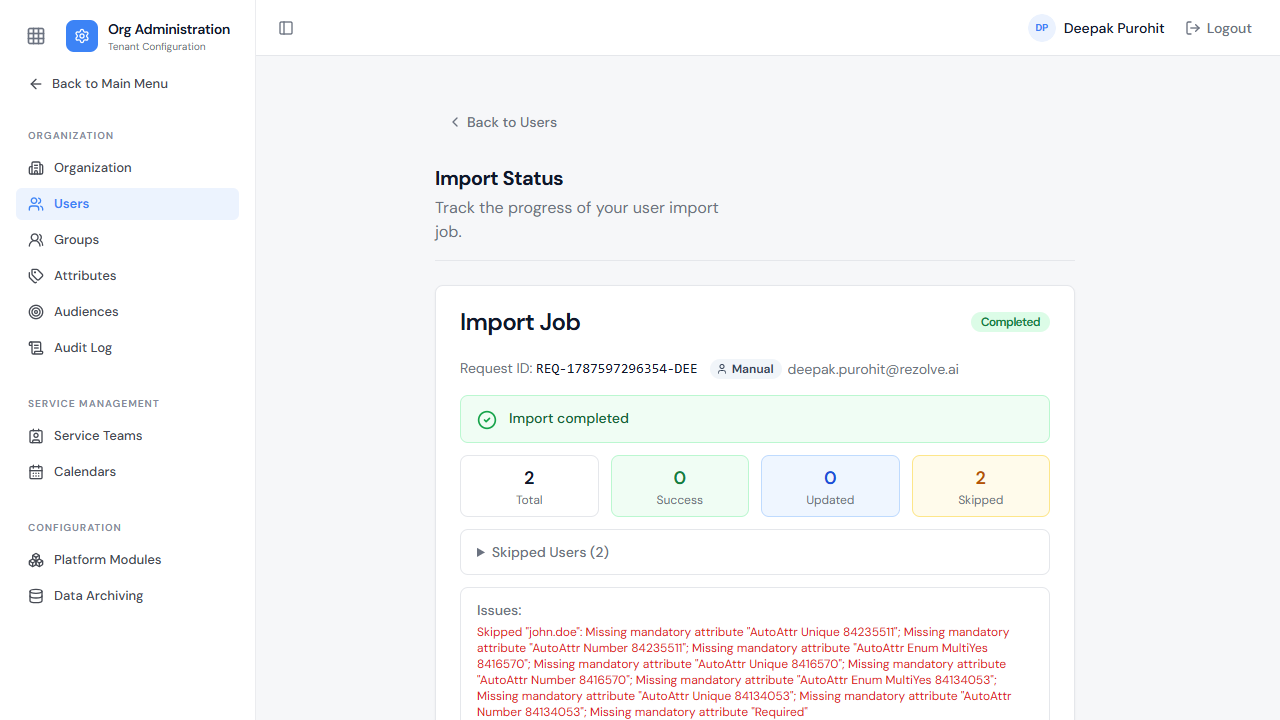
If a row specifies no role at all, the imported user defaults to the Ticket User and Bot User roles. An Import History view lists every past import with its status and result counts.
Syncing Users from Azure AD
The second bulk option, Azure AD Sync, imports users directly from an organization's Azure AD / Microsoft 365 tenant through a four-step wizard: Connection, Select Scope, Field Mapping, and Schedule.
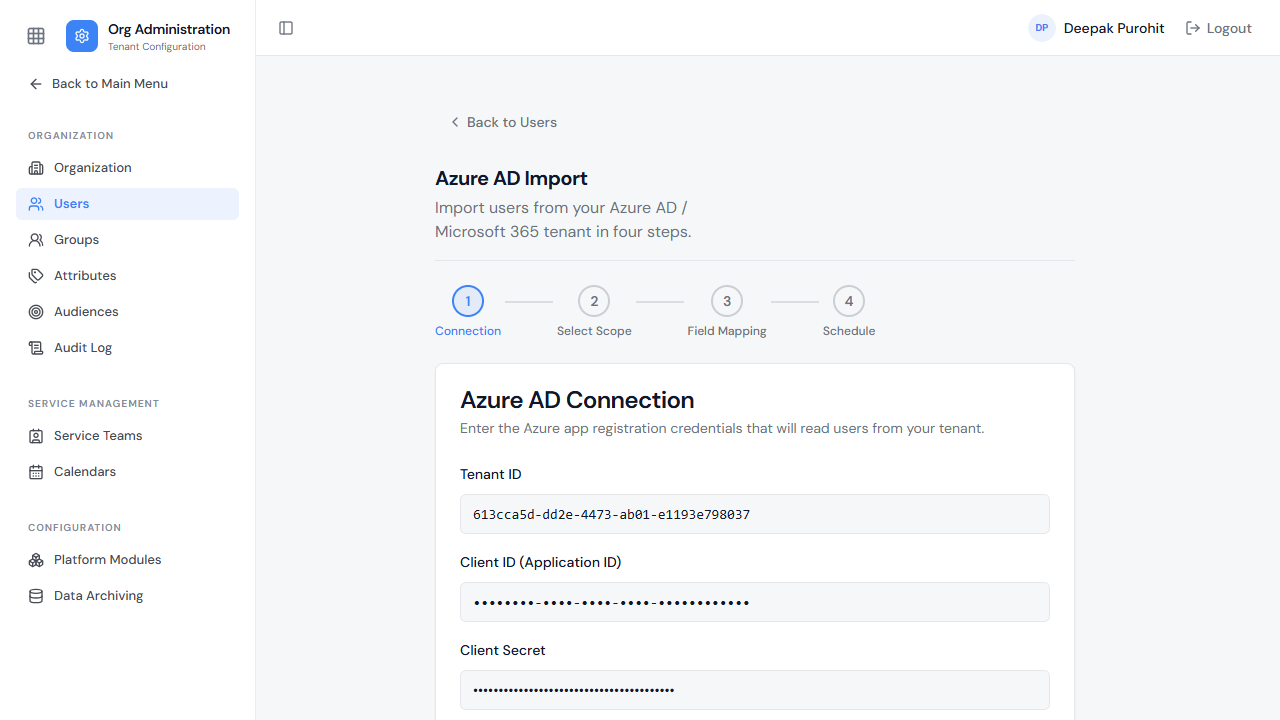
The Connection step's Tenant ID, Client ID, and Client Secret come from a dedicated Azure App Registration — they are not the same as the tenant's AAD Id on the Organization page. See External System Synchronization for the full steps: registering the application, generating a client secret, and granting the required Microsoft Graph permissions.
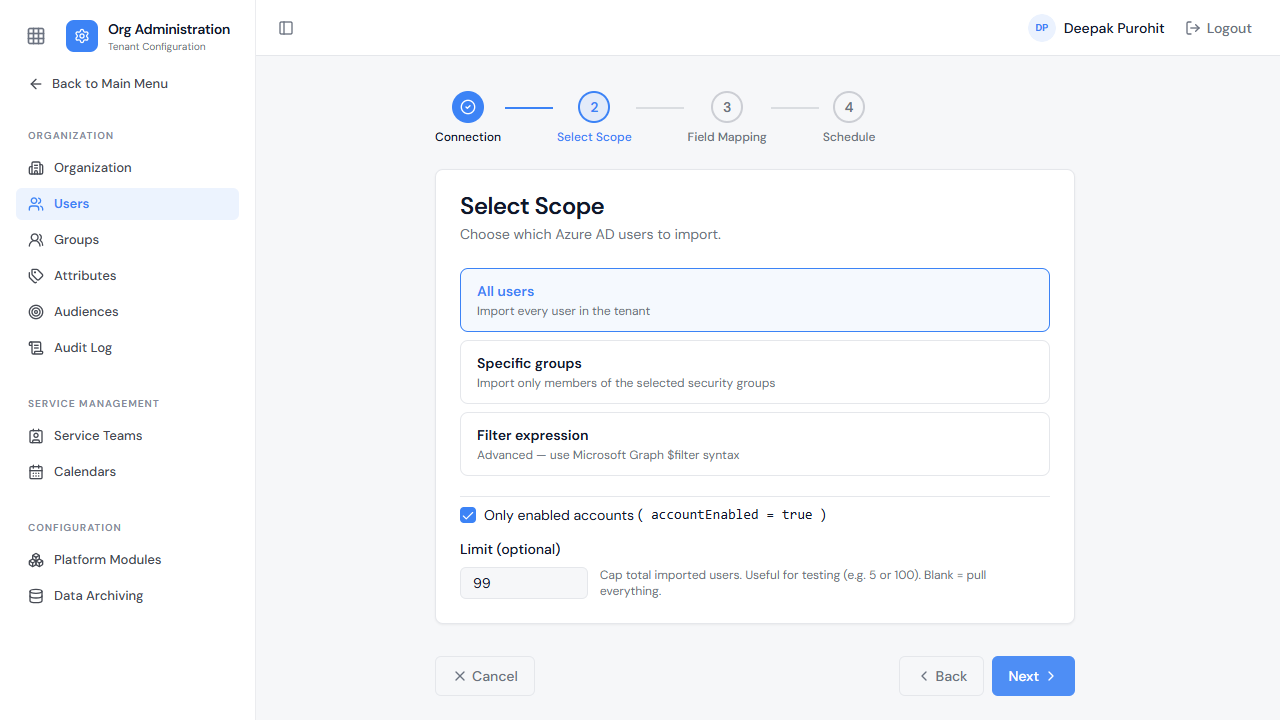
Once connected, an administrator chooses which Azure AD users to bring in:
- All users — every user in the Azure tenant.
- Specific groups — only members of the selected security groups.
- Filter expression — only users matching a custom Microsoft Graph filter condition.
Within whichever scope is chosen, Only enabled accounts restricts the sync to users currently in an active state in Azure, and Limit caps the maximum number of users pulled in from that scope.
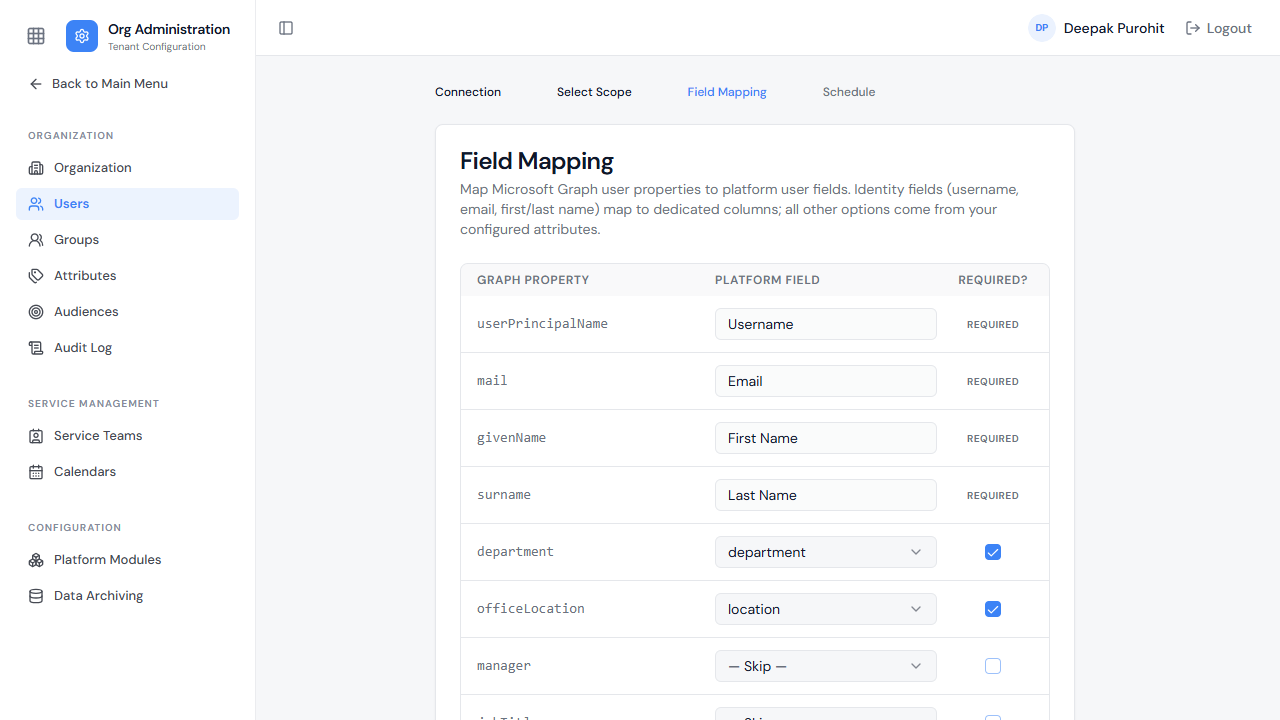
Field Mapping connects Azure's user properties to the platform. The identity fields — username, email, first and last name — are required and cannot be remapped. Every other Azure property is optional: mapping one turns it into a corresponding attribute on the imported user, populated with whatever value that property holds in Azure. Any property left unmapped is simply not assigned as an attribute.
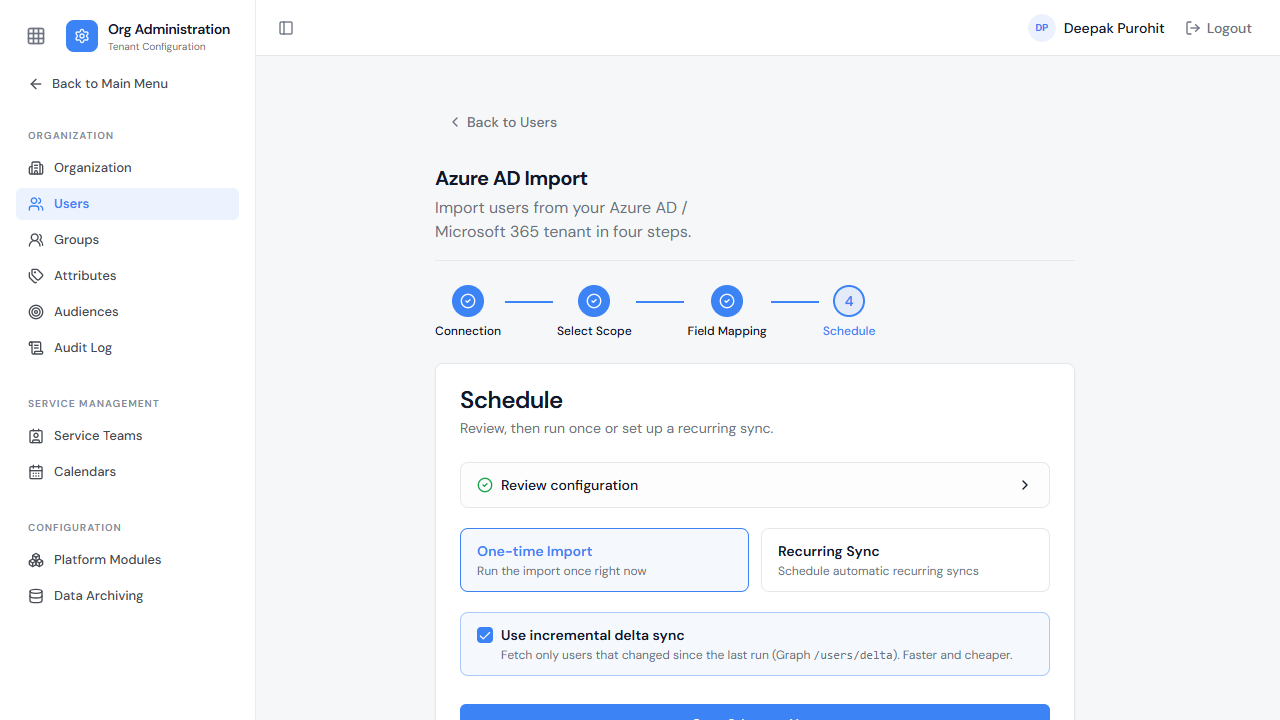
The final step reviews the full configuration and runs it either as a One-time Import (imports users immediately, once) or a Recurring Sync, which offers several scheduling options — a specific time of day, a cron expression, and a choice of timezone — plus the option to sync only changed users on each run rather than the full user list.
Both CSV and Azure AD imports share the same Import History view. A run's Initiated By column reads Manual for an import someone triggered directly, or Scheduled for one that ran automatically as part of a recurring sync.