Quick Guide on Assigning Roles and Queues NEW v2
Assigning Roles and Queues
USER MANAGEMENT Roles in Rezolve Each role assigned to someone gives different access and capabilities to the resipent. If you are not sure if a role is correct you can refer to the following chart. Alternatively, in User Management after selecting the person you want to make changes to, click the Manage Roles button, select the module you want to access and next to each role in that module you can click the “I” for more details on that specific role. REZOLVE Role Action / Purpose Comments Tenant Admin Site Administrator The Tenant Admin is automatically the person who signed up for the tenant. They are the administrators of the Admin Console. USER MGMT Role Action / Purpose Comments User Admin Provide access to User This role allows a user access to create users, modify Management users, define attributes & SSO configuration.
VIRTUAL AGENT Role Action / Purpose Comments Bot User To access Virtual Agent (Chat This is the default / primary role provided to all users Bot) who access virtual agent (chat bot) platform for the first time. Bot Analyst Provide access to Virtual Agent This role allows a user access to all sections of the (Chat Bot) Management Virtual Agent Mgmt section except Bot Settings (i.e. Access to Manage QA, Supervised Learning, Taxonomy) Bot Admin Provide access for Virtual Agent This role allows a user access to all sections of the and other maintenance feature Virtual Agent Mgmt section including Bot Settings. LIVE CHAT Role Action / Purpose Comments Chat Agent Provide access to My Chats This role provides an agent access to live chat. The user will be able take live chats in My Chat section. Chat Agent Admin Provide Access to Live Chat This role gives a user access to view the live chat settings Settings page with the ability to configure queues and assign (add/remove) agents from queues. Chat Agent Supervisor Provides additional Privileges This role allows you to monitor other agent chats, assign within Live Chat chats to agents and/or re-assign chats if needed. In addition, you can review past Live chats. TICKET MGMT Role Action / Purpose Comments Ticket User End user access to Self-created This is the default / primary role provided to all end user tickets in the Ticketing Module. This user can create tickets. They can check ticket status in My Tickets menu. Ticket Agent Provide access to My Tickets This role allows an agent to see, be assigned and work on tickets raised by users. Ticket Agent Supervisor Provides Supervisor privileges in This role gives you access to ticketing Reports, ability to the Ticketing system. close tickets at any status and a different view of ticketing if assigned as a queue approver. Ticket Admin Provide Access to Ticketing This role gives a user the ability to configure queues and Settings assign (add/remove) agents from queues. MORSEL MICRO-LEARNING
Role Action / Purpose Comments Trainee End user access to take assigned This role allows a user to access micro-learnings Micro-Learnings assigned to them. This comes up by default when a new trainee is created. NOTE: If a trainee has another role also, default view will be the trainee screen and they will have to use the menu to go to other modules. Content Author Provides access to create and This role allows the user to create micro-learnings and edit micro-learnings in Learnings edit micro-learnings they created. If assigned as a content author to a program, they are able to edit all the micro-learnings that are part of that specific program. Expert Provide access to My Chats and This role allows the user to be assigned as an expert to a My Tickets Program. Once assigned to a Program also, they can respond to Live Chat of Ticketing query escalated form the trainee. Program Director Provide Access Programs This role allows a user to create, edit, update a program, and add microlearning to that program. REQUEST SUPPORT Role Action / Purpose Comments Support User Provides access to raise support This role allows a user to access to raise request for tickets with Actionable Science support from the Rezolve or Morsel support team. Team They can only see their tickets. Support Supervisor Provides access to create and This role allows a user to access to raise request for view all support tickets with support from the Rezolve or Morsel support team. Actionable Science Team They can see all raised tickets.
EDIT A USER ACCOUNT To allow the bot to perform automations for your end-user, we need to enable certain Graph API(s). We will guide you through how to do this in Azure AD seperatly. ACCESS LEVEL NEEDED
- User Admin INSTRUCTIONS
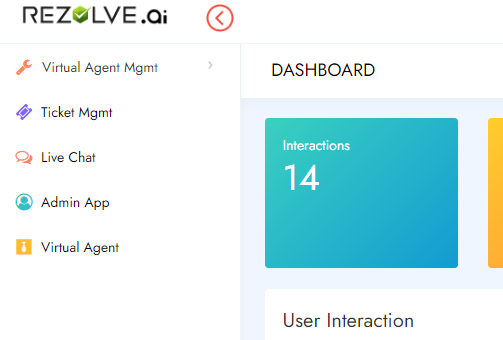
- Click on Admin App in the navigation pane on the left of your console
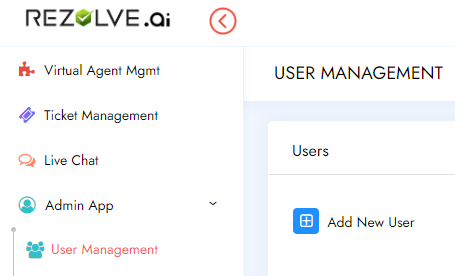
- Click on User Management in the navigation pane on the left of your console
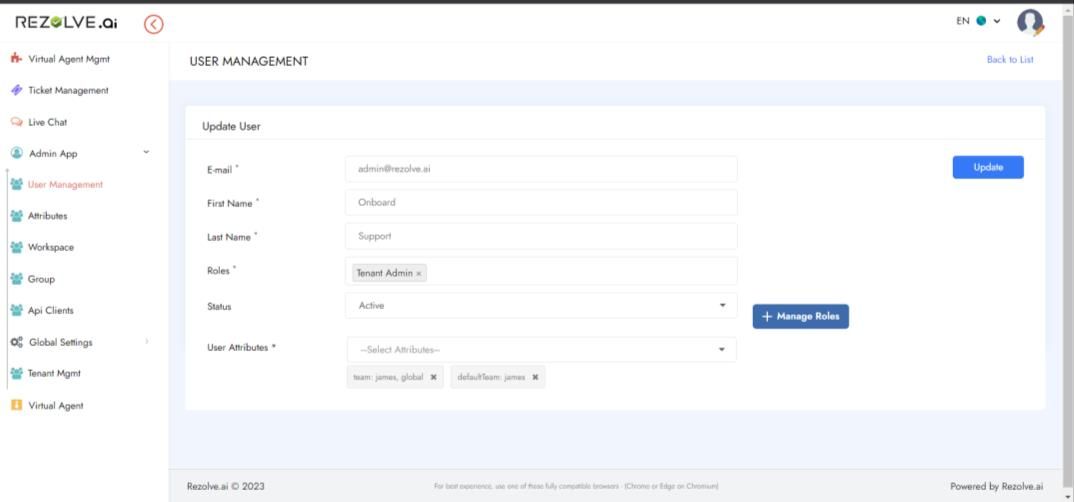
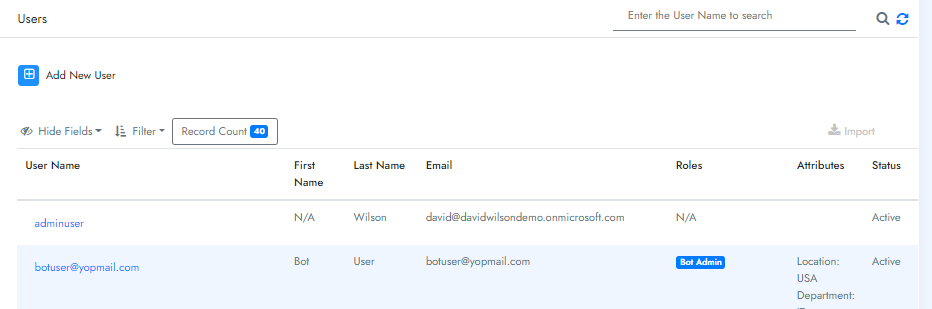
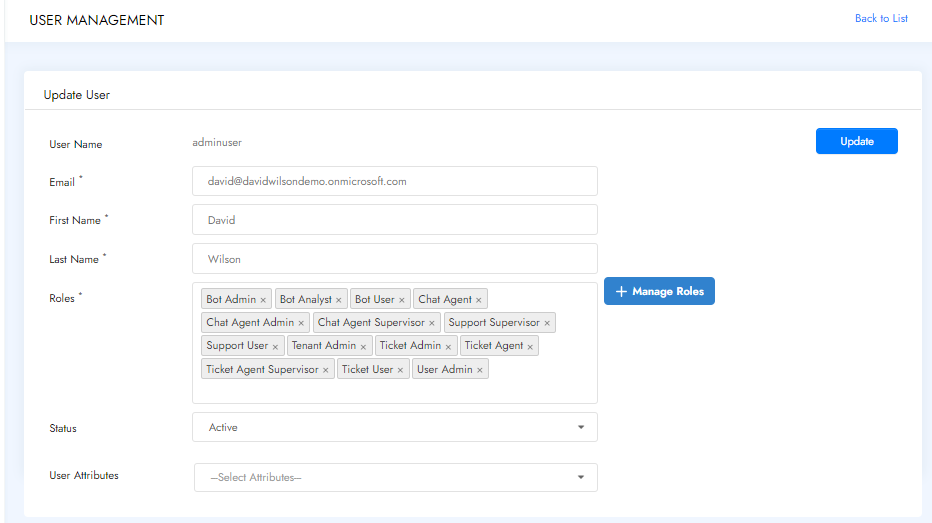
5 . 3. Click on the username on the same line as the user you would like to edit 6. 4. A new page will open and you can edit a. First Name b. Last Name c. Roles d. Attributes 1 . Important Note: Please only change Roles and Attributes if you have enabled Single Sign On. All other information is provided by the account info associated with your Active Directory. 2. NOTE: When adding and removing a Role, click outside of the Roles box for it to minimize. 5. When changes are complete, click Update to Save 7. 6. 7T.h is document contains proprietary information owned by Rezolve.ai and must not be distributed outside without authorization. 11501 Dublin Blvd STE 200, Dublin, CA 94568 info@rezolve.ai | www.rezolve.ai TICKET MANAGEMENT ASSIGNING A TICKET AGENT SUPERVISOR ACCESS LEVEL NEEDED
- Ticket Admin PRE-REQUISITE
- User Has Already Access Virtual Agent Once And Is Available In User Management As A User With Role “Ticket Agent Supervisor” INSTRUCTIONS
- Click on Ticket Management
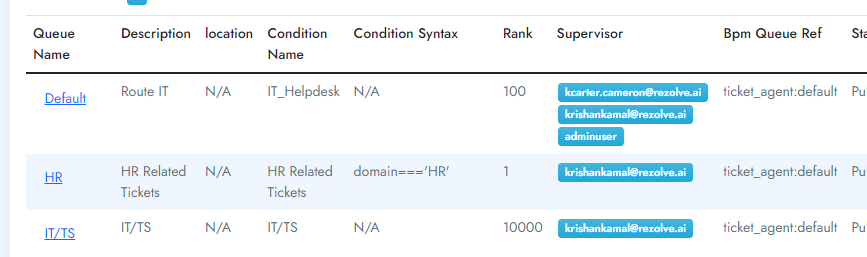
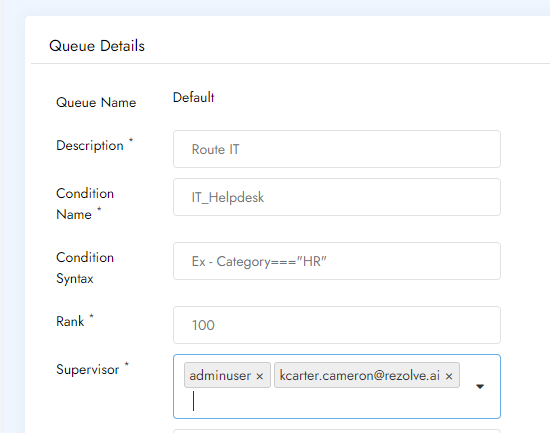
- Select Queue
- Click on the relevant Queue Name
- Go to Supervisor select the approver from the dropdown list and click Update when done.
ADD A NEW AGENT/SUPPORT STAFF TO TICKETING MODULE ACCESS LEVEL NEEDED
- Ticket Admin PRE-REQUISITE
- The user has already accessed the virtual agent once and is available in User Management as a User with the role “Ticket agent”. INSTRUCTIONS
- Elevate user access to be a ticketing agent by adding role Ticket agent from User Management.
- Once complete you can follow the steps outlined in Add an agent/support staff to a new or existing ticketing queue NOTE: To see the changes in access a user must logout and log back in. ADD AN AGENT/SUPPORT STAFF TO A NEW OR EXISTING TICKETING QUEUE ACCESS LEVEL NEEDED
- Ticketing Admin PRE-REQUISITE • User Queues are already created. If not, please follow the steps to Create a User queue. • The user that needs to be added is already a part of ticketing and has accessed the ticketing module at least once and has a role assigned “Ticket agent” INSTRUCTIONS
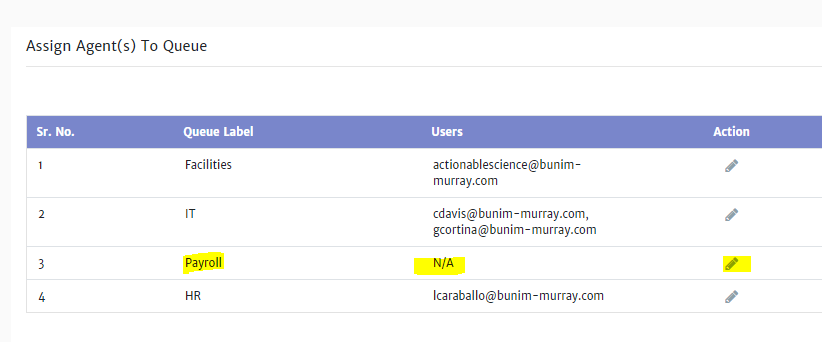
- Click on Queue Name that you want to modify.
- Under Username, start typing in the username that you want to add. The user will come as a suggestion. Select the user. NOTE: If you don’t see the user come under the suggestion, then the user is not available in ticketing or has not accessed ticketing at least once, go to Add a new agent/support staff to ticketing module.
- Select Status as Published from Dropdown.
- Click on Update.
LIVE CHAT ADD/REMOVE USERS FROM QUEUES
- For the user to act on Chats, we need to elevate their role and add “Chat Agent” from User Management. Once done, move to the next step.
- Navigate to Live chat - > Live chat settings - > Associate Agent(s) .
- Select the queue you want to add/remove members to by clicking on Edit (Pencil) sign under actions.
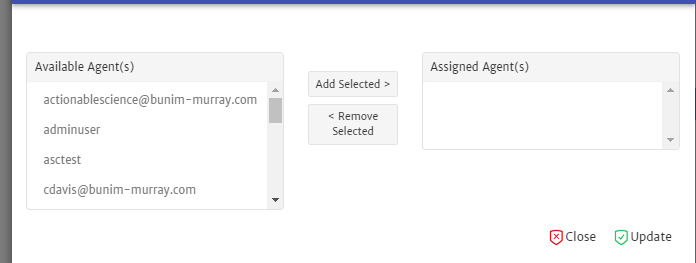
- Once you click on Edit (Pencil icon), a new screen will open:
ADD USERS TO A QUEUE
- On the left-hand side, you will see all users who have a chat agent role and can be added in the queue.
- Select the agent name on the left pane and click on Add Selected. The user will now move to the Assigned Agent(s).
- Click on Update and you will be back on the Associate Agent(s) screen with the new user added for the queue and available under Users.
REMOVE USERS FROM A QUEUE
- On the right-hand side, you will see all users who have a chat agent role and are part of the queue.
- Select the agent’s name on the right pane and click on Remove Selected. The user will now move to the Available Agent(s).
- Click on Update and you will be back on the Associate Agent(s) screen with the user removed form the queue and available under Users.