Enabling API Permissions existing app - For SharePoint Crawl
Enabling API Permissions For the bot to Search/Crawl SharePoint Knowledge Articles
REGISTER APP IN AZURE AD To allow the bot to perform automation for your end-user, we need SharePoint site ID and to enable certain SharePoint Permission(s). We will guide you through how to do this in Azure AD. Please note that the SharePoint page being used should be open to all of the bot end-users. This is to avoid them not being able to open/access documents or any other material that may be returned by the bot. ENABLE SHAREPOINT API SharePoint API Permissions are Required for the bot to be able to search and provide knowledge articles from SharePoint.
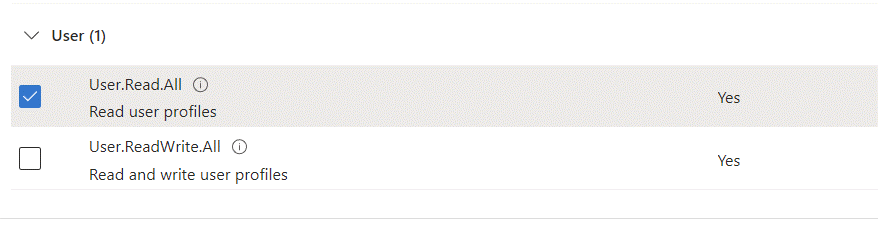
- AllSites.Read
- User.Read.All TYPE OF PERMISSIONS REQUIRED
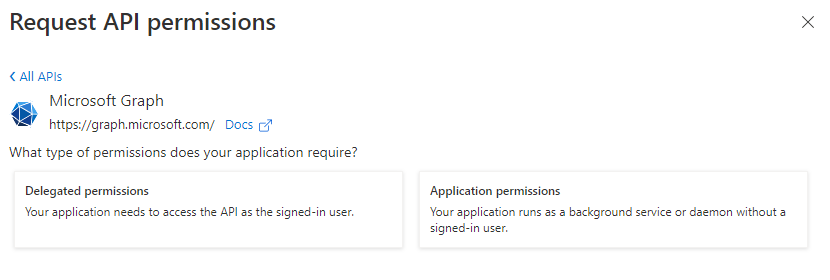
- Application permissions Instructions Part A
-
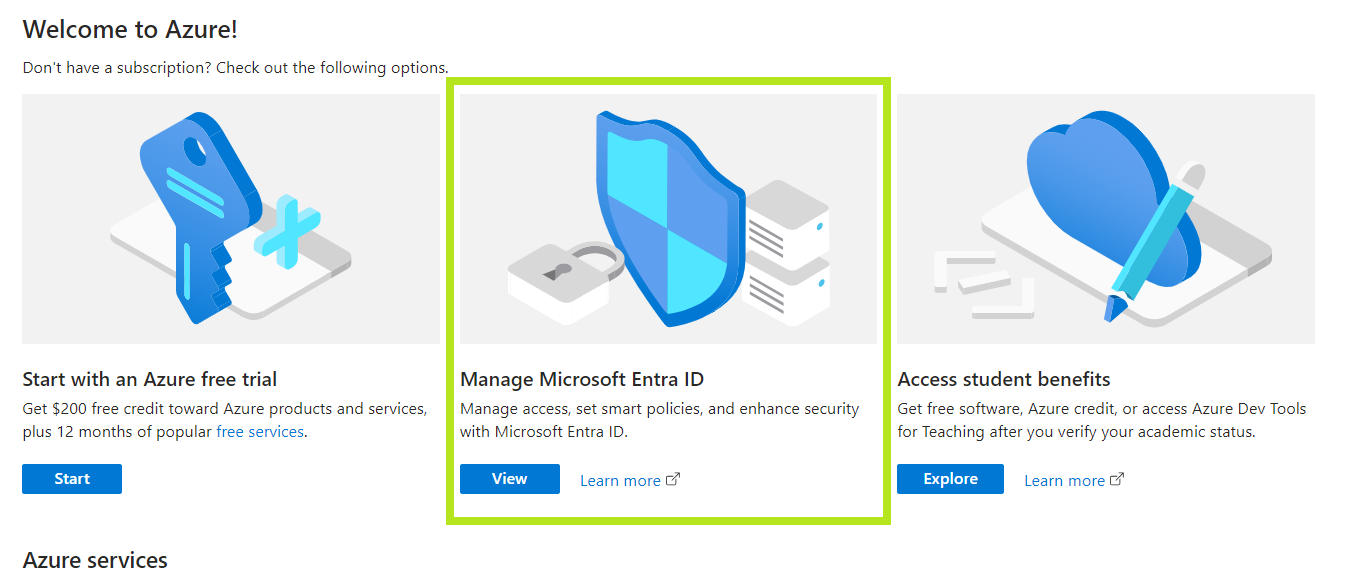
Open your Azure Portal
-
Click on the View button for Manage Microsoft Entra ID
-
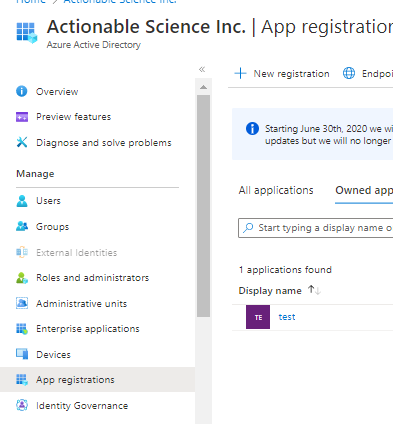
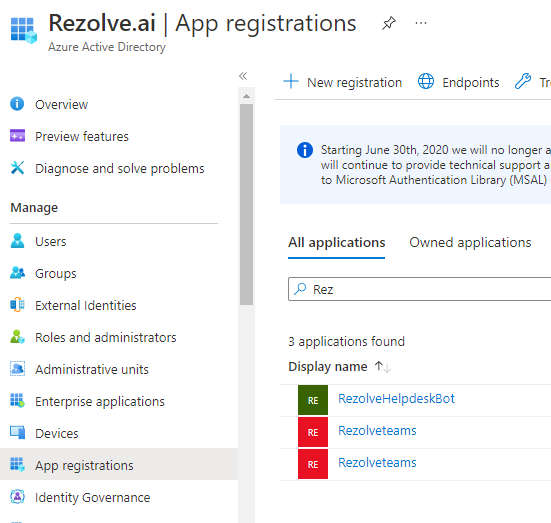
Click on App Registration
-
Search and Open the Rezolve SSO application you created
-
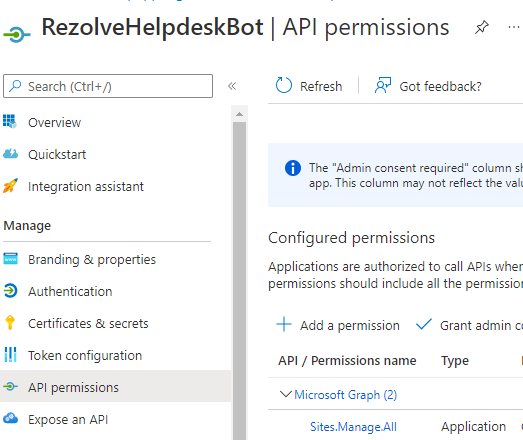
The App Overview page will open, look for API Permissions in the left hand side menu and click on it
-
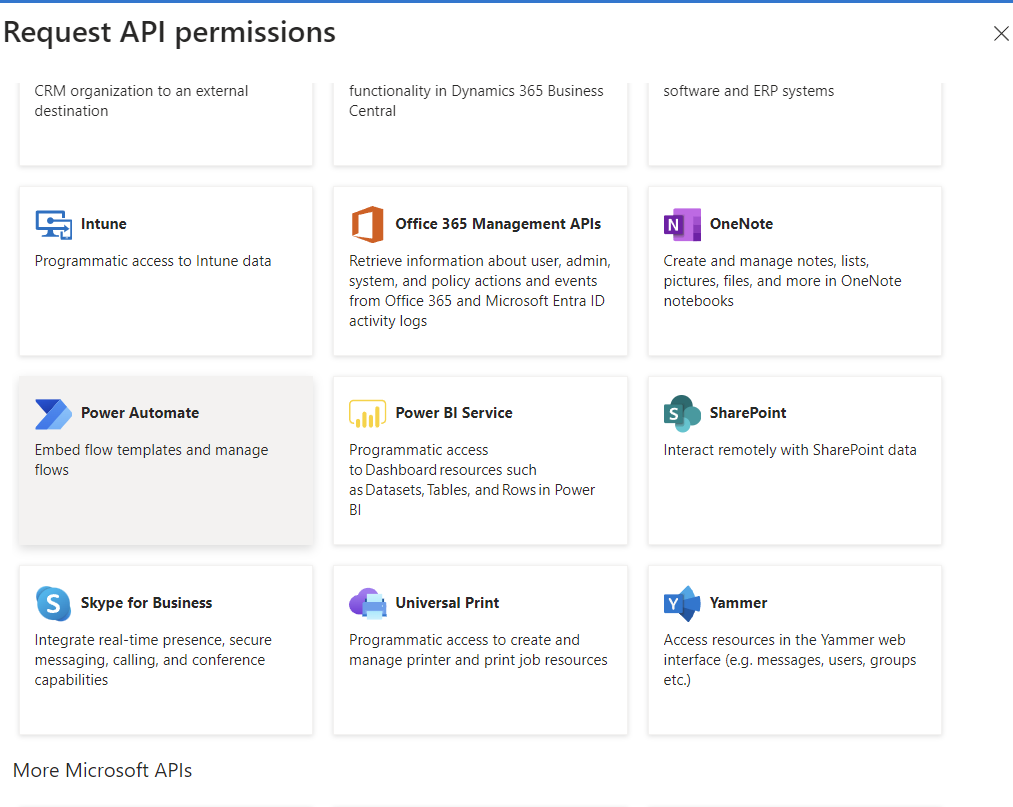
Select Add a Permission on the main part of the page
-
Scroll down and select SharePoint Teams and clickRegister
This document contains proprietary information owned by Rezolve.ai and must not 5. be distributed outside without authorization. 11501 Dublin Blvd STE 200, Dublin, CA 94568 info@rezolve.ai | www.rezolve.ai 8. Click on the Application Permission option 7. 8. 9. Search AllSites in the, select AllSites.Read and click Add Permissions 10. Click Add a Permission > SharePoint > Application permissions again 11. Type User in the search box, this time select User.Read.All and click Add Permissions 9.
- Close the Request API Permissions box so you are back at the Configure permissions screen
- Select Grant admin consent for …
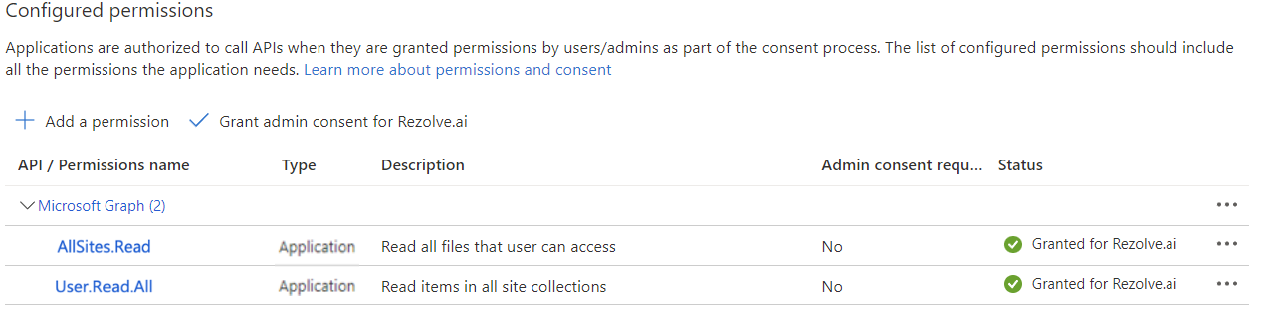
14.Click Yes to Grant admin consent confirmation 11. 15. Confirm that the screen looks similar to below with your listed permissions, Admin Consent Req set to Yes and Granted for has a green check 12. 13.
Instructions Part B
-
Look for Certificates & secrets in the left hand side menu and select it
-
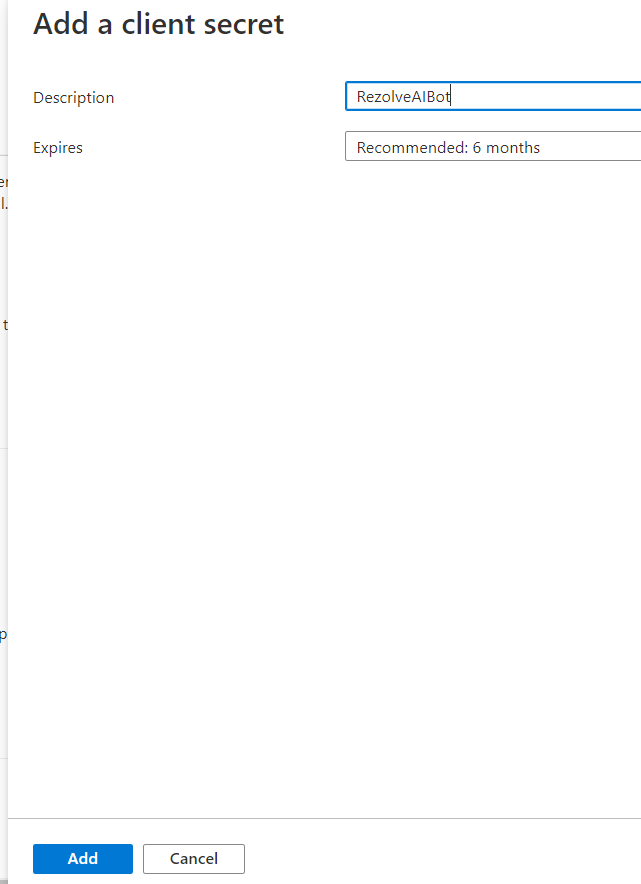
Then select New client secret on the main part of the page
-
Enter a description i.e. RezolveAIBot and click Add
-
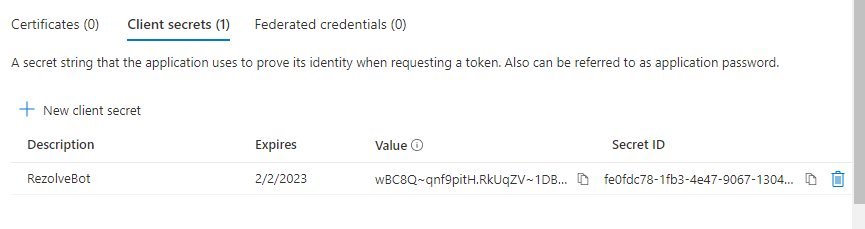
Copy the Value and Secret ID and save them somewhere
-
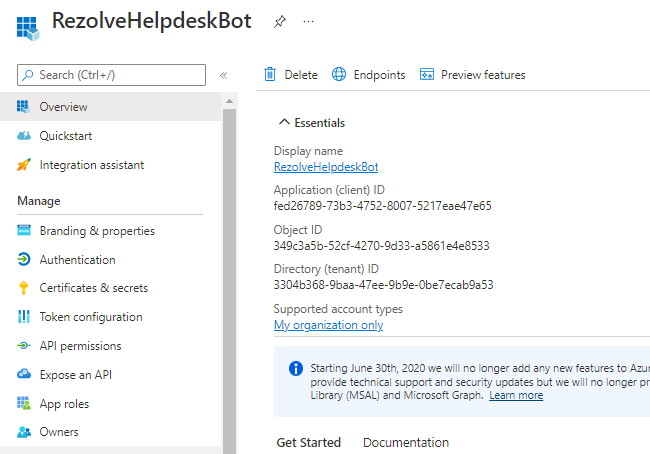
Select Overview in the left hand side menu
-
Copy the Application (client) ID and save with Client Secret ID
-
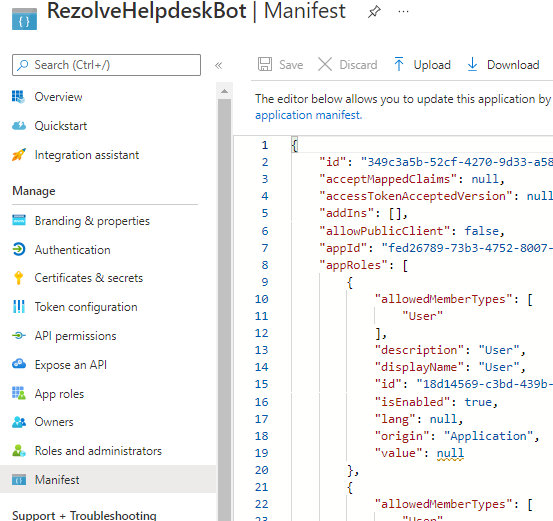
Select Manifest in the left hand side menu
-
Click on Download
-
Send the SharePoint Site ID, Application (client) ID, Client Secret ID, Client Secret Value and the downloaded Manifest to Rezolve
Instructions Part C Locating the site id and folder id in SharePoint is done by navigating to the SharePoint online site and then selecting the desired site or folder. The ID will be part of the URL of the page you are viewing. For example,‘https://your-tenant- name.sharepoint.com/sites/[Site-ID]’. To locate the Folder ID, navigate to the desired folder in the document library, the Folder ID will be the ID of the folder in the document library. The URL will look like 'https://your-tenantname.sharepoint.com/:f:/g/[Folder-ID]'. Remember that Azure registered app and SharePoint online may have different access and permission settings. Ensure that the app has the necessary permissions to access and manage the specific SharePoint site and its documents.