MS Teams setup
This guide provides step-by-step instructions to set up the Rezolve.ai bot notification and live chat app in Microsoft Teams, including Azure registration, permissions, authentication, secrets, database entries, manifest configuration, and Teams app upload.
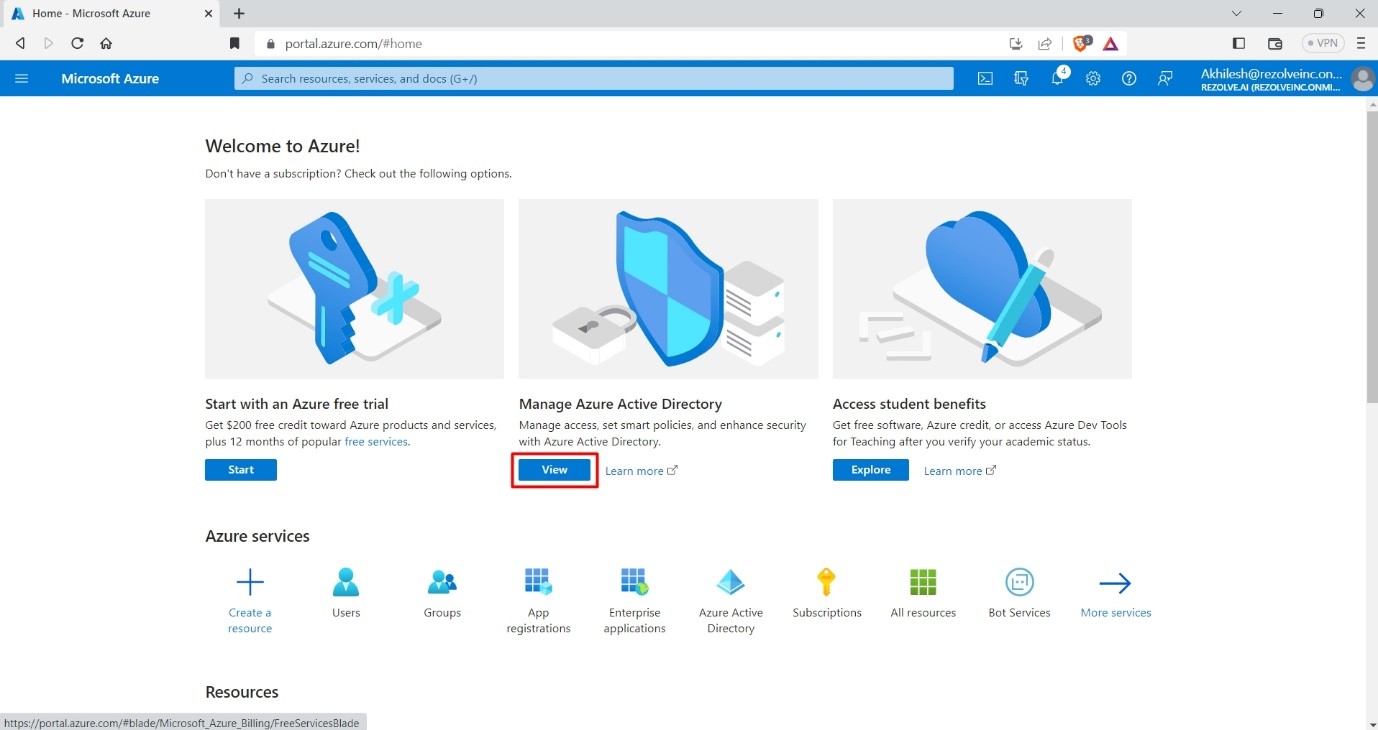
Step 1: Log in to Azure Portal
- Go to the Azure Portal.
- Navigate to App Registrations.
- Click New Registration to create a new app.
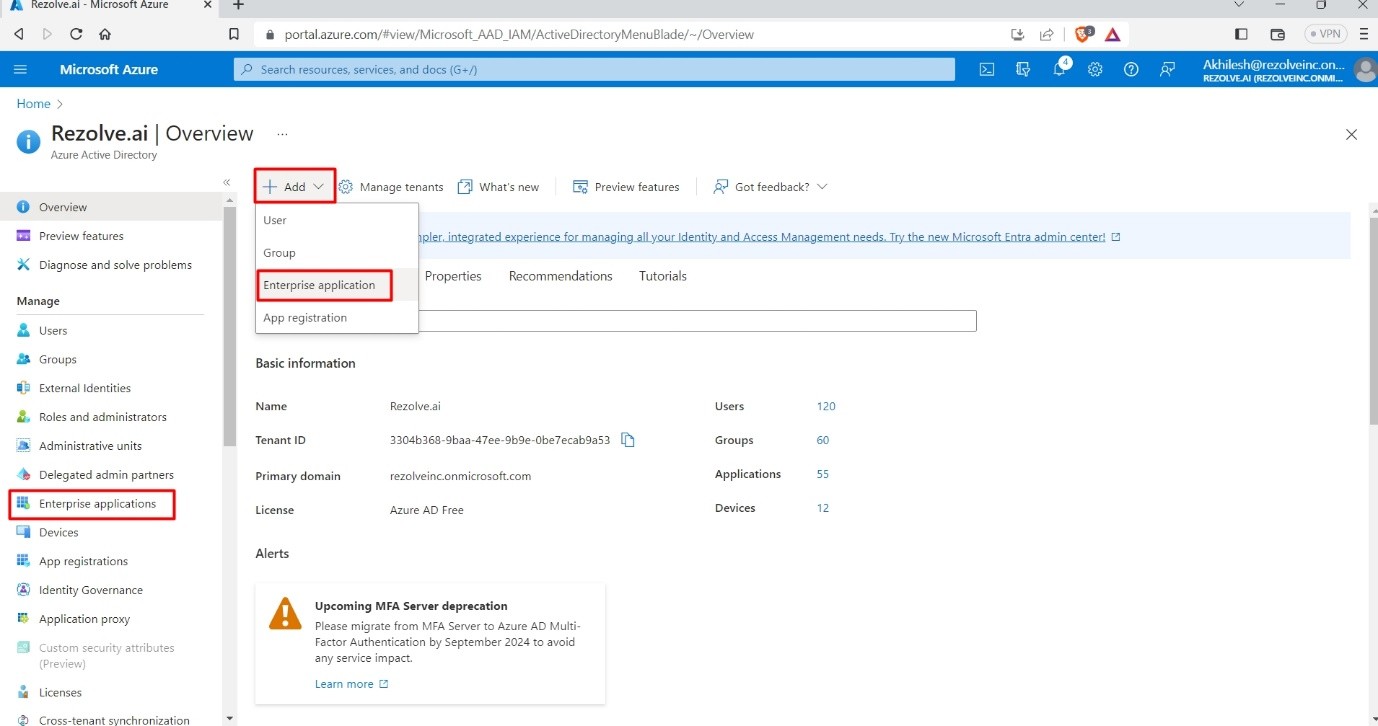
Step 2: Register a New App
- Enter the App Name.
- Specify Supported Account Types as required.
- (Optional) Add a Redirect URI:
- Choose Web.
- Enter the SSO URL from Keycloak if registering SAML, e.g.:
https://federation-sts-uat.apps.actionable-science.com/auth/realms/supportbot/broker/saml/endpoint
- Click Register.
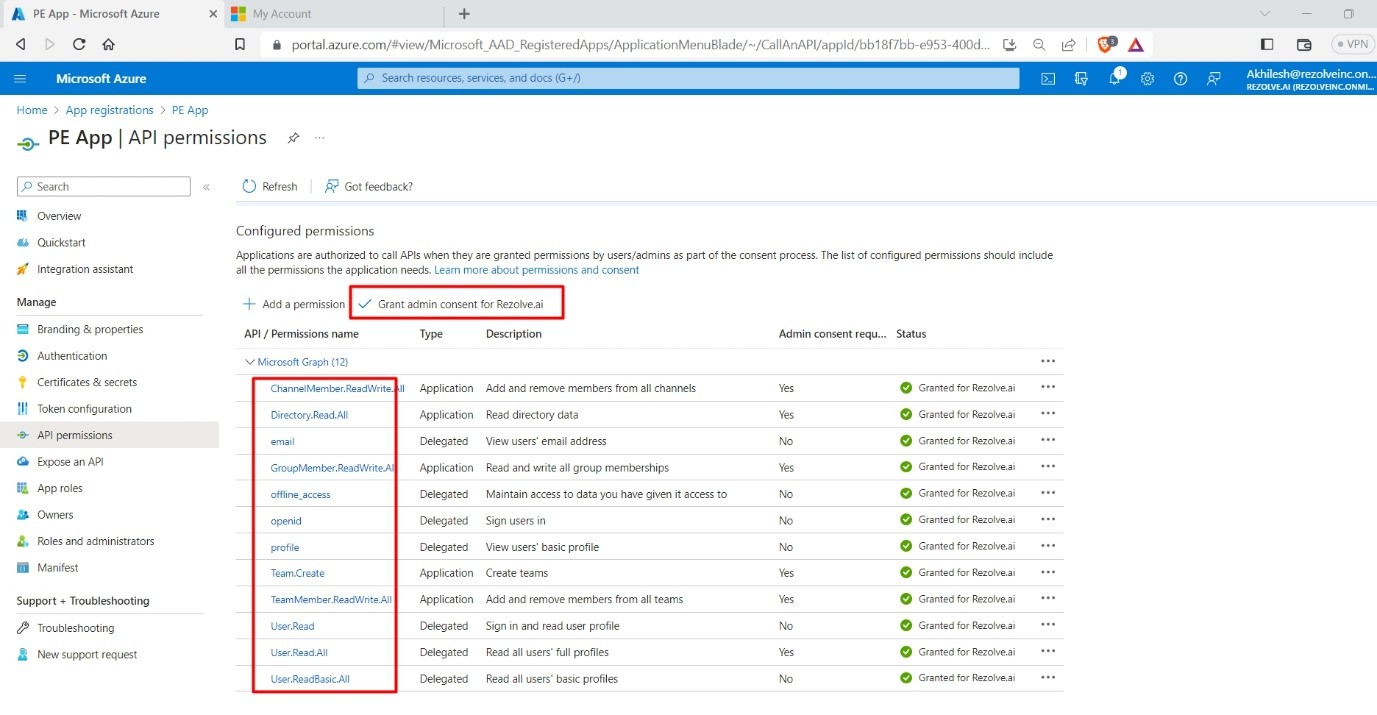
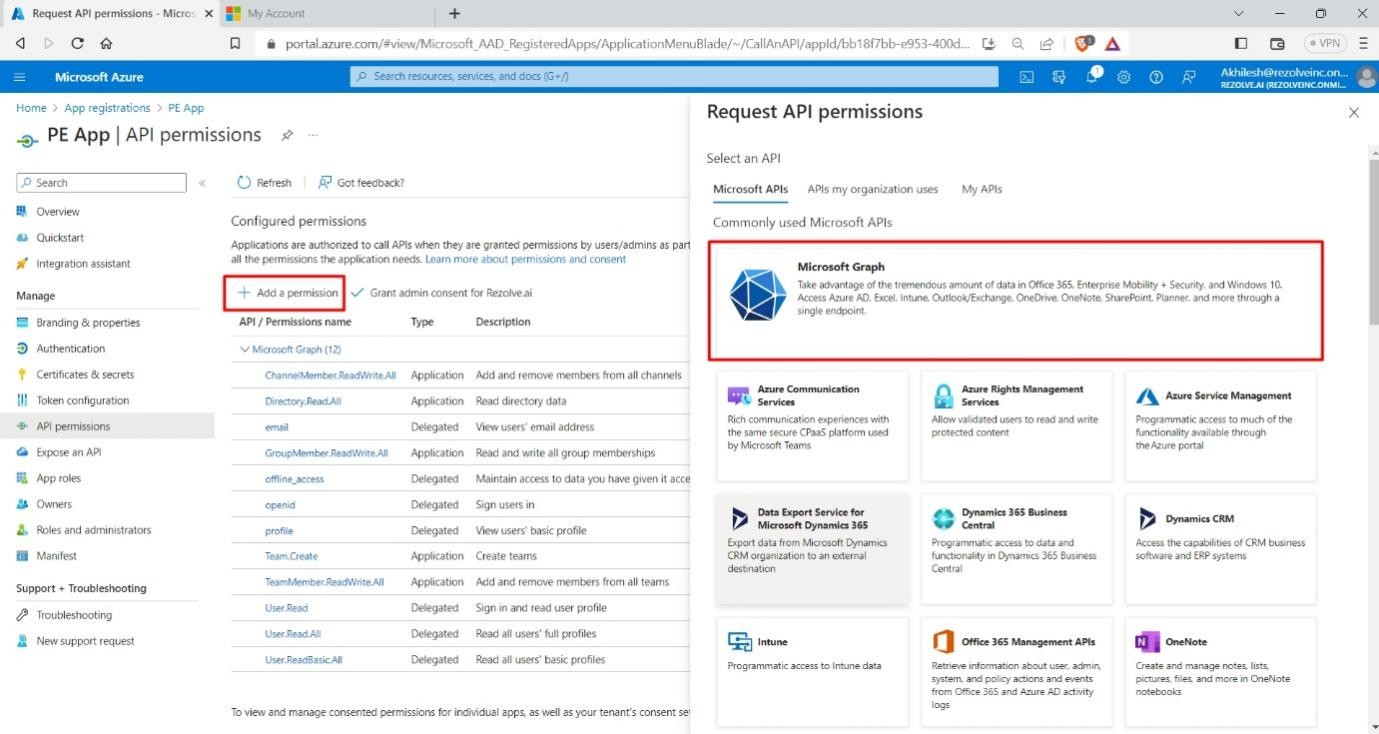
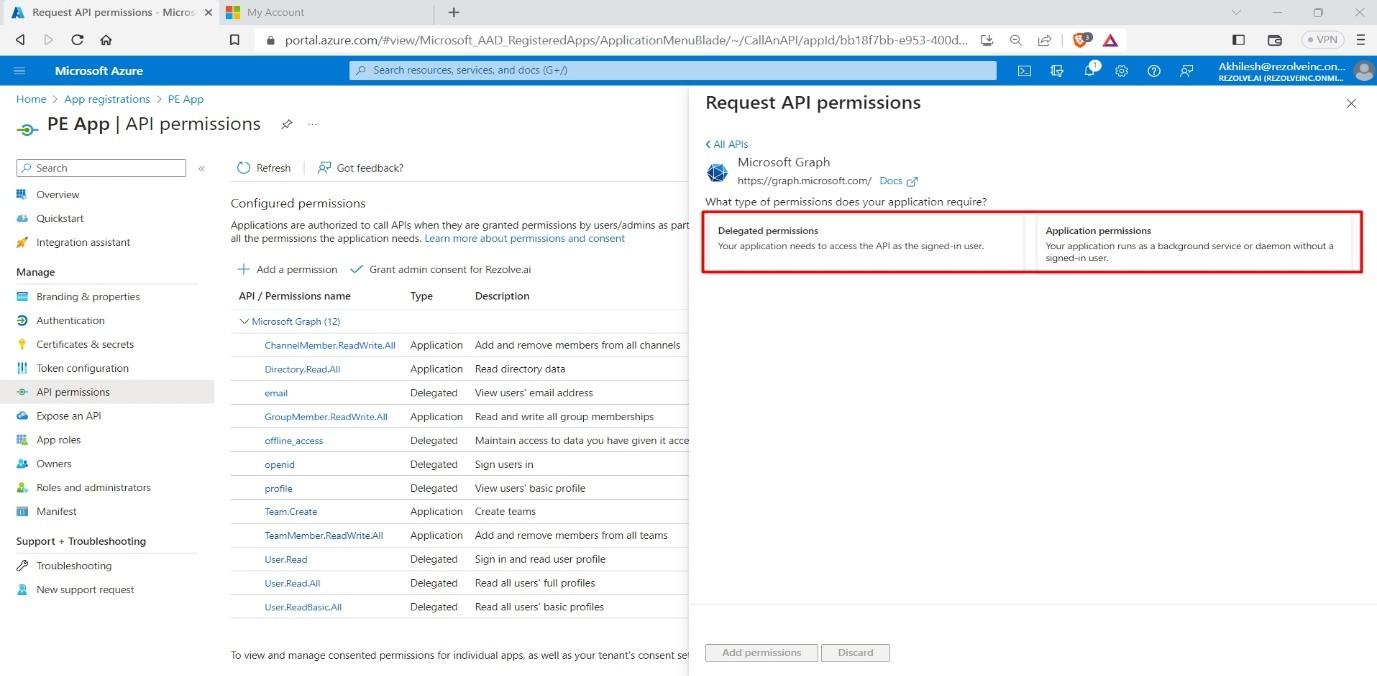
Step 3: API Permissions
- Go to API Permissions.
- Add all necessary permissions (delegated & application) as per your requirements.
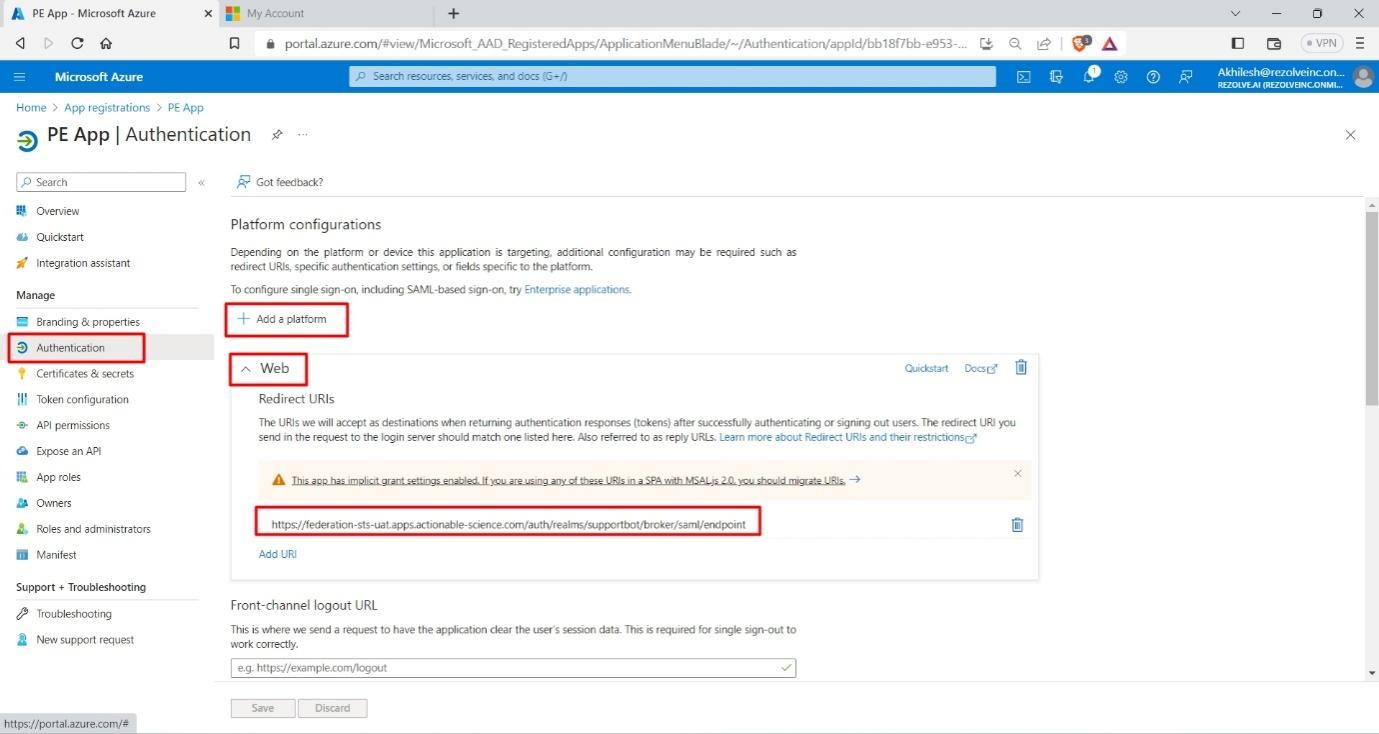
Step 4: Authentication Settings
- Go to the Authentication section of your app.
- Under Web, update the Redirect URI (replace realm/environment values as needed):
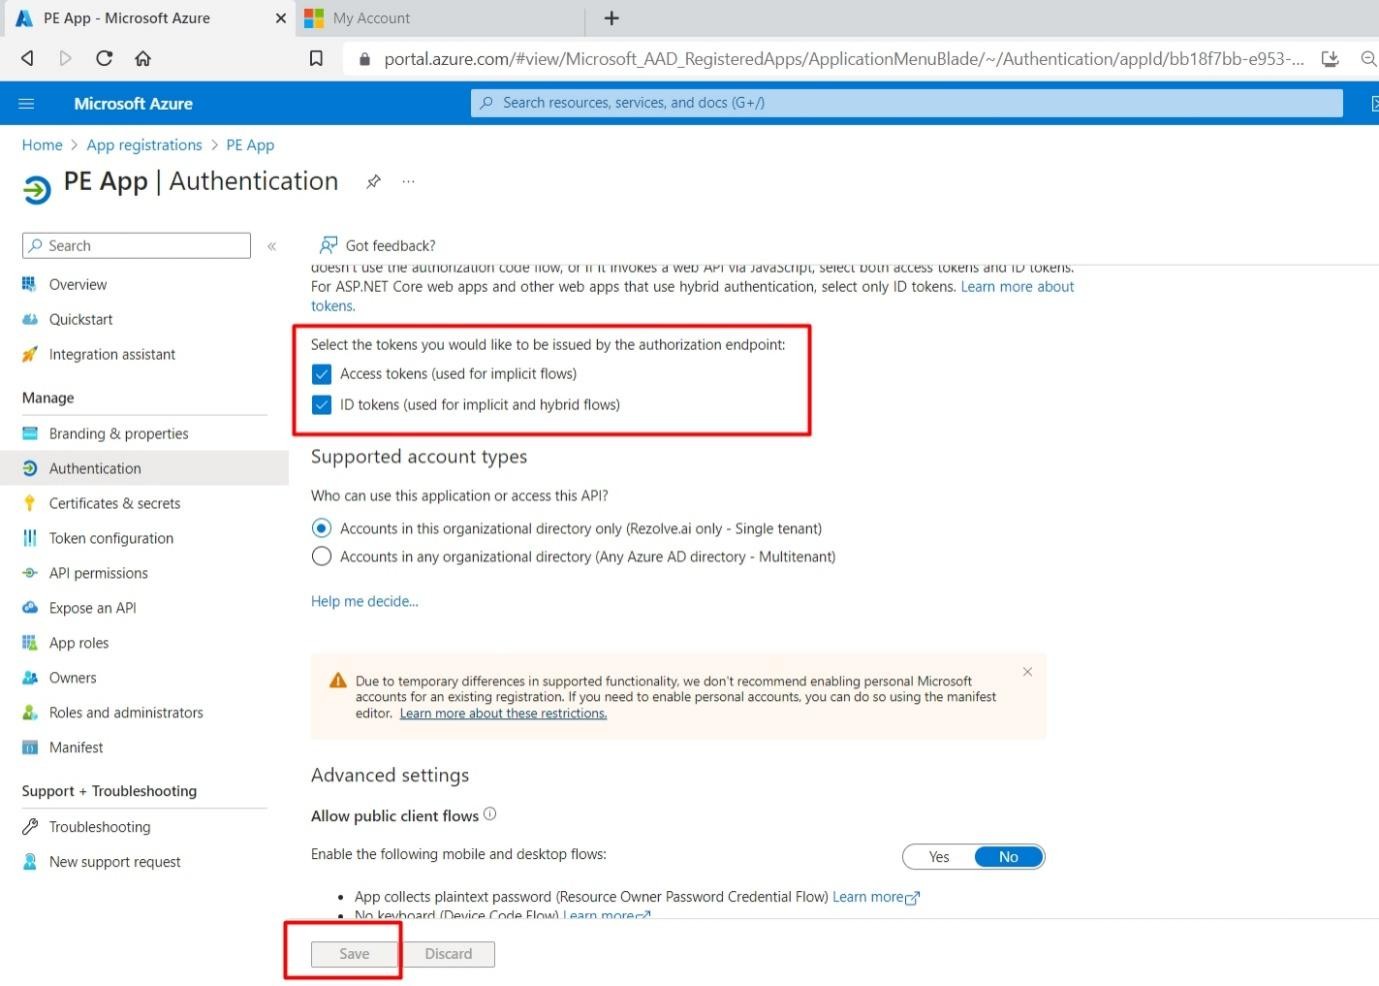
https://federation-sts-uat.apps.actionable-science.com/auth/realms/supportbot/broker/saml/endpoint - Check the Authorization endpoint checkbox.
- Click Save.
Step 5: Create a Client Secret
- Go to Certificates & Secrets.
- Click New Client Secret.
- Enter a description and set an expiration.
- Click Add.
- Copy the Value immediately – this is your client secret for future reference.
Step 6: Save App & Tenant IDs
- Go to the Overview screen.
- Copy and save the following:
- Application (client) ID
- Directory (tenant) ID
Step 7: Standard Server Configuration
- Go to your standard server (graphAPI & teamsso modules).
- Update Basic Config Options with:
- Base URL
- Type
- App ID (from Step 6)
- Secret (from Step 5)
Step 8: Database - bot_mapper Table Entry
- Run the following SQL to enable the Teams app (adjust values as needed):
INSERT INTO emmapull_uat.bot_mapper
  (id, tenant_id, deleted_seq, created_by, created_at, updated_by, updated_at, status, bot_id, bot_app_id, aad_tenant_id, app_name)
VALUES
  (93, '3802c1c1-9aec-440c-98f2-3b468cc87a1b'::uuid, NULL, NULL, '2020-08-05 17:58:40.193', NULL, '2020-08-05 17:58:40.168', 'Published', 'default', '33efe0de-5d52-4b41-8017-edcdffc84800', '3304b368-9baa-47ee-9b9e-0be7ecab9a53', '["notification", "agentchat", "tickets"]'::jsonb);
Step 10: Tenant Table Entry
- Ensure your Active Directory tenant ID exists in the
tenanttable. If not, add it to enable channel creation.
Step 11: Rezolve App Distribution
Rezolve will share:
- App to access bot as user (Target: Users)
- App for Agents (Target: Agents)
- App for notifications
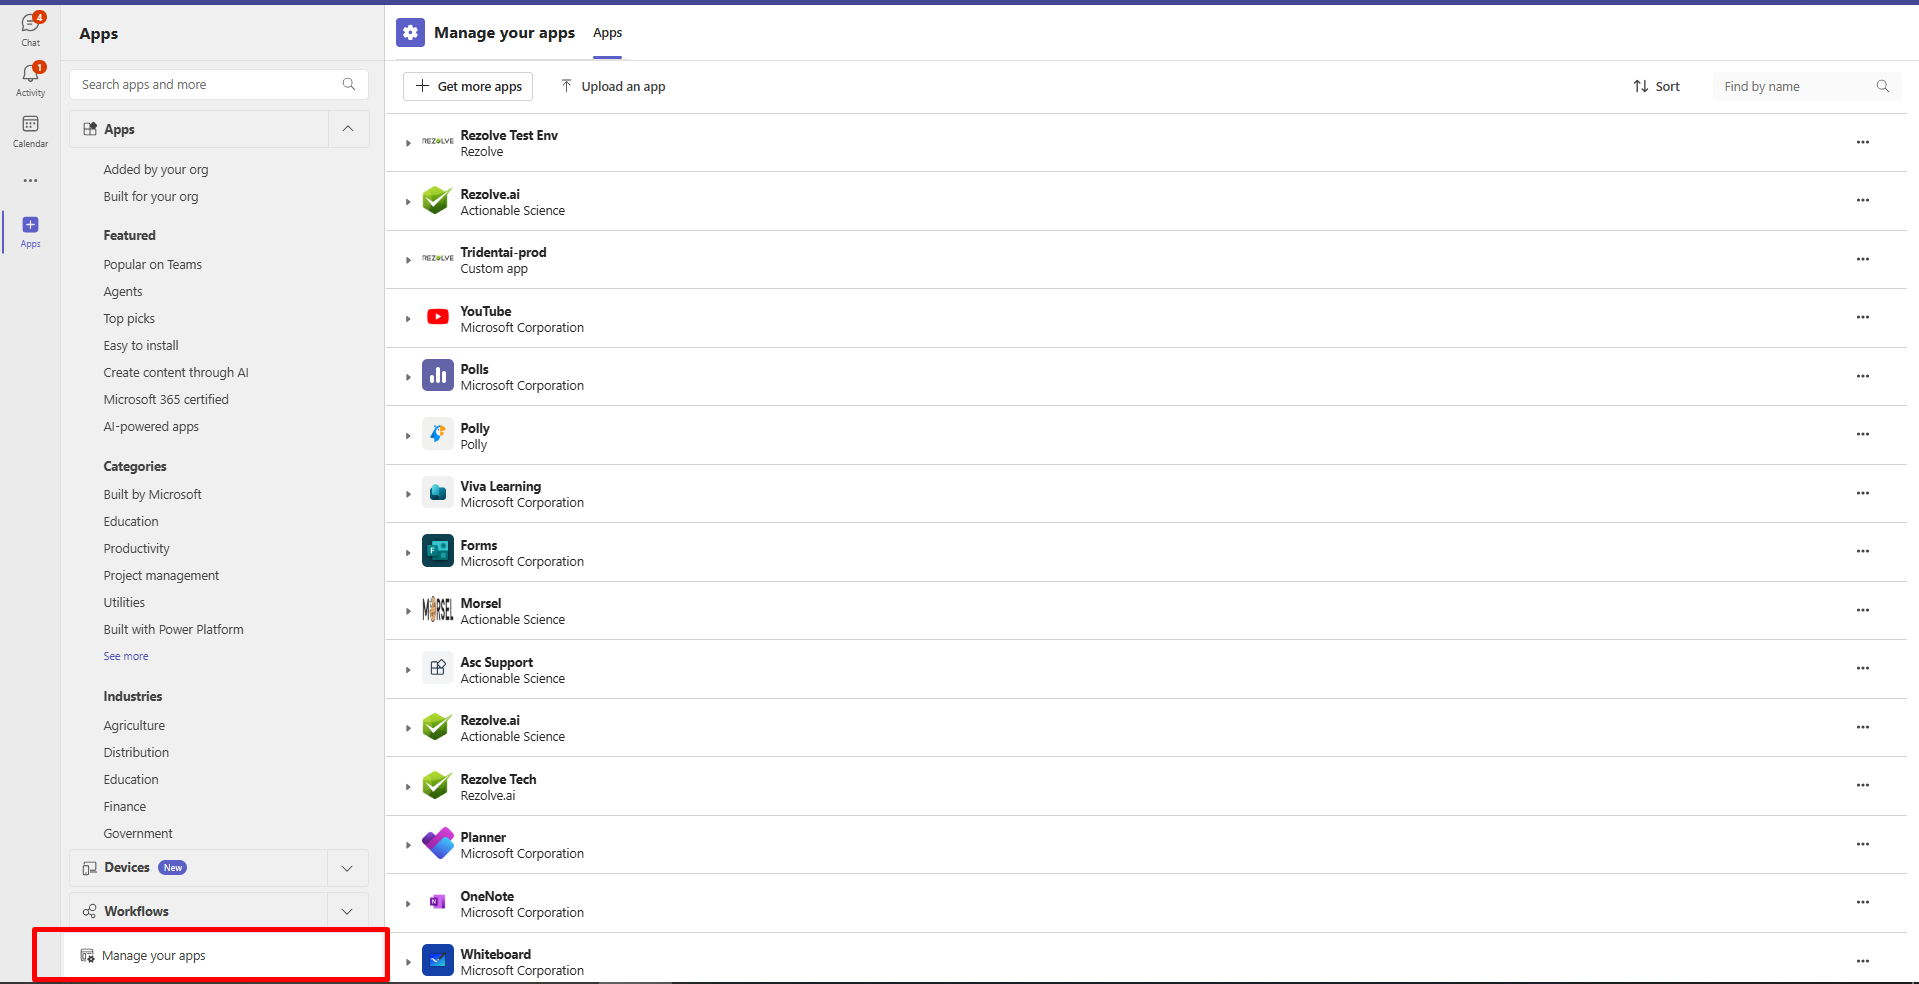
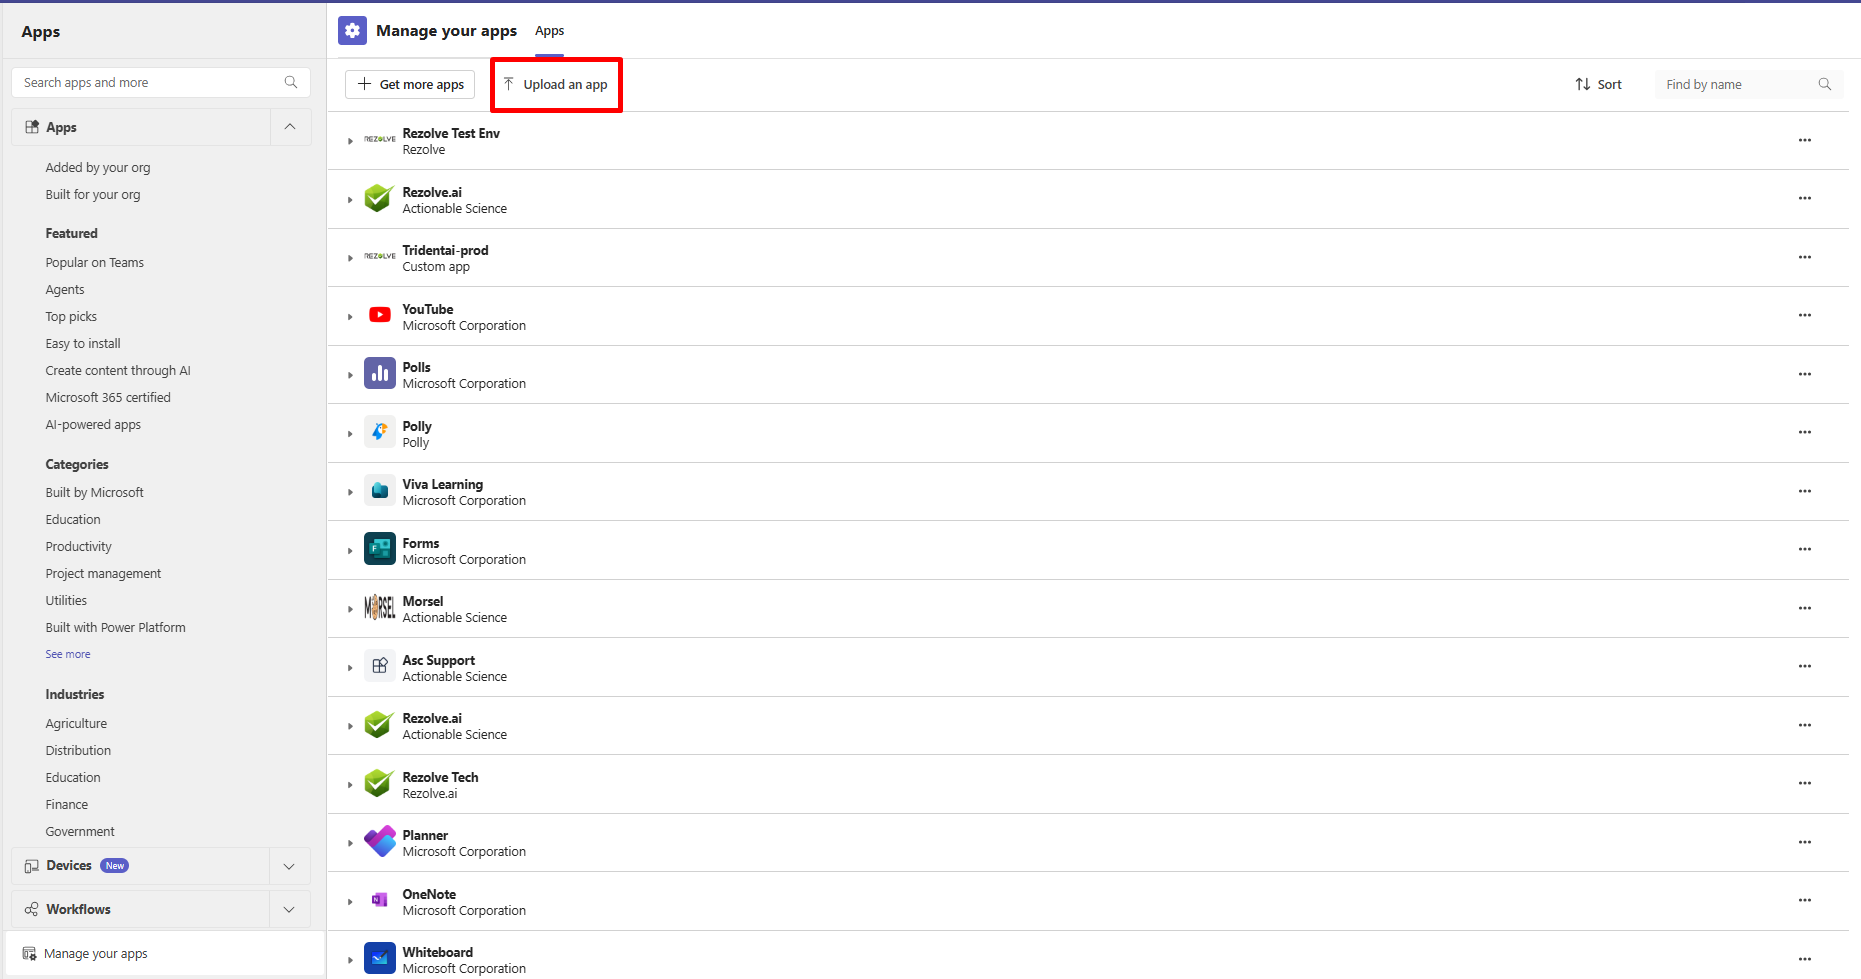
Step 12: Add App to Microsoft Teams
- Click the Apps icon in Teams (left panel).
- Click Manage your apps (lower left).
- Click Upload an app (header).
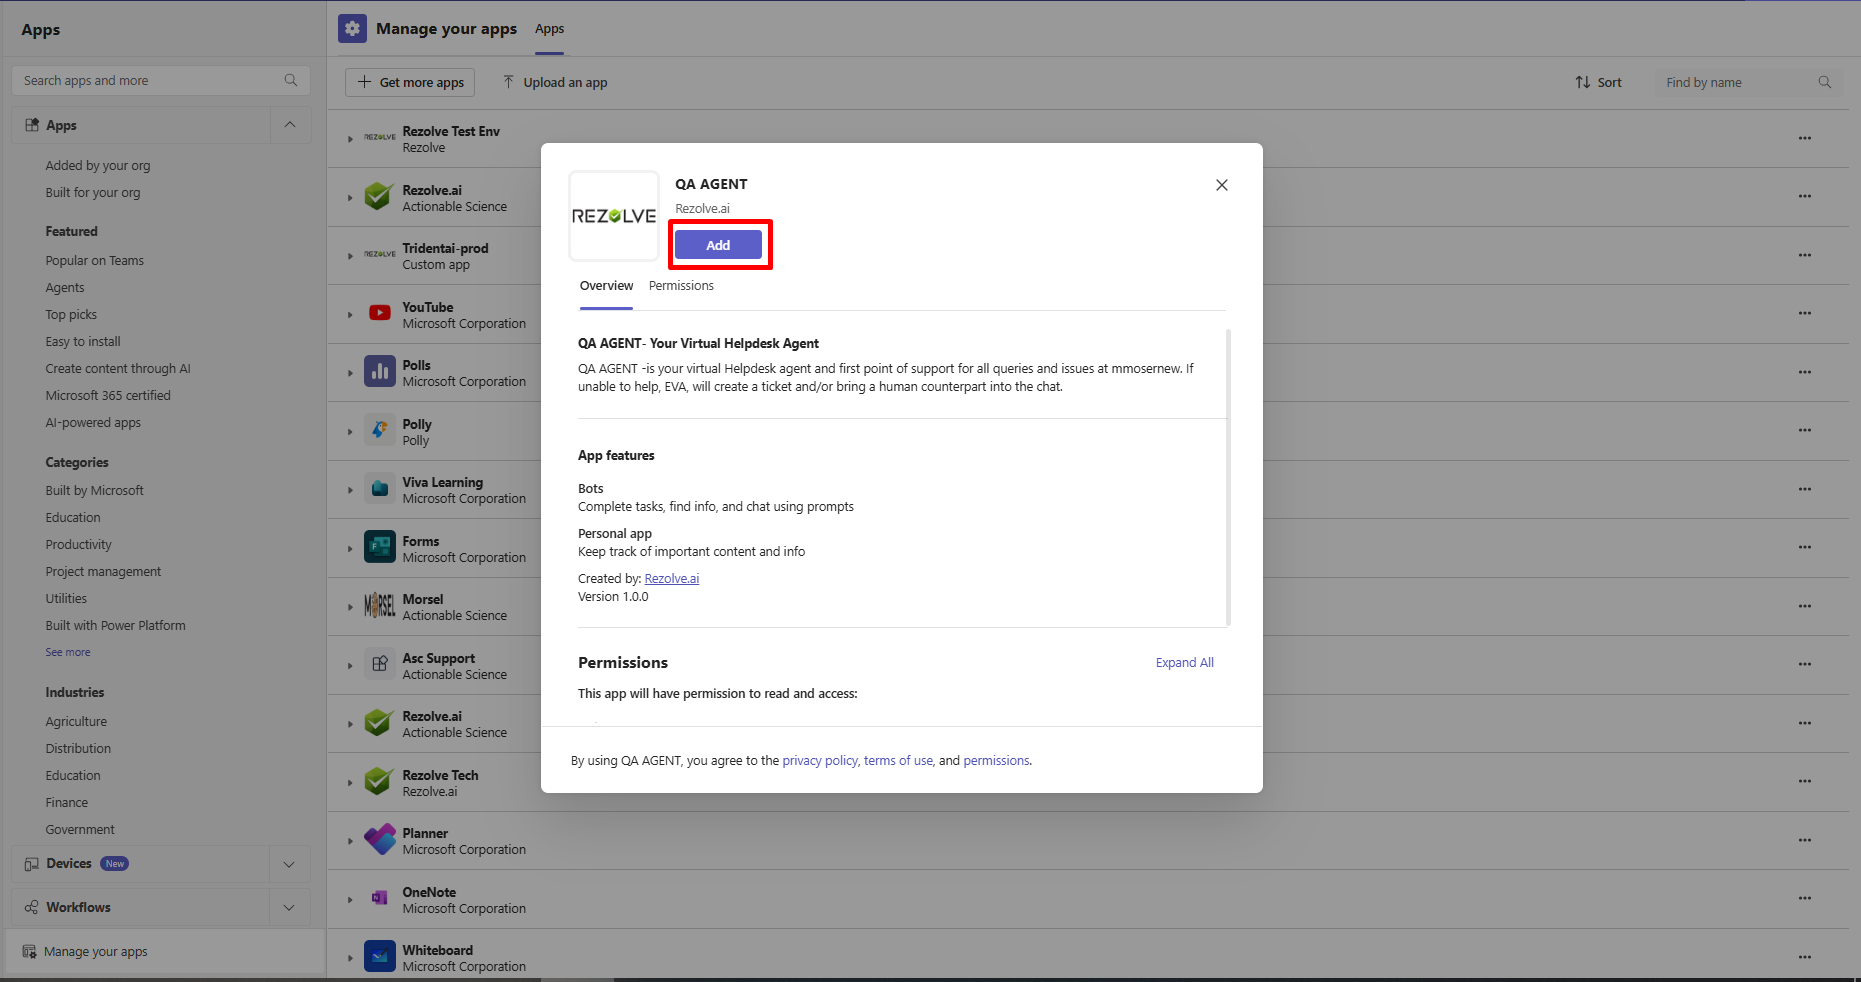
- Upload the application
.zipfile provided by Rezolve. - Add the app to Teams to access Rezolve bot services.
- Note: For issues, contact Rezolve IT support.
Manifest File Configuration
Sample manifest file (UAT):
{
    "$schema": "https://developer.microsoft.com/en-us/json-schemas/teams/v1.11/MicrosoftTeams.schema.json",
    "manifestVersion": "1.11",
    "version": "1.0.0",
    "id": "87f703c0-2820-46dc-b4dd-7de35bec536e",
    "packageName": "Rezolve.ai",
    "developer": {
        "name": "Rezolve.ai",
        "websiteUrl": "https://www.rezolve.ai/",
        "privacyUrl": "https://www.rezolve.ai/privacyPolicy",
        "termsOfUseUrl": "https://www.rezolve.ai/privacyPolicy"
    },
    "icons": {
        "color": "color.png",
        "outline": "outline.png"
    },
    "name": {
        "short": "qaregression",
        "full": "qaregression staging app"
    },
    "description": {
        "short": "LiveBot staging app User package",
        "full": "LiveBot staging app User package"
    },
    "accentColor": "#FFFFFF",
    "staticTabs": [
        {
            "entityId": "Notifications",
            "name": "Notifications",
            "contentUrl": "https://qaregression.staging.virtualpeople.ai/virtualagent/morsellogin?loginHint={loginHint}&tenantId={tid}&userObjectId={userObjectId}&groupId={groupId}&theme={theme}&appName=notification&tenant_name=qaregression",
            "websiteUrl": "https://qaregression.staging.virtualpeople.ai/",
            "scopes": ["personal"]
        },
        {
            "entityId": "ticket",
            "name": "Tickets",
            "contentUrl": "https://qaregression.staging.virtualpeople.ai/virtualagent/morsellogin?loginHint={loginHint}&tenantId={tid}&userObjectId={userObjectId}&groupId={groupId}&theme={theme}&appName=ticket",
            "websiteUrl": "https://qaregression.staging.virtualpeople.ai/",
            "scopes": ["personal"]
        },
        {
            "entityId": "agentchat",
            "name": "My Chat",
            "contentUrl": "https://qaregression.staging.virtualpeople.ai/virtualagent/morsellogin?loginHint={loginHint}&tenantId={tid}&userObjectId={userObjectId}&groupId={groupId}&theme={theme}&appName=agentchat",
            "websiteUrl": "https://qaregression.staging.virtualpeople.ai/",
            "scopes": ["personal"]
        },
        {
            "entityId": "about",
            "scopes": ["personal"]
        }
    ],
    "bots": [
        {
            "botId": "399bfa5d-6077-4b83-ab29-7d1c2d368ae0",
            "scopes": ["personal"],
            "supportsFiles": true,
            "isNotificationOnly": false
        }
    ],
    "permissions": [
        "identity",
        "messageTeamMembers"
    ],
    "validDomains": [
        "*.staging.virtualpeople.ai",
        "qaregression.staging.virtualpeople.ai",
        "*.virtualpeople.ai",
        "*.*.virtualpeople.ai"
    ]
}
Note: The Announcement feature will function seamlessly only when Step 8 & 9 database entries are in sync. The manifest file must contain all parameters in the same format as the sample provided.
For further assistance, please contact Rezolve support.