Connecting SharePoint to Knowledge Management
This guide provides detailed instructions for connecting your SharePoint sites and document libraries to the Knowledge Management system, allowing you to leverage existing content and maintain a single source of truth.
Prerequisites
Before connecting SharePoint to the Knowledge Management system, ensure you have:
- SharePoint Online or SharePoint Server 2019+: Earlier versions may have limited functionality
- Admin access to the SharePoint site you wish to connect
- Microsoft Graph API credentials (for SharePoint Online) or SharePoint API credentials (for on-premises)
- Knowledge Management admin privileges in your platform account
Connection Methods
Method 1: Direct Integration (Recommended)
The direct integration method uses Microsoft Graph API for SharePoint Online or the SharePoint REST API for on-premises installations.
Step 1: Configure Microsoft 365 App Registration
- Log in to the Azure Portal
- Navigate to "App registrations" and create a new registration
- Set the redirect URI to your Knowledge Management callback URL
- Under "API permissions," add the following Microsoft Graph permissions:
- Sites.Read.All
- Files.Read.All
- User.Read
- Grant admin consent for these permissions
- Note the Application (client) ID and generate a client secret
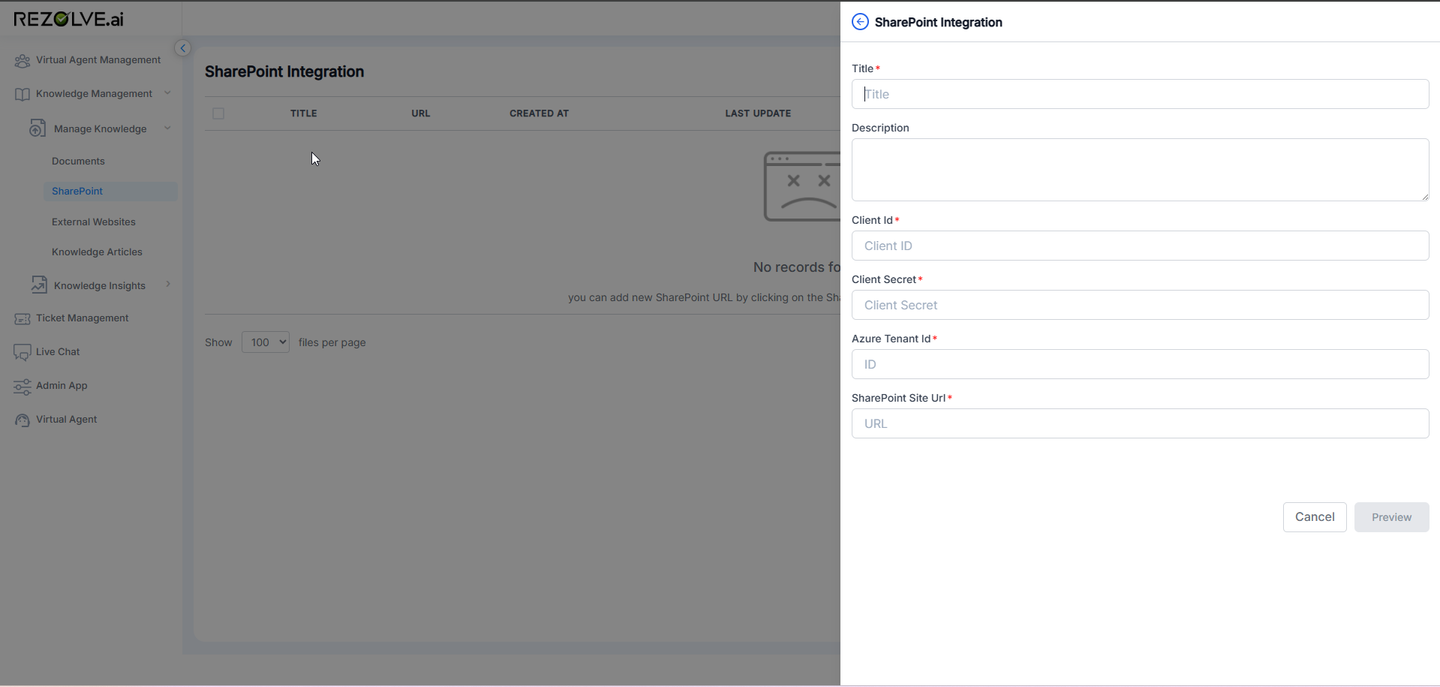
Step 2: Configure Knowledge Management
- In your Knowledge Management admin panel, navigate to "External Repositories"
- Select "Add Repository" and choose "SharePoint"
- Enter the following details:
- Connection Name (e.g., "Marketing SharePoint")
- SharePoint URL (e.g., "https://company.sharepoint.com/sites/marketing")
- Client ID and Client Secret from Azure
- Select the authentication method (OAuth 2.0 recommended)
- Click "Test Connection" to verify the setup
- Save the configuration
Method 2: Scheduled Sync
If direct integration isn't possible due to network restrictions, you can set up a scheduled sync.
- In the Knowledge Management admin panel, go to "Scheduled Imports"
- Select "SharePoint" as the source
- Configure the connection details as in Method 1
- Set the sync schedule (hourly, daily, weekly)
- Select the document libraries and folders to include
- Define content mapping rules (optional)
- Save and activate the sync job
Content Mapping
Document Properties to Metadata
Map SharePoint document properties to Knowledge Management metadata:
| SharePoint Property | Knowledge Management Field |
|---|---|
| Title | Article Title |
| Created By | Author |
| Modified Date | Last Updated |
| Category | Category |
| Tags | Tags |
Content Filtering
You can filter which content is imported using:
- Content Types: Select specific SharePoint content types
- Metadata Filters: Import only documents with specific metadata values
- Date Filters: Import only documents created or modified after a certain date
- Path Filters: Include or exclude specific folders
Advanced Configuration
Permissions Sync
Enable permissions synchronization to maintain the same access controls:
- Go to "Repository Settings" > "Permissions"
- Enable "Sync Permissions from SharePoint"
- Map SharePoint groups to Knowledge Management roles
- Set the permissions sync frequency
Content Transformation
Configure how SharePoint content is transformed during import:
- HTML Conversion: Convert Office documents to HTML for better rendering
- Content Extraction: Extract text from PDFs and images using OCR
- Link Rewriting: Update internal links to work within Knowledge Management
- Image Handling: Configure how embedded images are processed
Troubleshooting
Common Issues
| Issue | Solution |
|---|---|
| Connection timeout | Check network connectivity and firewall settings |
| Authentication failure | Verify credentials and API permissions |
| Missing content | Check content filtering rules and permissions |
| Broken links | Enable link rewriting in transformation settings |
Logs and Diagnostics
Access detailed connection logs:
- Go to "System" > "Logs" > "Integration Logs"
- Filter for "SharePoint" connections
- Review error messages and timestamps
Performance Optimization
For large SharePoint repositories:
- Start with a smaller subset of content for initial testing
- Use incremental syncing to only import new or changed documents
- Schedule syncs during off-peak hours
- Consider content archiving strategies for older documents
Next Steps
- Configure content categorization for imported SharePoint documents
- Set up audience targeting for SharePoint content
- Explore analytics to monitor usage of SharePoint content